Before you start
Industrial is a multi-purpose WordPress theme for industrial, construction, manufacturing and renewable-energy sites, and it ships twelve complete starter sites. You pick one, import it, and then replace its words and pictures with yours.
Ten minutes spent on this chapter saves an hour later. Two things catch people out, and both are here: the plugin that travels beside the theme, and the fact that importing a demo adds a whole site's worth of content to the site it runs on.
What you downloaded
Your purchase is a single file, industrial_main.zip. Unzip it on your
computer. Inside:
| File or folder | What it is |
|---|---|
industrial.zip |
The theme — this is the one you upload in Appearance |
industrial-child.zip |
The optional child theme, for editing theme files |
plugins/anps_theme_plugin.zip |
The Anps Theme Plugin — required |
plugins/js_composer.zip |
WPBakery Page Builder, if you want the legacy builder |
plugins/revslider.zip |
Slider Revolution, used by the demo sliders |
documentation/index.html |
This manual, which works with no connection |
licensing/ |
The GPL text and the split-licence statement |
The same manual is published at docs.themes.anpsthemes.com/industrial, which is the copy that is updated with each release. The copy in your download is the one that works offline.
Do not upload
industrial_main.zipto WordPress. It is the wrapper, not the theme, and WordPress will reject it with "The package could not be installed". Unzip it first and uploadindustrial.zip.
What your site needs
Everything below is ordinary shared hosting. The numbers matter most during a demo import, which creates several hundred posts and pages and copies every image the demo uses into your media library in one run.
| What | Recommended | Why |
|---|---|---|
| WordPress | 6.0 or newer | The theme is built and tested against it |
| PHP | 8.0 or newer | Older versions no longer receive security fixes |
| Memory limit | 256M | Resizing a full-width hero image is the high-water mark of an import |
| Upload max filesize | 32M | Demo media and larger images |
| Max post size | 32M | Keep it at or above the upload limit |
| Max execution time | 600 seconds | An import runs for minutes; a shorter limit kills it part way |
| Max input vars | 3000 | Below this, saving a long builder page silently drops part of the layout |
ZipArchive |
Required | Without it the theme cannot unpack demo content or install plugins |
mysqli |
Required | Database access |
| GD or Imagick | Required | Every thumbnail and crop is generated from your images |
| Uploads folder | Writable | The demo's media is saved into it |
| cURL | Recommended | Plugin downloads and licence checks; some hosts block the fallback |
| HTTPS | Recommended | Forms, logins and anything you sell |
You do not have to check any of this by hand. Once the theme is active, Appearance → Theme Options → System Requirements prints your server's real values beside the ones above, and under every row that falls short it prints a sentence you can forward to your host unchanged. See What your server needs.
The setup wizard shows the same check as its second step, and the demo import screen repeats it as a warning.
How the theme, plugin and demos fit together
Three parts, and it is worth knowing which does what before you customise anything.
Industrial, the theme, is the design layer: the templates, the header and footer, the type scale, the colour options and the per-demo styling. It is what an update replaces, which is why your own code belongs in the child theme or in Custom CSS.
Anps Theme Plugin carries the working parts: the Portfolio and Team post types, all 87 Elementor widgets, all 32 WPBakery elements, the theme's own sidebar widgets, and the demo importer. It is required. With the theme active and the plugin missing you get a plain site and a notice telling you so.
The demo packs ship inside the theme. Each one is a real site that a designer built and exported: pages, media, menus, content, widgets and theme settings. Importing a pack reproduces that site here.
The plugin is not optional. Post types, widgets, elements and the demo importer are all in it. Install it before you do anything else.
How to read this manual
Read Installing the theme and The setup wizard now, then The twelve demos and Importing a demo — in that order, because your choice of page builder decides which demos you can use, and an import is easiest to get right the first time.
After that the manual is reference, not a course. Go to the chapter for the job in front of you:
- Colours, fonts, header, footer and settings — Theme Options, screen by screen, Colours and typography and Header, top bar and footer.
- Editing pages and adding sections — Building pages with Elementor, or Building pages with WPBakery if you are working on an existing WPBakery site.
- Projects, staff and posts — Portfolio, Team and News and the blog.
- Selling — Shop and products.
- Looking an element or widget up by name — Element and widget reference.
- Your licence key, updates and getting help — Licence, updates and support.
- Something looks wrong — Troubleshooting.
Admin paths are written as arrow chains, like Appearance → Theme Options →
Header Options. Anything in code type is a slug, a setting name or a file
path — something you type or search for, not something you translate.
Installing the theme
Two files go on to the site: the theme, industrial.zip, and the plugin,
plugins/anps_theme_plugin.zip. Install the theme first, activate it, and let
the setup wizard take care of the plugin — that is the
shortest correct route. The rest of this chapter is for the cases where you
would rather do it by hand, or where the upload is refused.
Before you upload anything, confirm the download is unzipped and you can see
industrial.zip as a file of its own. See
Before you start for what is in the package.
Installing the theme from the WordPress admin
The one requirement is that the host's upload limit is larger than
industrial.zip. Check the file's size on your computer against the limit
printed on the upload screen; if it is too small, use the FTP route below.
- Go to Appearance → Themes → Add New → Upload Theme.
- Choose
industrial.zipand select Install Now. - When the upload finishes, select Activate.
Activation is the moment the theme starts running, and it is what opens the wizard. Nothing is written to your content.
Do not upload
industrial_main.zip. That file is the wrapper around the whole purchase: theme, plugin, child theme, licence text and this manual. WordPress inspects it, finds nostyle.cssat the top level and answers "The package could not be installed". Unzip it on your computer and upload theindustrial.zipinside it.
If the upload fails before it finishes, the limit being hit is almost always
upload_max_filesize or post_max_size. Both are listed in
What your server needs, and the FTP route below
avoids them entirely.
Installing the theme over FTP
Use this when the admin upload is refused, or when you already work over FTP.
- Unzip
industrial.zipon your computer. You get a folder namedindustrial. - Connect to the site with an FTP or SFTP client, or open the host's file manager.
- Upload the whole
industrialfolder intowp-content/themes/, so the theme's ownstyle.cssends up atwp-content/themes/industrial/style.css. - Go to Appearance → Themes and activate Industrial.
Keep the folder named
industrial. The child theme names its parent asTemplate: industrial, and the licence and update check reads the parent theme's folder. Renaming the folder detaches the child theme and stops the update check from recognising the site.
Upload the folder in full. A part-uploaded theme usually shows as a broken admin screen rather than a clear error, because PHP files are missing rather than malformed.
Installing the Anps Theme Plugin
The Anps Theme Plugin carries the Portfolio and Team post types, every Elementor widget and WPBakery element, the theme's own sidebar widgets, and the demo importer. Without it the theme renders plain pages and no demo can be imported. It is not optional.
The wizard's Plugins step installs it for you. To do it by hand:
- Go to Plugins → Add New → Upload Plugin.
- Choose
plugins/anps_theme_plugin.zipfrom your download. - Select Install Now, then Activate Plugin.
The plugin is versioned separately from the theme and is updated alongside it — see Licence, updates and support.
The required-plugins notice
Once the theme is active, WordPress shows a notice across the admin listing the plugins the theme registers. It reads "This theme requires the following plugins" for the two page builders, and "This theme recommends the following plugins" for the rest, with a link to Appearance → Install Plugins. That screen installs and activates in one action.
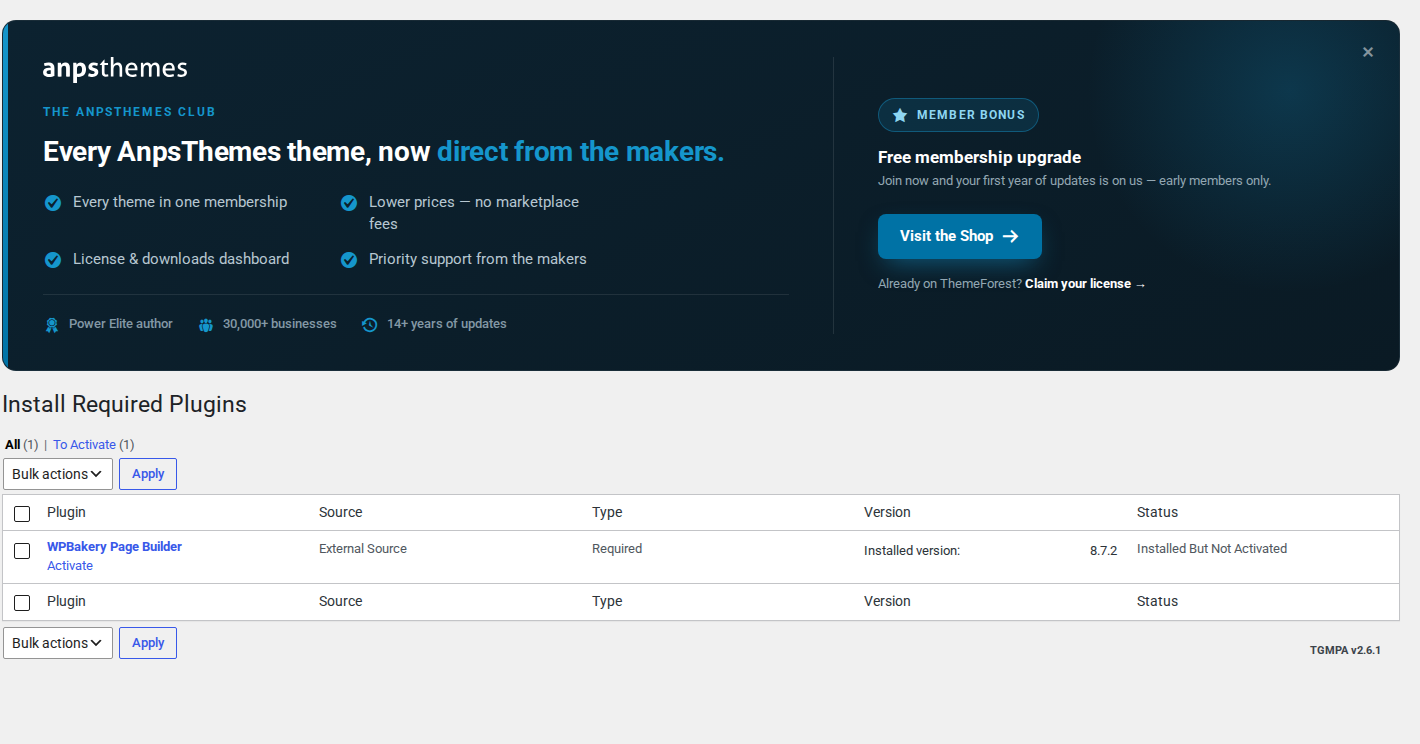
The theme registers nine plugins:
| Plugin | Marked required | What it is for |
|---|---|---|
| WPBakery Page Builder | Yes | The legacy builder; needed only if you choose it |
| Elementor Page Builder | Yes | The primary builder |
| Anps Theme Plugin | No, but the theme needs it | Post types, widgets, elements, demo importer |
| Slider Revolution | No | The sliders in the demo home pages |
| Font Awesome | No | The icon set the icon pickers offer |
| Contact form 7 | No | The demo contact forms |
| WooCommerce | No | Shop, products, cart and checkout |
| Newsletter | No | The newsletter sign-up used by some demos |
| Envato Market | No | A marketplace plugin the list still carries. The theme does not use it: updates and licensing run through ANPS Club |
The notice asks for both builders; you want one. Appearance → Install Plugins marks WPBakery and Elementor as required because the theme ships layouts for both. Running both at once is not supported, and the demo importer refuses to run while two builders are active. The wizard's Plugins step leaves out the builder you did not pick, which is why it is the easier route. See The setup wizard.
Anps Theme Plugin is not flagged required on that screen, but the theme depends on it. Install it whatever else you skip.
What happens when you activate the theme
Activation sets a flag that lasts 30 minutes. The next ordinary admin page you open sends you once to Appearance → Setup Wizard, and the flag is cleared whether or not you go through the wizard.
That expiry is deliberate. If you activate the theme and then close the tab, the wizard does not lie in wait: the flag lapses, and opening wp-admin two days later lands you on the dashboard as usual. The redirect is also skipped when you activate several themes at once, and for users who cannot install plugins.
Nothing else happens on activation. No content is created, no option is overwritten, and no demo is imported until you ask for one in Importing a demo.
Using the child theme instead
industrial-child.zip is a child theme: a style.css and a functions.php
that borrow everything from Industrial and give you somewhere safe to put your
own code. Install it exactly as you installed the parent —
Appearance → Themes → Add New → Upload Theme — and activate the child
instead of the parent.
The parent must stay installed. It is where the templates, the framework and the Theme Options panel live; the child only overrides.
With the child active, everything still works as documented: Theme Options, the setup wizard, the demo importer, the licence screen and all the builder elements, because all of it is in the parent theme and the plugin.
It matters because a theme update replaces the entire industrial folder.
Anything you edited inside it — a template, a stylesheet, a function — is gone
after the update. The same edit in the child theme survives every update. If
you are only changing colours, fonts or a few rules, you do not need the child
theme at all: use Appearance → Theme Options → Custom CSS. See
The child theme and custom code.
Switching to the child counts as activating a theme. If you have not finished or dismissed the wizard yet, it prompts once more. Once the wizard is complete or you have dismissed it, switching changes nothing.
If the child theme is offered as "Broken" with a missing-parent message, the
parent is either not installed or its folder is not named industrial.
Troubleshooting covers the rest of the install-time
failures.
The setup wizard
The wizard does the four things that have to happen before you have a working site, in the order they have to happen in: check the server, choose a page builder, install the plugins, import a demo. It is the quickest way through a new install, and the best diagnostic you have, because each step reports what actually happened rather than assuming it worked. Nothing in it is compulsory: every step can be skipped, and everything it does can also be done by hand from Theme Options.
When the wizard opens, and when it stops
Activating the theme sets a flag that lives for 30 minutes. The next ordinary admin page you open takes you to the wizard once, and the flag is cleared at that point either way. Once the wizard has been finished or dismissed, no flag is set again, so a later theme switch does not reopen it.
If you activate the theme and walk away, the flag lapses. The wizard does not ambush you on the dashboard days later, and it never interrupts a bulk theme activation or a user who is not allowed to install plugins.
Selecting I'll set it up myself on the first step ends it there and then: the wizard is marked complete, it stops prompting, and the Finish step confirms that it will not open again.
Reopening the wizard later
The wizard is a normal admin screen and stays available at
Appearance → Setup Wizard (themes.php?page=anps-setup), and from the
Setup Wizard link at the top of the Theme Options sidebar.
It remembers the furthest step you reached, so returning drops you back where you got to rather than at the beginning. The step rail across the top links back to steps you have already seen; steps ahead of you are not links, because jumping forward would skip the work a later step depends on. Going back to an earlier step does not rewind your progress.
Other plugins' admin banners are suppressed on this screen only, so what you read here is the theme's own reporting and nothing else.
Wizard step 1: Welcome
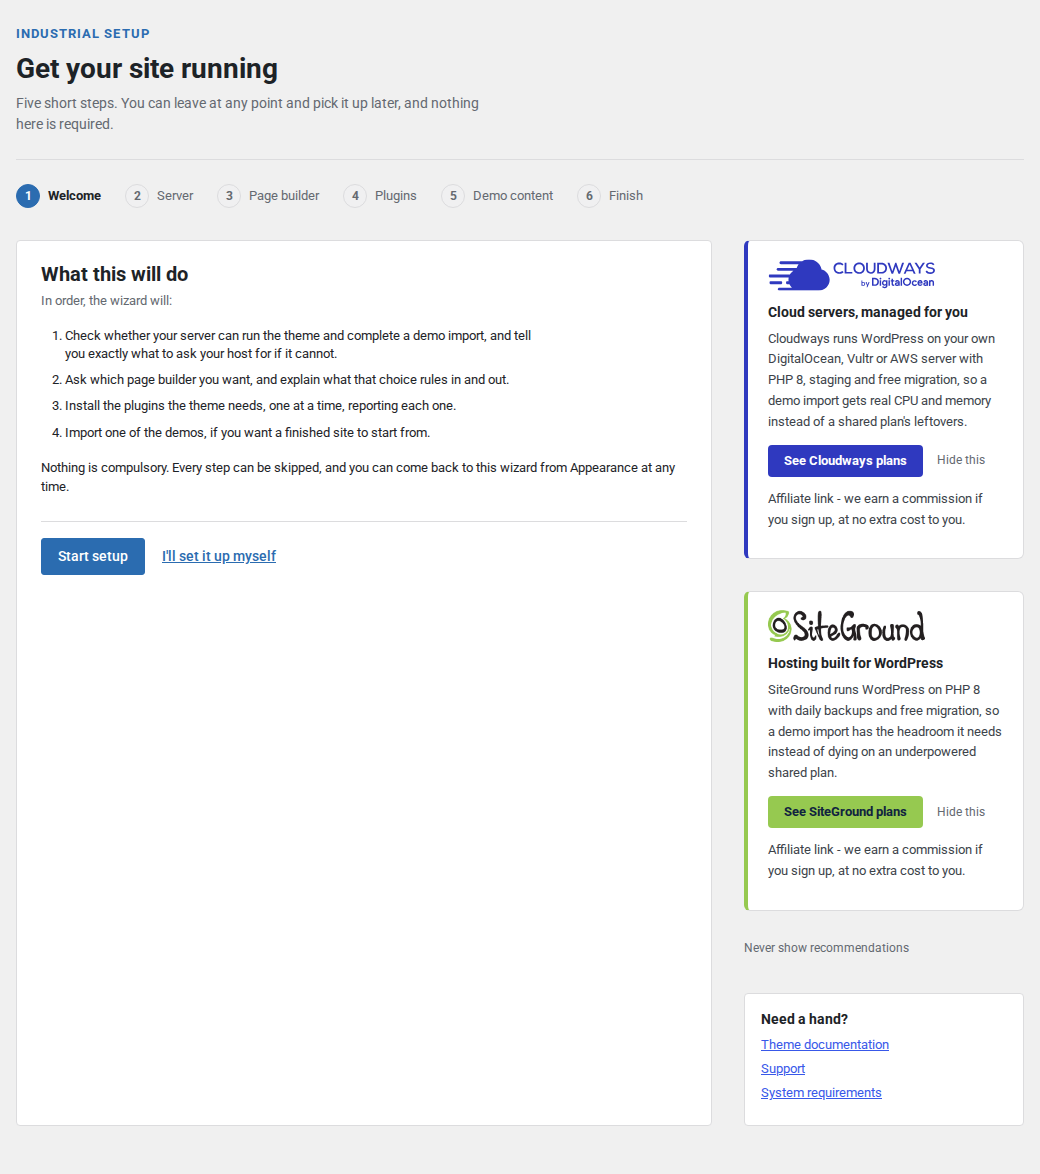
A plain statement of what the wizard is about to do, in order: check the server and say what to ask your host for, ask which page builder you want and explain what that rules in and out, install the plugins one at a time and report each one, and import a demo if you want a finished site to start from. Two actions: Start setup, and I'll set it up myself.
Wizard step 2: Server
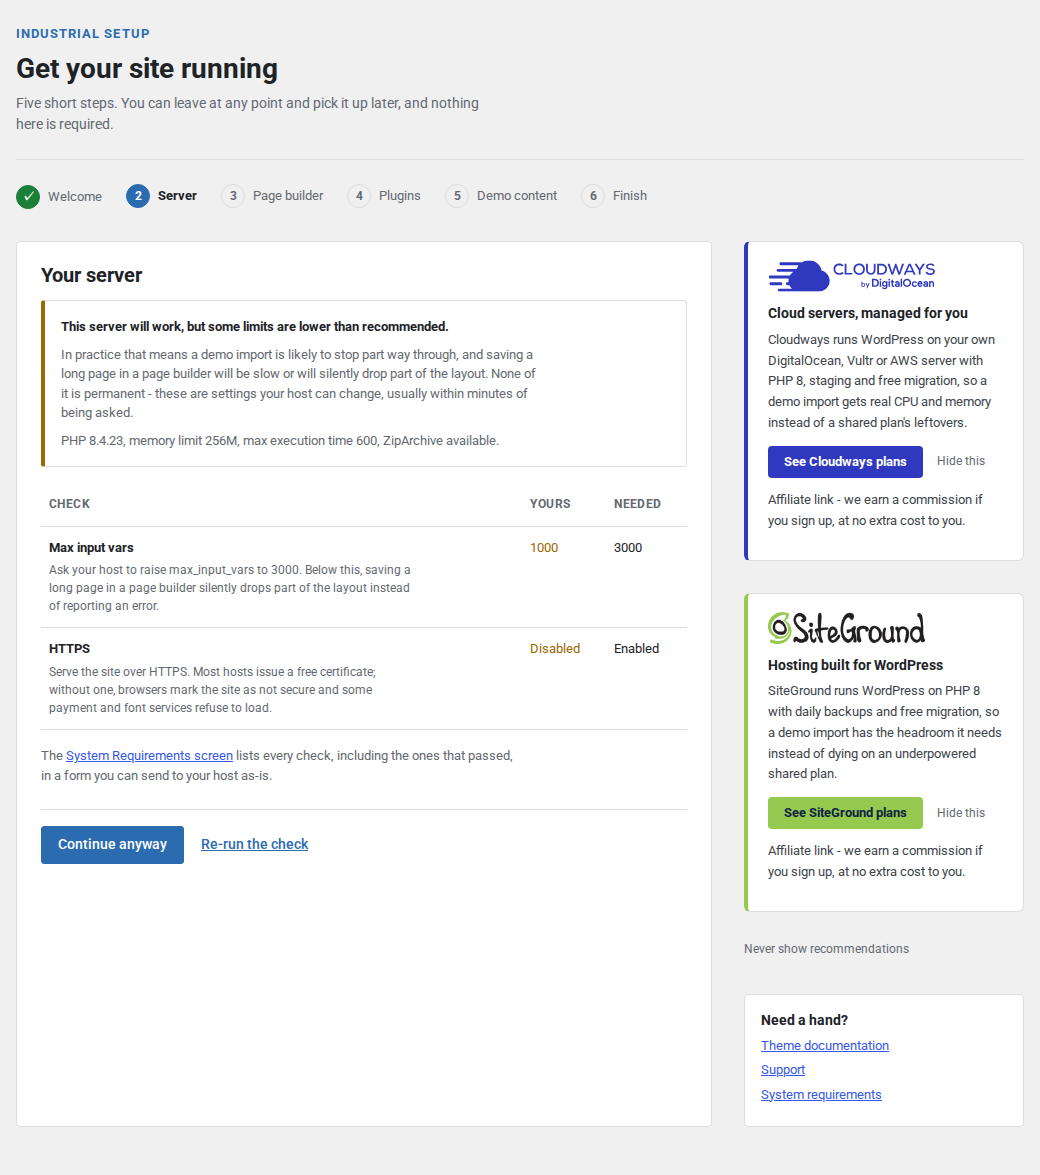
This is the same measurement as Appearance → Theme Options → System Requirements, presented as a verdict instead of a table. Three outcomes:
| Verdict | What it means |
|---|---|
| Pass | The server can run the theme and complete a demo import |
| Warning | It will work, but some limits are below what the theme is built against |
| Fail | At least one value is below the floor where something genuinely breaks |
When everything passes you get one line of confirmation plus the summary of
your PHP version, memory limit, execution time and ZipArchive availability.
When it does not, the step lists only the rows that need attention — failures
first — with your value, the needed value, and a sentence written to be
forwarded to your host unchanged.
Two things to know about the buttons. Continue anyway is real: a warning is not a wall, and plenty of sites on lower limits import a demo without trouble. The risk is stated so that if the import does stop part way through, you already know why. Re-run the check measures again rather than re-reading a stored verdict, so after your host changes something the new values appear immediately.
The link under the table opens the System Requirements screen, which lists every check including the ones that passed. Full detail on each row, and on what breaks when it is too low, is in What your server needs.
Wizard step 3: Page builder
Elementor or WPBakery — one of them, not both.
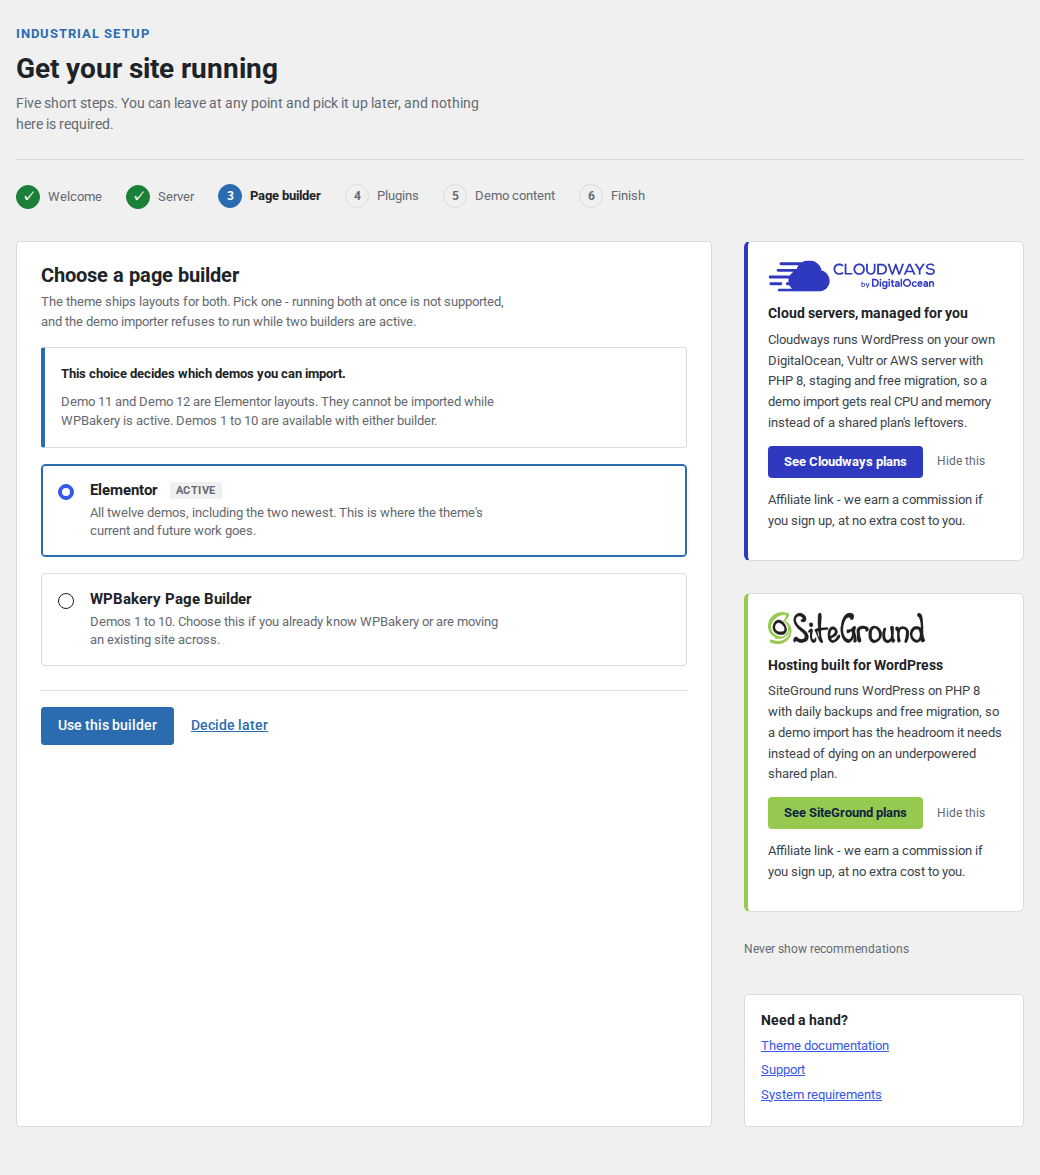
The consequence is printed on the step before anything is installed: Demo 11 and Demo 12 are Elementor layouts and cannot be imported while WPBakery is active. Demos 1 to 10 work with either builder. Running two builders at once is not supported, and the demo importer refuses to run at all in that state.
| Choice | What you get |
|---|---|
| Elementor | All twelve demos, and every element the theme adds from here on |
| WPBakery Page Builder | Demos 1 to 10; choose it if you know WPBakery or are moving an existing site across |
Elementor is pre-selected on a fresh install. If one builder is already active it is pre-selected instead and marked Active, and selecting it does not reinstall anything.
Use this builder records the choice and installs that builder if it is not already installed. If the install fails, the wizard does not trap you on this step: it carries the reason forward and shows it once at the top of the Plugins step, where you can try again.
Decide later moves on without recording a choice and without installing anything. The Plugins step then offers both builders, and the Finish step says no builder was chosen.
Changing builder later is not a setting. Pages are stored in the format of the builder that made them. Switching builders on a site that already has content leaves the old pages unrenderable by the new builder, and the demo pages would have to be imported again. Decide here.
Wizard step 4: Plugins
A list of every plugin the theme registers, minus the builder you did not choose. Each row shows its real state:
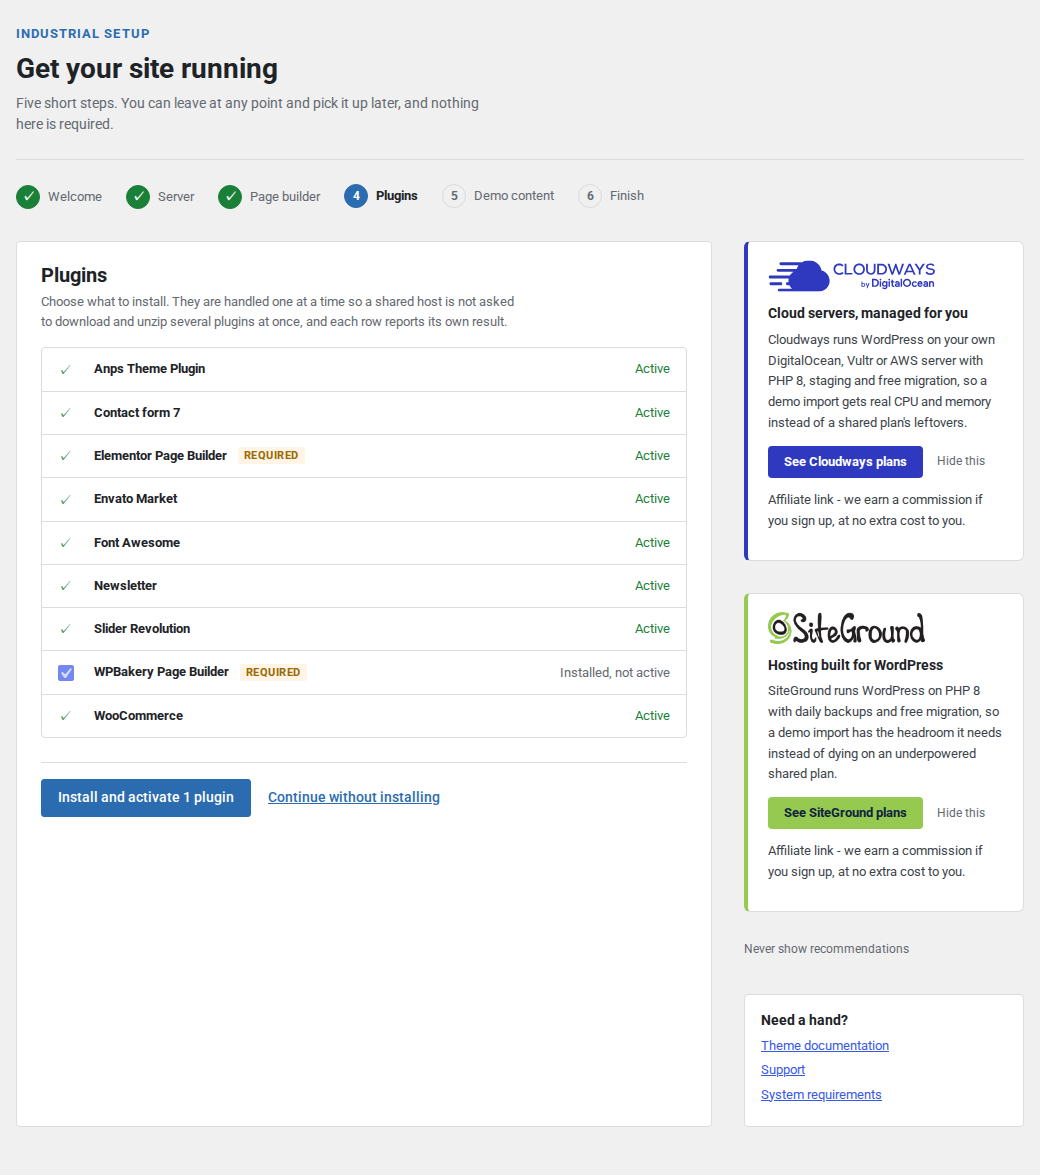
| Row state | Meaning | Checkbox |
|---|---|---|
| Not installed | Not present on the site | Ticked, and you can untick it |
| Installed, not active | Present but switched off | Ticked, and you can untick it |
| Active | Nothing to do | None; the row shows a tick instead |
Rows the theme marks as required — the page builder — are ticked and locked, so the tick is a statement rather than a suggestion. Everything else is ticked by default and is yours to untick. Already-active plugins are never reinstalled.
The button counts what you selected, so it reads "Install and activate 3 plugins" rather than something vague, and is disabled with "Nothing selected" if you clear the list. What happens when you press it:
- Plugins are installed one at a time, in order, never in parallel. A shared host asked to download and unzip several plugins in one request tends to run out of memory or time part way through.
- An overlay covers the page with an elapsed-time counter so a long download does not look like a hung tab.
- Each row reports its own result. A failure stops that row, not the queue.
- If a request is cut short by a hosting limit, the row does not claim a failure. It says the request was cut short, then asks the server what the plugin's state actually is — because on this kind of host the plugin has often installed and activated before the request died, and reporting that as a failure makes you install it twice.
When the queue finishes, the wizard moves to the Demo content step, and every row has ended in a definite state rather than still spinning.
Continue without installing skips the step. If you skip it, install the Anps Theme Plugin from Plugins → Add New → Upload Plugin before importing anything — the importer is in that plugin.
If the theme's plugin list cannot be read at all — usually another plugin interfering with the installer — the step says so and points you at Appearance → Install Plugins instead.
Wizard step 5: Demo content
A grid of the twelve demos, each with a Preview link to the live demo site and an Import button. What each demo looks like is covered in The twelve demos.
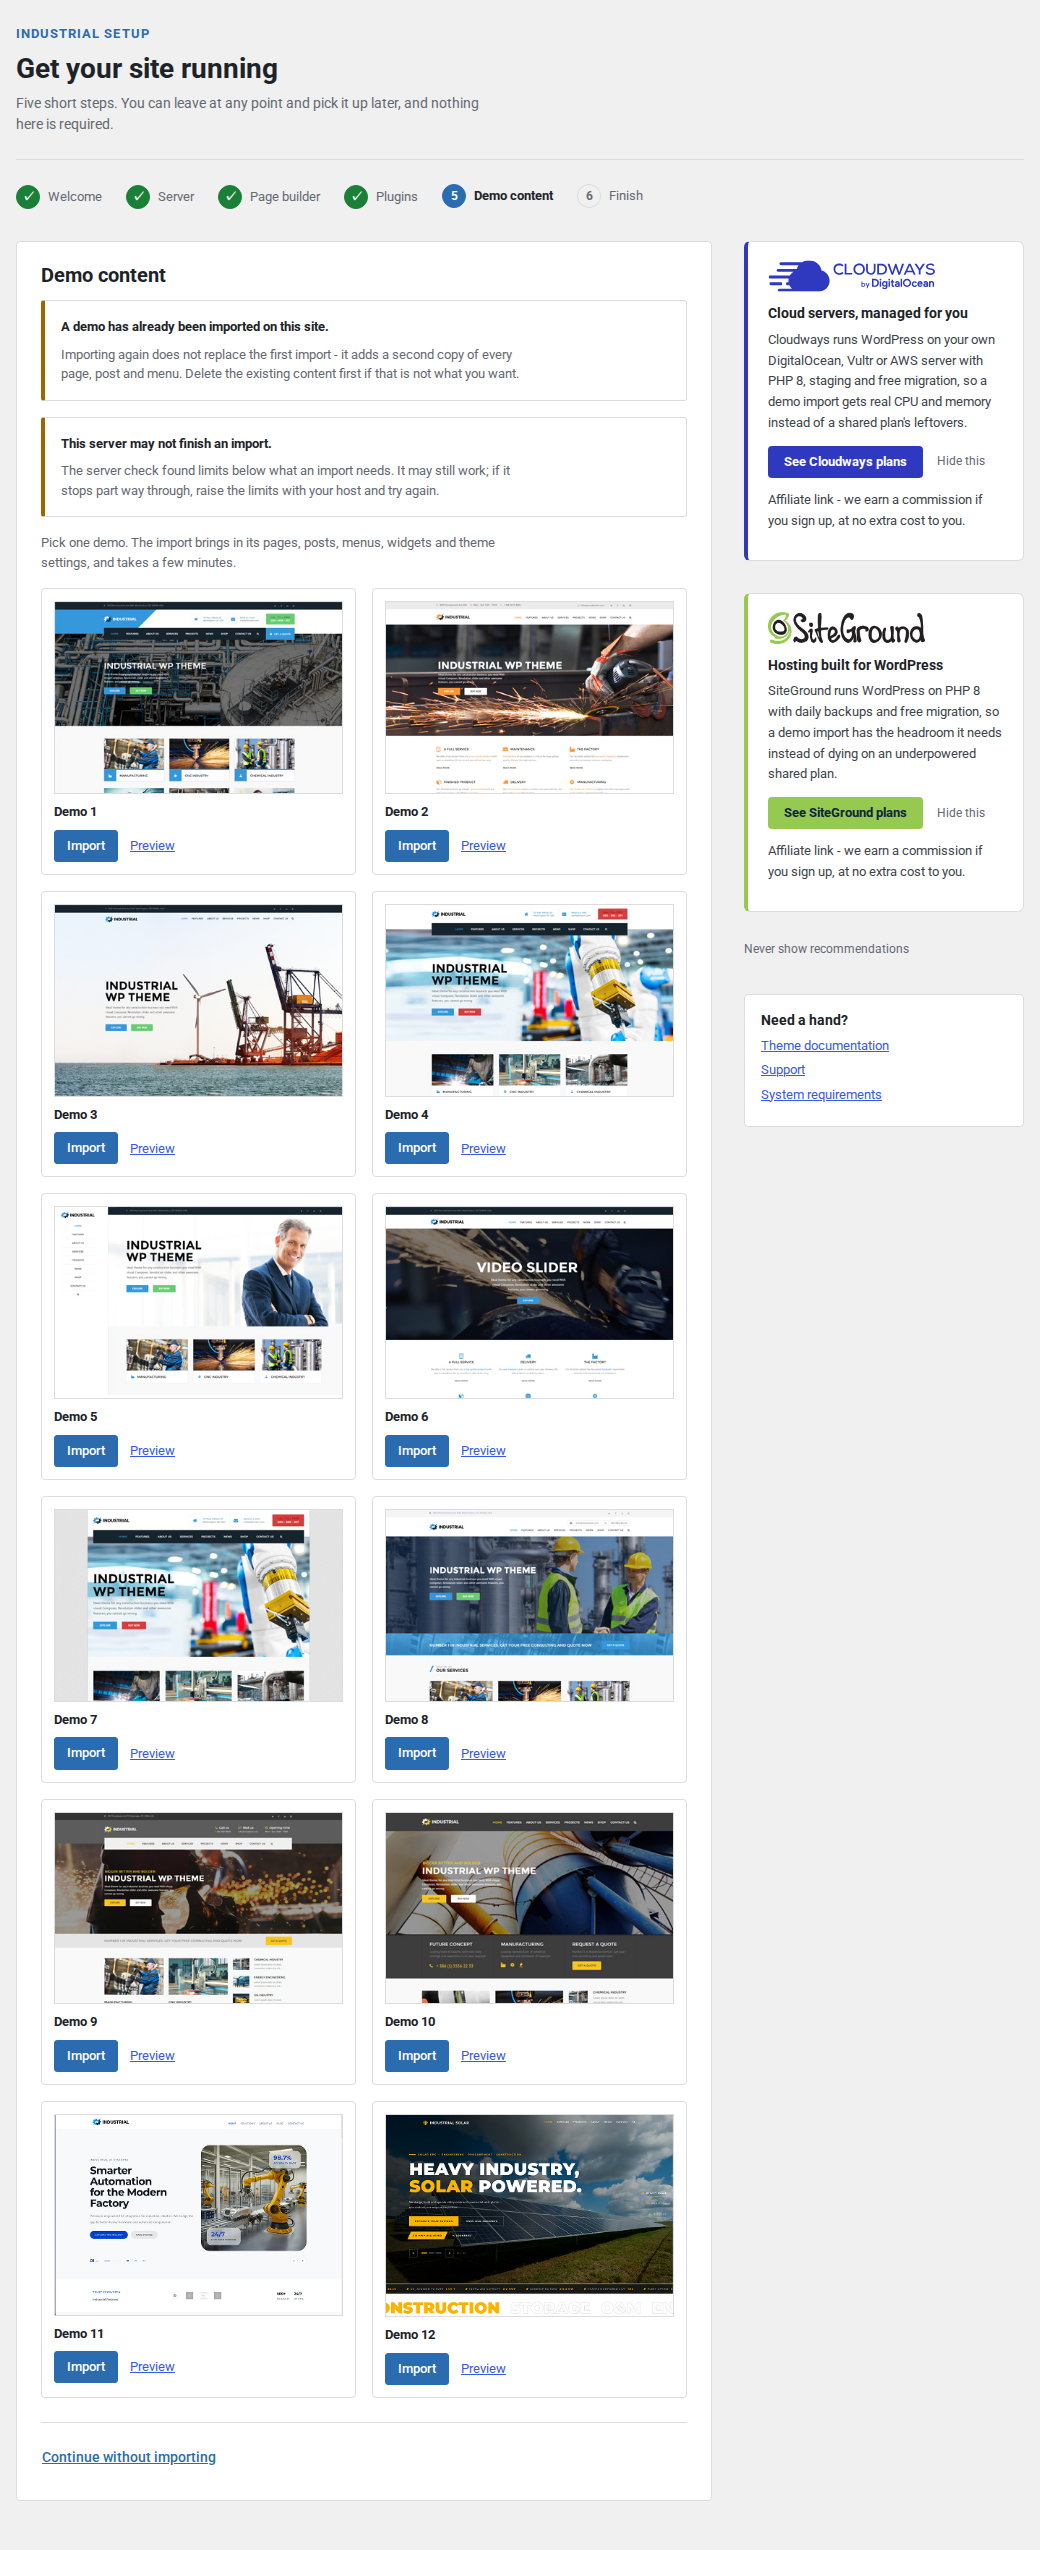
A demo your current builder cannot handle is greyed out with its button disabled, and the reason is printed on the card: activate Elementor, deactivate WPBakery, or both. That is the same rule the importer itself applies, so the grid never offers an import that would be refused.
Three warnings can appear above the grid, and each is worth reading before you press anything:
A demo has already been imported on this site. Importing again does not replace the first import. It adds a second copy of every page, post and menu. Delete the existing content first if that is not what you want.
A previous import did not finish. The site may be partly imported. Check its content before importing again — importing on top of a partial import leaves duplicates behind.
This server may not finish an import. The server check found limits below what an import needs. It may still work; if it stops part way, raise the limits with your host and try again.
An import brings in the demo's pages, posts, menus, widgets and theme settings, and takes a few minutes. The overlay says so and asks you to keep the tab open. When it finishes you land on the Finish step; if the importer refuses the demo, you come back to this step with the reason, so you can pick another one.
Continue without importing goes straight to Finish. You can import later from Appearance → Theme Options → Dummy Content, which is documented in Importing a demo.
Wizard step 6: Finish
A short account of what was done: which builder was chosen or that none was, and whether demo content is in place. A successful import prints the importer's own log here, which is the thing to copy into a support request if anything looks wrong.
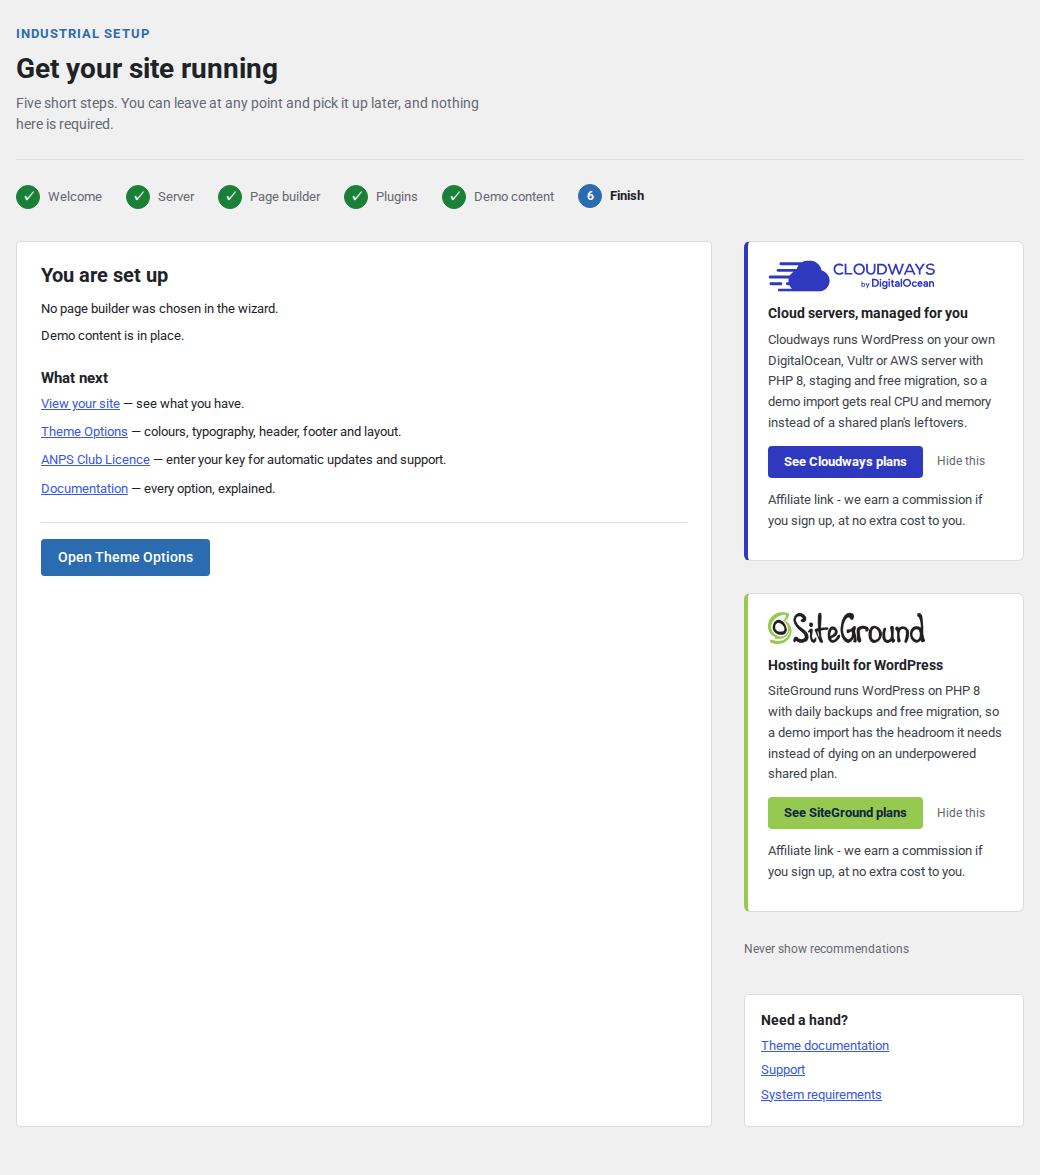
Then four links: View your site, to see what you actually have; Theme Options, for colours, typography, header, footer and layout; ANPS Club Licence, to enter your key; and the online Documentation.
If no demo was imported, the step also links to Theme Options → Dummy Content. If you chose to set the theme up yourself, it confirms the wizard will not open again but stays under Appearance. Enter your licence key next — it is what turns on automatic updates. See Licence, updates and support.
The wizard's side column
Every step carries the same side column. Its lower card, Need a hand?, holds three links: the online documentation, ANPS Club support, and the System Requirements screen.
Hosting recommendations in the wizard
Above that card you may see one or more partner cards — hosting and service recommendations. They are worth understanding precisely:
- They are affiliate links. Each card says so, and following one earns
ANPS a commission. The redirect goes through
anpsthemes.com/go/. - They appear in the wizard's side column and nowhere else. There is no admin notice, no dashboard widget and nothing on any Theme Options screen.
- They are shown to administrators only, and Hide this removes a card for your user account alone, permanently.
- Never show recommendations, under the stack, turns the whole thing off for the site. When it is off, the System Requirements screen carries one muted line saying so, with a link to turn it back on — that is the way back if you change your mind.
- Nothing is tracked. No impression is recorded, nothing is fetched from a remote server, and every logo is a file shipped inside the theme. Viewing a card sends no request anywhere; only clicking one does anything at all.
What your server needs
The theme measures your server in thirteen places and prints the results at Appearance → Theme Options → System Requirements. The setup wizard runs the same measurement as its second step, and the Dummy Content screen repeats it as a warning before an import.
All three read one measurement, so they cannot disagree with each other about whether this server can import a demo.
Every number below is an ordinary shared-hosting setting. None of it requires a bigger plan or a different host in most cases — these are values a support agent changes in a minute or two, once asked precisely.
The thirteen checks
The Recommended column is what the theme is built and tested against. The last column is what actually goes wrong on a site below it.
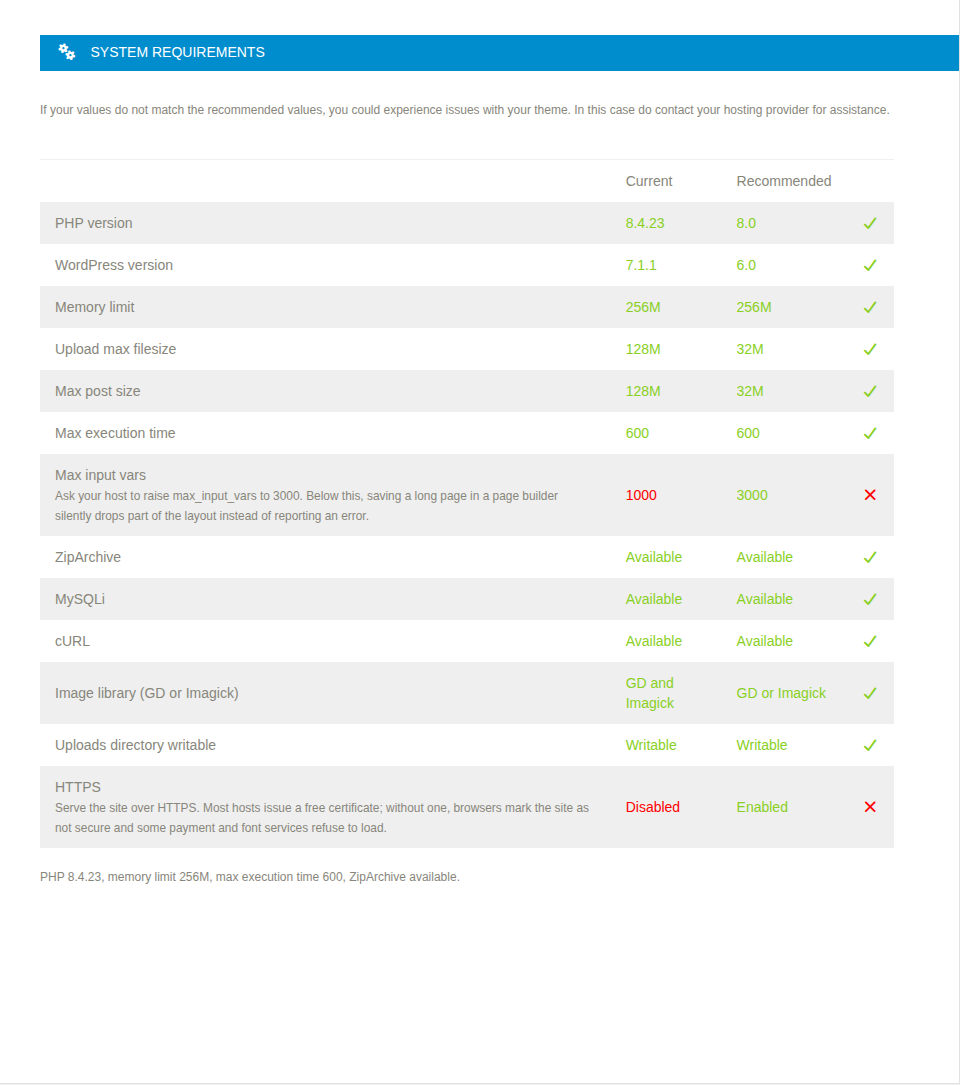
| Check | Recommended | What breaks when it is lower |
|---|---|---|
| PHP version | 8.0 | Older branches receive no security fixes, and some theme features do not run at all |
| WordPress version | 6.0 | The theme is tested against 6.0 and newer; below that, blocks, editor screens and core functions the theme calls may be missing |
| Memory limit | 256M | A demo import stops part way through. Resizing a full-width hero image is the high-water mark of a run, so the failure lands mid-import with the site half populated |
| Upload max filesize | 32M | Demo media and larger images fail to upload; the theme zip itself may be refused by Add New → Upload Theme |
| Max post size | 32M | A large upload or a long builder page is rejected outright. Keep it at or above the upload limit, or the upload limit is the one that does not apply |
| Max execution time | 600 | An import takes minutes; a shorter limit kills the request part way and leaves the site half imported, with no error page to explain it |
| Max input vars | 3000 | Saving a long builder page silently drops part of the layout — no warning, and sections missing after the save |
ZipArchive |
Available | The theme cannot unpack demo content or install plugins. The wizard's Plugins step and every import fail |
| MySQLi | Available | No database access; WordPress does not run without the mysqli extension |
| cURL | Available | Plugin downloads and licence checks fall back to a slower transport that some hosts block entirely, so updates appear to be unavailable |
| Image library (GD or Imagick) | GD or Imagick | WordPress cannot create the image sizes the theme uses, so every thumbnail renders at full size: a grid of 300-pixel tiles each downloading a 2000-pixel photograph |
| Uploads directory writable | Writable | No demo media and no uploaded image can be saved. An import runs and produces content with no pictures |
| HTTPS | Enabled | Browsers mark the site as not secure, and some payment and font services refuse to load |
Either image library is enough; the theme needs one working resizer, not both.
mysqli and ZipArchive are pass-or-fail: an extension is present or it is
not.
Reading the Recommended column
Each row is graded against two thresholds, not one. The Recommended value is the upper one; below it there is a lower floor where something genuinely breaks. That is why a row can be marked as needing attention without being fatal.
| Grade | Meaning |
|---|---|
| Pass | At or above the recommended value |
| Warning | Below recommended, at or above the floor. The site works; an import may not finish |
| Fail | Below the floor. Expect the failure described in the table above |
The floors are lower than most people assume:
| Check | Recommended | Fails below |
|---|---|---|
| PHP version | 8.0 | 7.4 |
| WordPress version | 6.0 | 5.6 |
| Memory limit | 256M | 128M |
| Upload max filesize | 32M | 8M |
| Max post size | 32M | 8M |
| Max execution time | 600 | 60 |
| Max input vars | 3000 | 1000 |
A missing required extension — ZipArchive, mysqli, or both image libraries —
is a failure with no middle ground. A missing cURL and a site not served over
HTTPS are recommendations, so they show as warnings rather than failures.
A warning is not a reason to stop. Plenty of sites on 128M of memory import a demo without trouble. The point of the grade is that if the import does stop half way, you know the answer before you open a support ticket.
The WP_MEMORY_LIMIT trap
The most common wasted afternoon on this screen: adding
define( 'WP_MEMORY_LIMIT', '256M' );
to wp-config.php, reloading System Requirements, and finding the memory row
unchanged.
WP_MEMORY_LIMIT asks PHP to raise the limit for this request. PHP can only
grant it up to the ceiling the host has set. If the host caps memory_limit at
128M, the constant achieves nothing at all, and the row keeps reporting 128M
because that is genuinely all the memory the import can use.
The same applies to ini_set() calls in a plugin or .htaccess, and to
upload_max_filesize and post_max_size, which PHP will not let a script
raise at runtime at all.
The memory row therefore has to be fixed on the server. Ask your host to raise
memory_limit to 256M — the row's own hint says exactly that, in words you can
forward.
Why max_input_vars has its own row
max_input_vars caps how many separate fields PHP accepts in one request. It
does not reject a request that exceeds the cap — it takes the fields up to the
limit and silently discards the rest.
WPBakery posts one input per shortcode attribute. A long page with thirty sections, each with a background, spacing, colour and typography setting, can pass a few thousand inputs in one save. Past the limit, the tail of the page is dropped before PHP hands the request to WordPress, so the page saves successfully and comes back missing its last sections. No error is raised anywhere, in any log, because as far as PHP is concerned nothing went wrong.
That failure is undiagnosable from the symptom, which is why the check has its own row rather than being folded into a general "PHP settings" note. If a long page keeps losing its bottom half on save, this is the row to read.
Elementor stores its layout as one JSON field and is not exposed to this in the same way, but the limit is worth raising regardless: WordPress menus and widget screens hit it too, on sites with large menus.
Unlimited and unknown values
Some servers report no limit rather than a number, and the screen handles both honestly:
| Value on your server | How the row reads |
|---|---|
memory_limit, upload_max_filesize or post_max_size of -1 |
Unlimited, and the row passes |
max_execution_time of 0 |
Unlimited, and the row passes — 0 genuinely means no time limit |
A negative max_execution_time or max_input_vars |
Unlimited, and the row passes |
max_input_vars that cannot be read |
Unknown, and the row passes rather than claiming a value nobody measured |
The distinction in the last two rows matters. For execution time, 0 means "no
limit" and is reported as such. For max_input_vars there is no meaningful
zero, so a 0 means the value could not be read — and a value that was never
measured is not reported as a failure.
What to send your host
Two things on the screen are written to be copied out.
The hint under a row that is not passing. Every non-passing row prints one
sentence naming the directive, the value to set it to, and what it affects. It
is written to be forwarded to a hosting support agent unchanged, without
editing and without explaining the theme. The memory hint also states that
WP_MEMORY_LIMIT cannot raise the limit above the host's ceiling, which saves
the round trip where support suggests exactly that.
The summary line under the table. One line naming your PHP version, memory
limit, maximum execution time and whether ZipArchive is available — the four
values every support conversation starts by asking for. Paste it into a support
request and the first reply can be an answer rather than a question. See
Licence, updates and support for what else to
include.
The same summary appears on the wizard's Server step, so you can grab it before you have imported anything.
If a value is below what an import needs and you cannot get it raised, Importing a demo explains what a part-finished import leaves behind and how to clear it, and Troubleshooting covers the symptoms these limits produce once the site is live.
The twelve demos
Industrial ships twelve complete starter sites. Each one is a real site that was built and exported: its pages, its posts, its portfolio and team entries, its menus, its widgets and its theme settings. Importing one reproduces that site on your install, and you then replace its words and pictures with yours.
Your page builder decides which demos you can import, so read the builder column before you fall in love with a layout.
The demo catalogue
Twelve demos, in the order the theme lists them. The preview links open the demo as a live site.
| Demo | Preview | Builder | What it is |
|---|---|---|---|
| Demo 1 | demo-1 | Elementor or WPBakery | Industrial and construction layout; full-width menu header, theme default colours, a "Get a quote" button in the header |
| Demo 2 | demo-2 | Elementor or WPBakery | Same site with a classic header and an orange accent colour |
| Demo 3 | demo-3 | Elementor or WPBakery | Classic header, transparent over the home slider, blue accent |
| Demo 4 | demo-4 | Elementor or WPBakery | Full-width menu header, transparent on the front page, blue accent |
| Demo 5 | demo-5 | Elementor or WPBakery | Vertical side menu instead of a horizontal header, blue accent |
| Demo 6 | demo-6 | Elementor or WPBakery | Classic header, solid on the front page, blue accent |
| Demo 7 | demo-7 | Elementor or WPBakery | Full-width menu header, transparent on the front page, blue accent |
| Demo 8 | demo-8 | Elementor or WPBakery | Classic header, blue accent, its own front-page composition |
| Demo 9 | demo-9 | Elementor or WPBakery | Full-width menu header, yellow accent |
| Demo 10 | demo-10 | Elementor or WPBakery | Classic header, yellow accent |
| Demo 11 | demo11e | Elementor only | Industrial automation and robotics supplier: sectors, solutions, case studies and an insights blog |
| Demo 12 | demo12 | Elementor only | Solar EPC contractor: services, built projects, a savings calculator and its own header and banner design |
Preview before you import, not after. An import takes minutes and adds a site's worth of content. Open the preview links first and pick one demo. Importing a second demo to compare them leaves you with two of everything — see Importing a demo.
What demos 1 to 10 have in common
Demos 1 to 10 are ten designs over one content set. Each of them brings the same 27 pages — About us, Services, Projects, Gallery, Contact us, a set of industry pages (Oil, Chemical, CNC, Manufacturing, Energy engineering, Material engineering), an FAQ, element demonstration pages and the WooCommerce pages — together with nine portfolio projects, three team members, sixteen products, six posts, one contact form and a Slider Revolution slider.
What differs between them is the front page design, the header type, the accent colour and the theme options that go with them. So the choice between Demo 3 and Demo 7 is a design choice, not a content choice: you can change the header type and the colours afterwards from Theme Options without reimporting.
If you cannot decide, import the one whose front page is closest to what you want and treat the rest as settings.
Demo 11, the automation supplier
Demo 11 is a newer, sparser design for an industrial automation and robotics supplier. It brings a front page built from a hero slider, a trust strip, a KPI strip, sector and solution sections and an insights feed; a Solutions page; an About page; a Contact page with locations and contact channels; a Case Studies page; four portfolio entries used as sector case studies — Automotive, Electronics, Logistics and Precision Manufacturing — and five blog posts.
Its sections come from 31 Elementor widgets of its own, named demo11_* in the
Industrial Elements category. They are ordinary widgets: you can drag them
into any Elementor page, not only the imported ones.
Demo 11 sets the Demo 11 portfolio single style and the Style 2 blog single style, a blue accent colour and a fixed header height. It does not ship a Slider Revolution slider; its hero is an Elementor widget.
Demo 12, the solar contractor
Demo 12 is a solar EPC contractor — engineering, procurement and construction.
It brings a front page with a full-bleed hero slider, a scrolling marquee, an
expanding services explorer, featured projects, a savings calculator, a track
record band and testimonials; Services, Projects, About, News and Contact
pages; nine portfolio entries written as delivered solar plants; and eight
posts. Its 24 demo12_* Elementor widgets are also in Industrial Elements
and usable anywhere.
Demo 12 differs from the other eleven in three ways worth knowing before you import it:
- Its own header type. It sets the header to
style5, the fixed transparent header that solidifies on scroll. No other demo uses it. You can select it yourself at Appearance → Theme Options → Header Options, and see Header, top bar and footer. - Its own banner treatment for portfolio and blog singles. It sets the portfolio single style and the single post style to Demo 12 (Solar). That style renders a photographic banner with the heading inside it, so the theme's own page header is suppressed on those templates to stop the title appearing twice.
- Its own footer design. The Solar footer adds a Footer top band (Solar) widget area for a call to action, contact details and a newsletter sign-up.
Demo 12 does not ship a Slider Revolution slider either.
Which builder each demo needs
Demos 1 to 10 exist in two versions inside the theme, one for each builder. The importer picks the version that matches the builder you have active, so the same demo number gives you an Elementor site or a WPBakery site depending on which plugin is running.
Demos 11 and 12 exist in one version only. The rule the importer enforces is strict:
Demo 11 and Demo 12 need Elementor active and WPBakery inactive. Not one or the other — both conditions. With WPBakery still active the importer refuses them even if Elementor is installed and running.
The demo screen shows the reason under any demo you cannot pick: "Activate Elementor to import this demo", "Deactivate WPBakery to import this demo", or both.
With two page builders active the importer does nothing at all. It refuses every demo, not only 11 and 12, with "Please activate only one page builder". Both builders are registered as required plugins, so a site that installed everything the theme offered has both — deactivate the one you are not using before you import.
Choosing a demo you can live with
What you can change afterwards, without reimporting:
- Colours, fonts, header type, footer style, page layout and every other theme option. See Colours and typography and Page layout and page setup.
- Every page's content, including adding and removing sections.
- The logo, the menus, the widgets and the sliders.
What you cannot change afterwards:
- The builder. The demo's pages are stored as builder data. Elementor cannot read a WPBakery page and WPBakery cannot read an Elementor page. Switching builder later means rebuilding every page by hand.
- The demo, without duplicates. Importing a second demo adds to the first rather than replacing it.
Elementor is the builder to choose for a new site. WPBakery is supported for sites already built on it, and Demos 11 and 12 — the two newest designs — are Elementor-only. See Building pages with Elementor and, if you are working on an existing WPBakery site, Building pages with WPBakery.
The setup wizard asks you to choose a builder before it shows you the demos, for this reason. When you have chosen, go to Importing a demo.
Importing a demo
Importing a demo is the fastest way to a finished-looking site, and it is the single most consequential thing you will do in this theme. Read this chapter before you press Import, not after.
What an import does to your site
An import runs for minutes — it downloads every image the demo uses, so it is as slow as your server and your connection make it. Do not close the tab and do not refresh.
It adds a whole site's worth of content:
| What arrives | Where it lands |
|---|---|
| Pages | Pages, including the demo's front page, its inner pages and the WooCommerce pages |
| Posts and categories | Posts |
| Portfolio projects | Portfolio |
| Team members | Team (demos 1 to 10) |
| Products | Products, when WooCommerce is active |
| Media | Your media library, downloaded from the demo server |
| Menus | Appearance → Menus |
| Elementor templates | Templates → Saved Templates, where a demo uses them |
| Contact forms | Contact, when Contact Form 7 is active |
| Slider Revolution sliders | Slider Revolution, for the demos that ship one |
It also overwrites settings you may have set already:
| What is overwritten | To what |
|---|---|
| Theme options | The demo's own colours, fonts, header, footer and layout settings |
| Every widget area | Emptied first, then filled with the demo's widgets |
| Primary menu assignment | The demo's menu |
| Permalink structure | /%postname%/, and the rules are flushed |
| Front page and posts page | The demo's Home page, and its News or Blog page |
| Feed setting | Feeds switched to excerpts |
| Blog post meta options | Category and author meta on posts cleared |
An import permanently deletes your WooCommerce pages. Before it copies anything in, the importer deletes the pages WooCommerce has registered as Shop, Cart, Checkout, My account and Terms. They are deleted outright, not put in the trash, and the demo's own versions take their place. If your shop pages carry content you need, an import is not a safe operation on that site.
Apart from those WooCommerce pages, the import does not remove your existing pages and posts. That is the trap:
A second import leaves you with two of everything. Importing again does not replace the first import. You get a second Home page, a second set of inner pages, a second menu and a second copy of the media. Delete the first import's content before you import again, or start from a clean install.
Before you import a demo
- Install the plugins first. The demo's pages are made of builder elements and plugin widgets. Import with the plugins missing and you get pages of raw shortcode text or unstyled blocks. See The setup wizard for the plugin step.
- Have exactly one page builder active. Elementor, or WPBakery, never both. See The twelve demos.
- Back up if the site has anything on it. A database export plus
wp-content/uploadsis enough. There is no undo and no "remove demo content" button. - Check the server. An import is the heaviest thing this theme ever asks of your host: hundreds of posts and a few hundred image downloads and resizes in one request. Read What your server needs and fix the memory limit and the execution time before you start, not after an import dies half way.
- Import on a clean install if you can. It is faster than cleaning up.
The two places you can import from
The same importer, reached two ways:
| Where | Path |
|---|---|
| The setup wizard's demo step | Appearance → Setup Wizard, step 5 |
| The Theme Options screen | Appearance → Theme Options → Dummy Content |
Both read the same catalogue of twelve demos and apply the same rules, so a demo you cannot select in one is not selectable in the other. Each demo has a Preview link that opens the live demo in a new tab and an Import button that starts the run.
The wizard sends you to its final step when the import succeeds and back to the demo step when it is refused, so you can pick another demo. The Dummy Content screen reports the outcome in place.
Warnings on the import screen
Three warnings can appear above the demo grid. None of them is decoration.
"A demo has already been imported on this site." The theme recorded a finished import. Importing again adds a second copy of everything rather than replacing the first. This one appears in the wizard.
"A demo import was started and did not finish." The previous run was killed part way through — usually by the execution time limit or by exhausted memory. Your site is now partly imported, and importing again on top of a partial import leaves duplicates behind. Before you retry:
- Look at Pages, Posts, Portfolio and your media library and see how far it got.
- Delete what arrived, emptying the trash as well.
- Raise the memory limit and the execution time with your host. Non-passing rows on Appearance → Theme Options → System Requirements print a sentence you can forward to them unchanged.
- Then import again.
"One or more issues with server found." The server check did not pass. The import may still finish; if it stops part way, this is why. It is the same check as What your server needs.
When the importer refuses
The importer stops before touching anything and prints its own reason. It refuses in these cases:
| Reason | What to do |
|---|---|
| Two page builders active | Deactivate the builder you are not using, then import |
| Demo 11 or Demo 12 without Elementor | Activate Elementor |
| Demo 11 or Demo 12 with WPBakery active | Deactivate WPBakery |
| No supported page builder active | Activate Elementor, or WPBakery for a legacy site |
| A demo file is missing from the theme | Re-upload the theme; the download is incomplete |
The reason shown is the importer's own message, captured while the import ran and carried over to the screen you land on. So a refusal never looks like a silent failure: if you get no message and the demo did not arrive, treat it as an interrupted import rather than a refusal, and work through the interrupted list above.
One more message is worth recognising. If a page's Elementor layout data could not be read after the import, the screen names the affected pages and tells you not to open them in Elementor — Elementor would offer to convert them, and that replaces the layout for good. Send that message to support unchanged. Support is at club.anpsthemes.com/help; see also Troubleshooting.
After the import finishes
Check these four things straight away, in this order:
- The front page. Open the site. The importer sets the demo's Home page as the front page and its News or Blog page as the posts page. If you land on a list of posts instead, set them yourself at Settings → Reading.
- The menu. The importer assigns one imported menu to the Primary Navigation location. Demos with more than one menu may not get the one you expected. Check Appearance → Menus → Manage Locations.
- Permalinks. The importer sets
/%postname%/and flushes the rules. If an inner page or a portfolio item gives a 404, open Settings → Permalinks and press Save Changes without altering anything. - The images. They were downloaded from the ANPS demo server during the import. If your host blocks outbound connections you will see broken images and an incomplete media library; that is a hosting issue, not a theme one.
The demo's photographs are not yours to keep. They are licensed for the demo sites only and are placeholders on your install. Replace them with your own images before the site goes public — see Going live, which also covers the logo and favicon, which after an import still point at the ANPS demo server.
With the content in, the rest of the manual is reference. If something looks broken rather than merely unfinished, go to Troubleshooting.
Theme Options, screen by screen
Everything the theme lets you set without touching code lives in one panel. This chapter is the map: what each screen is for, how saving works, and the detail on the screens that do not get a chapter of their own.
Where Theme Options lives
The panel is at Appearance → Theme Options. Its own sidebar lists every screen, and the heading at the top of that sidebar shows the theme version you are running, which is the number to quote when you ask for support.

Opening the panel with no screen chosen lands you on Color Management. The first link in the sidebar is not a settings screen at all: it reopens the setup wizard.
Many of the same settings are also in Appearance → Customize → Theme options, where you see the result live before you save. The Customizer carries a subset, not the whole panel; where a setting exists in both, they read and write the same option, so it does not matter which one you use.
The sixteen Theme Options screens
| Screen | What it controls |
|---|---|
| Color Management | Every colour in the theme, plus five starting schemes |
| Typography | The three font roles and the font size of each element |
| Update Google Fonts | Refetches the Google font list the pickers offer |
| Custom Fonts | Uploads your own font files as a ZIP |
| Custom CSS | A stylesheet of your own, loaded after the theme's |
| Page Layout | Boxed or full width, background, default sidebars, headings, blog columns |
| Page Setup | Home slider, 404 page, excerpt length, portfolio and team slugs, post meta |
| Header Options | Header type, top bar, sticky behaviour, search icon, heading background |
| Footer Options | Footer on or off, column counts, fixed footer, mobile columns |
| WooCommerce | Cart icon, shop columns, products per page, product gallery behaviour |
| Logos & Media | Every logo variant, favicon, home screen icon, text logo |
| Dummy Content | Imports one of the twelve demos |
| Theme Update | A page of links about updating; no settings |
| Import/Export | Moves the theme's settings between sites |
| Import/Export Widgets | Moves the contents of your widget areas between sites |
| System Requirements | What your server provides against what the theme needs |
Colours and fonts are covered in Colours and typography. Header Options and Footer Options are covered in Header, top bar and footer. Page Layout and Page Setup are covered in Page layout and page setup. Dummy Content is the same importer the wizard uses and is covered in Importing a demo. The rest are below.
How each screen saves
Each screen is its own form with its own Save button — the floating Save button at the top right and Save all changes at the foot of the page do the same thing. "All changes" means all changes on this screen. Nothing on any other screen is touched, and moving to another screen with unsaved changes discards them.
A screen can only write the settings it draws. That matters in one case you will meet: a screen that offers a choice your site does not currently use — a demo may have set the footer style or a font the picker has not fetched — shows that stored value as the selected option, so saving the screen writes it back unchanged rather than resetting it to the first item in the list.
Seven screens have no Save button because they hold no settings of their own: Update Google Fonts, Custom Fonts, Dummy Content, Theme Update, Import/Export, Import/Export Widgets and System Requirements. Each has its own action button instead, and pressing it acts at once.
The Update Google Fonts screen
The Google font list is a snapshot, stored on your site rather than read live. The theme fetches it when it is first activated, and the screen shows how many fonts are currently in it.
Press Update Google Fonts to fetch the current list. It takes a while on a slow connection, and it needs outbound HTTP from your server; if your host blocks that, the list stays as it was. Do this before you go hunting for a font you cannot find in Typography.
The Custom CSS editor
Appearance → Theme Options → Custom CSS is the right place for small visual changes: a colour the options do not expose, a margin you want tighter, a element you want hidden on one page.
It is a code editor, not a plain box — WordPress's own editor, with line numbers and syntax highlighting, so a missing brace is visible as you type. If you have turned syntax highlighting off in Users → Profile, you get a plain textarea and the CSS still saves the same way.
What you write here is stored by WordPress itself, in the same place as Appearance → Customize → Additional CSS, and the two show the same stylesheet. It is stored per active theme, so it survives theme updates — the update replaces the theme's files, not your CSS.
Switching to the child theme starts a fresh sheet. WordPress keeps custom CSS against whichever theme is active, so CSS written while the parent theme was active does not appear once you activate the child theme. Copy it across before you switch. For anything larger than a handful of rules, use the child theme's stylesheet instead — see The child theme and custom code.
WooCommerce display options
These settings do nothing until WooCommerce is installed and active. They cover how the theme presents the shop; WooCommerce's own settings, under WooCommerce → Settings, still handle payment, shipping and tax.
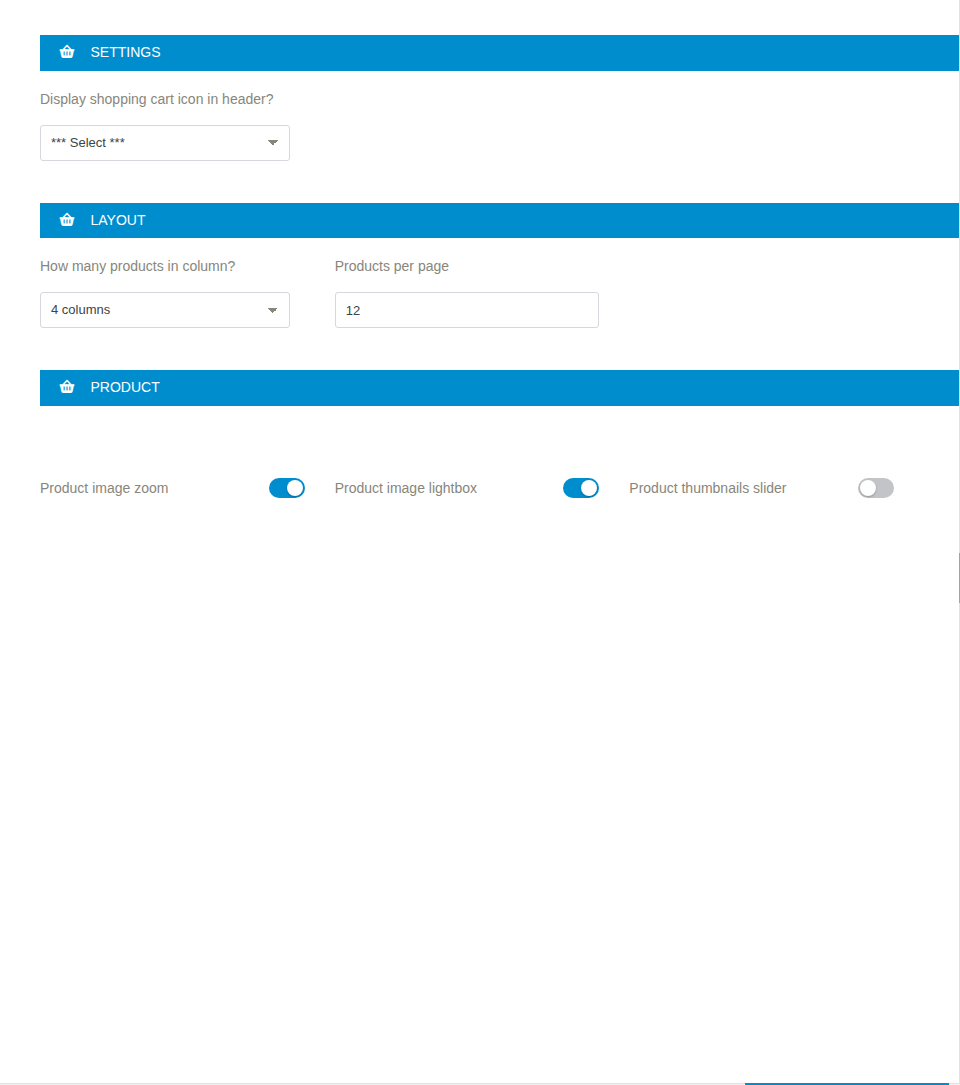
| Setting | Effect |
|---|---|
| Display shopping cart icon in header | Never, only on shop pages, or on every page |
| How many products in column | Three or four products per row on shop and category pages |
| Products per page | How many products before pagination; 12 by default |
| Product image zoom | Magnifies the main product image on hover |
| Product image lightbox | Opens the product image full size when clicked |
| Product thumbnails slider | Turns the gallery thumbnails into a slider instead of a grid |
The colours of the cart's item counter are on the Color Management screen. See Shop and products for the rest of the shop.
Logos, favicon and the text logo
Appearance → Theme Options → Logos & Media holds one primary logo and a set of variants. Only the primary logo is required: where a variant is empty, the primary logo is used instead.
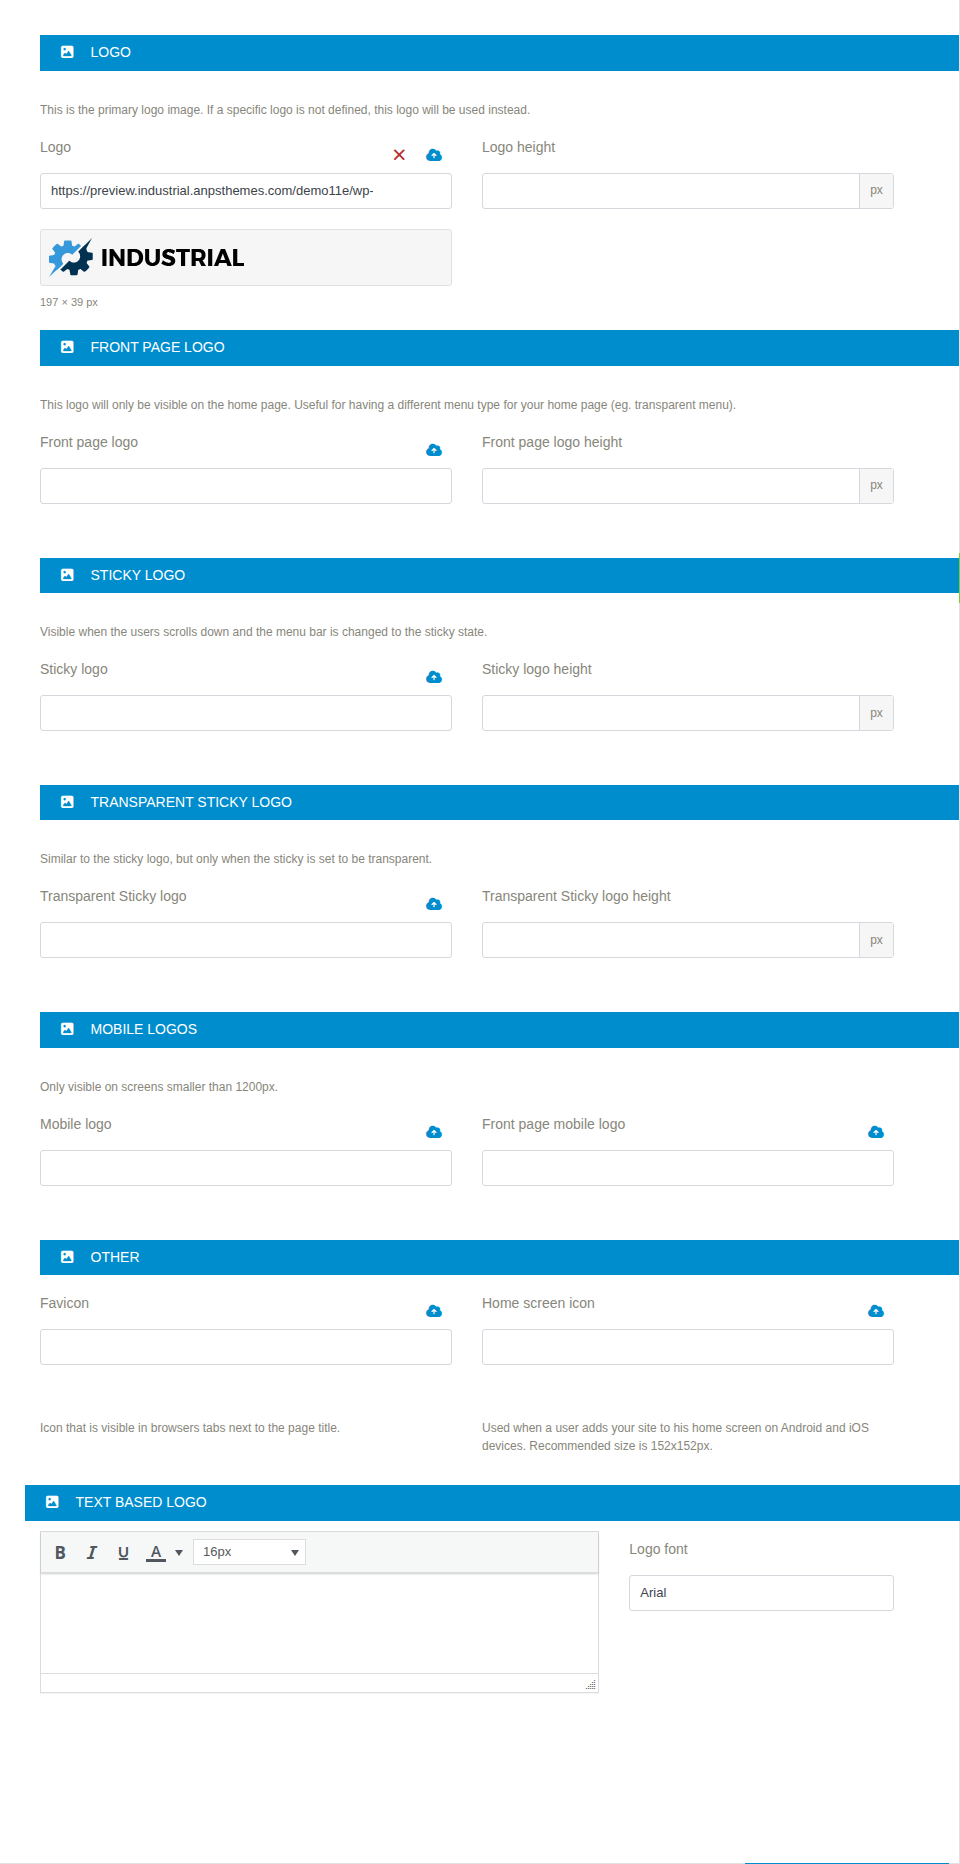
| Upload | Where it appears |
|---|---|
| Logo | Everywhere, unless a more specific logo below applies |
| Front page logo | The front page only — useful when the front page has a transparent header over a dark hero |
| Sticky logo | While the header is in its sticky state, after you scroll |
| Transparent Sticky logo | The sticky state when the sticky header is transparent |
| Mobile logo | Screens narrower than 1200px |
| Front page mobile logo | The front page, on screens narrower than 1200px |
| Favicon | The browser tab |
| Home screen icon | When a visitor adds the site to an Android or iOS home screen; 152×152px |
Logo, front page logo, sticky logo and transparent sticky logo each take a height in pixels; width follows the image's own proportions. Leave the height empty to let the image set its own size.
Text Based Logo is for sites with no logo image. Type the wording into the small editor — bold, italic, underline, colour and size are available — and pick the font it is set in. A text logo is used only when no logo image is uploaded for the case in hand.
Individual pages can override the logo, the sticky logo and the mobile logo; see Header, top bar and footer.
The Dummy Content screen
This is the demo importer, the same one the wizard's fifth step runs. It lists the twelve demos, disables the ones your current page builder rules out and prints the reason on the button, and warns you when the server check has not passed or when a previous import stopped part way through.
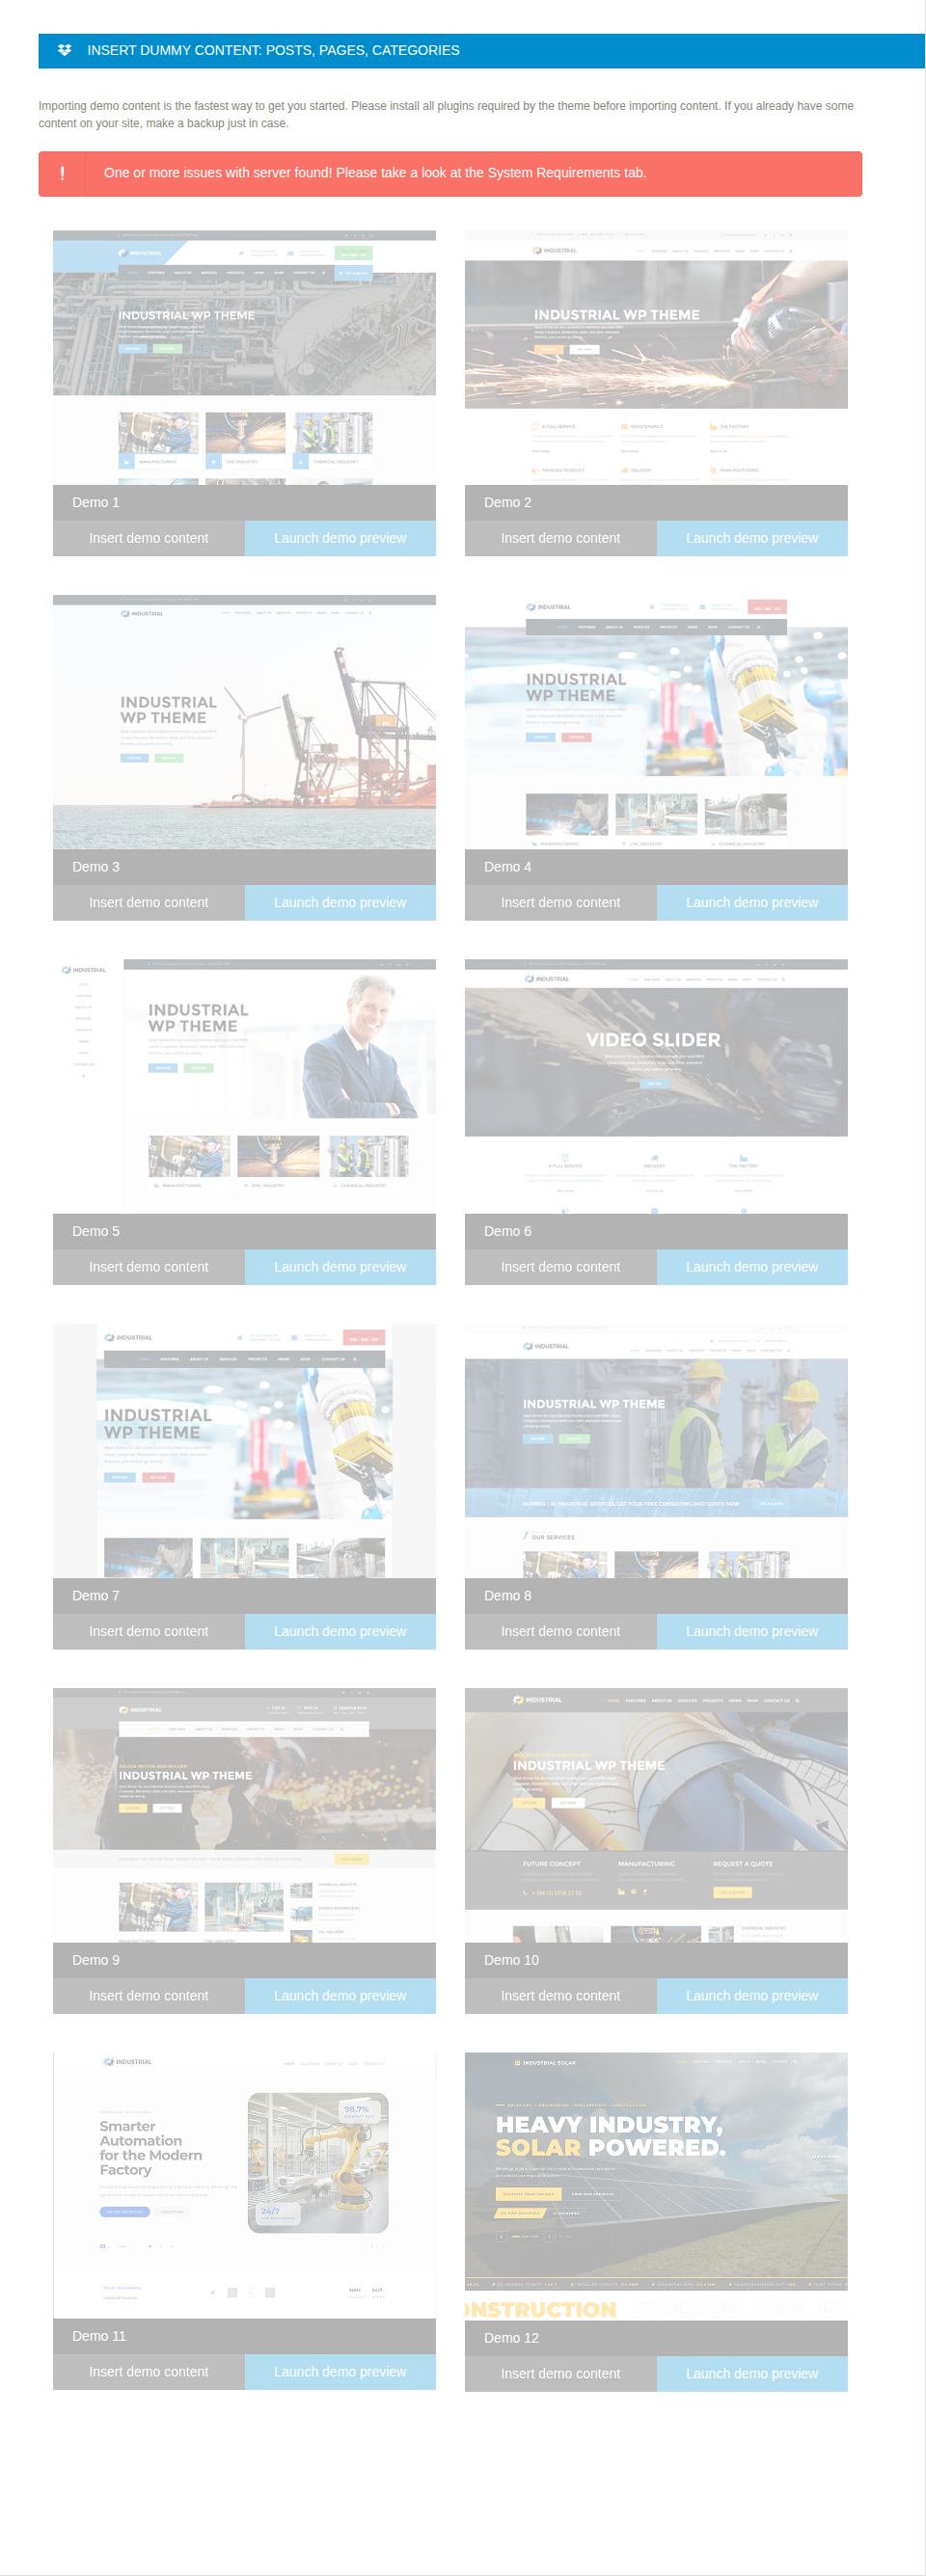
Importing twice does not replace the first import. It adds a second copy of every page, post, menu and widget. Read Importing a demo before you press the button.
What the Theme Update screen says
A page of links, with nothing to set. Updates for this theme are delivered through your ANPS Club licence: enter your key once at Appearance → ANPS Club Licence and updates then arrive in Dashboard → Updates like any other. See Licence, updates and support.
The text on this screen is out of date. It describes updating through the marketplace plugin and an API token, which is not how this theme is updated. Use the ANPS Club licence screen.
Exporting and importing theme settings
Appearance → Theme Options → Import/Export moves a configured theme from one site to another — a staging site to a live one, or your last build to your next.
The Export box holds the settings as JSON. It contains every option whose name
begins with anps_: colours, fonts, sizes, header and footer configuration,
layout, portfolio and team settings, logo URLs. The two cached font lists are
left out deliberately, because the receiving site fetches its own. Export
downloads the same content as anps-theme-options.json; Copy to clipboard
takes it without a file.
It is settings only. Pages, posts, menus, images and widgets are not in it.
To import, paste the JSON into the Import box or choose a .json file, then
press Import.
Importing overwrites your current settings and cannot be undone. Every setting present in the file replaces the one on this site. Settings not mentioned in the file are left alone, which means an import does not reset a site to a known state — it applies one configuration over another. Export your current settings first, so you have something to go back to.
Logo and background uploads travel as URLs. If the images do not exist at the same addresses on the new site, upload them there and reselect them.
Exporting and importing widgets
Widgets are separate, on Appearance → Theme Options → Import/Export Widgets, because they live in a different part of the database.
Export downloads anps-widgets.txt: every widget area on the site that has
widgets in it, with each widget's settings. Widgets that point at a navigation
menu are written down by the menu's slug rather than its internal number, so
they still find the right menu on the other site — provided a menu with that
slug exists there. Choose a file and press Import to bring them in.
A widget import adds; it does not replace. Widgets in the file are added to their widget areas alongside whatever is already there. Importing the same file twice gives you two of everything. Clear the widget areas first if you want the file's contents and nothing else.
Widget areas are created by other settings — the number of footer columns, for example, decides how many footer widget areas exist. Set those before you import, or the widgets have nowhere to land. See Widgets and sidebars.
Reading the System Requirements screen
Thirteen checks, with your server's current value beside the value the theme is built against. Under any row that falls short, the screen prints a sentence you can send to your host unchanged.
"Recommended" is what the theme is built and tested against, not a hard floor. A value below it is a warning, not necessarily a failure — but the limits that govern time, memory and upload size are the ones that decide whether a demo import finishes. What your server needs goes through each check and what to do about it.
This screen also carries the one line that turns hosting recommendations back on if you have switched them off everywhere.
Opening the wizard from Theme Options
The wizard is still there after first activation, at the top of the Theme Options sidebar or directly at Appearance → Setup Wizard. It does not open by itself once you have finished it or chosen "I'll set it up myself", and nothing in it is destructive to visit: every step can be skipped, and the demo step is the only one that changes your content. See The setup wizard.
Colours and typography
Two screens carry most of the theme's visual identity: Appearance → Theme Options → Color Management sets every colour, and Appearance → Theme Options → Typography sets the fonts and their sizes. Three smaller screens sit beside them — Update Google Fonts, Custom Fonts and Custom CSS.
If you imported a demo, both screens already hold that demo's values. Changing them changes the whole site at once, including pages built in Elementor or WPBakery, because the theme writes these colours and fonts into the stylesheet it generates on every page load.
Starting from a colour scheme
The top of the Color Management screen offers five schemes: Default, Orange, Green, Red and Yellow. Picking one fills the colour fields below with that scheme's values.
A scheme is a starting point, not a mode. Once applied, every colour is still yours to change, and the theme does not remember which scheme you came from.
A scheme replaces the colours below it. Any colour you have already tuned by hand is overwritten. The change is written when you save, so if you picked a scheme by accident, leave the screen without saving.
The main theme colours
These are the colours the whole site is built from.
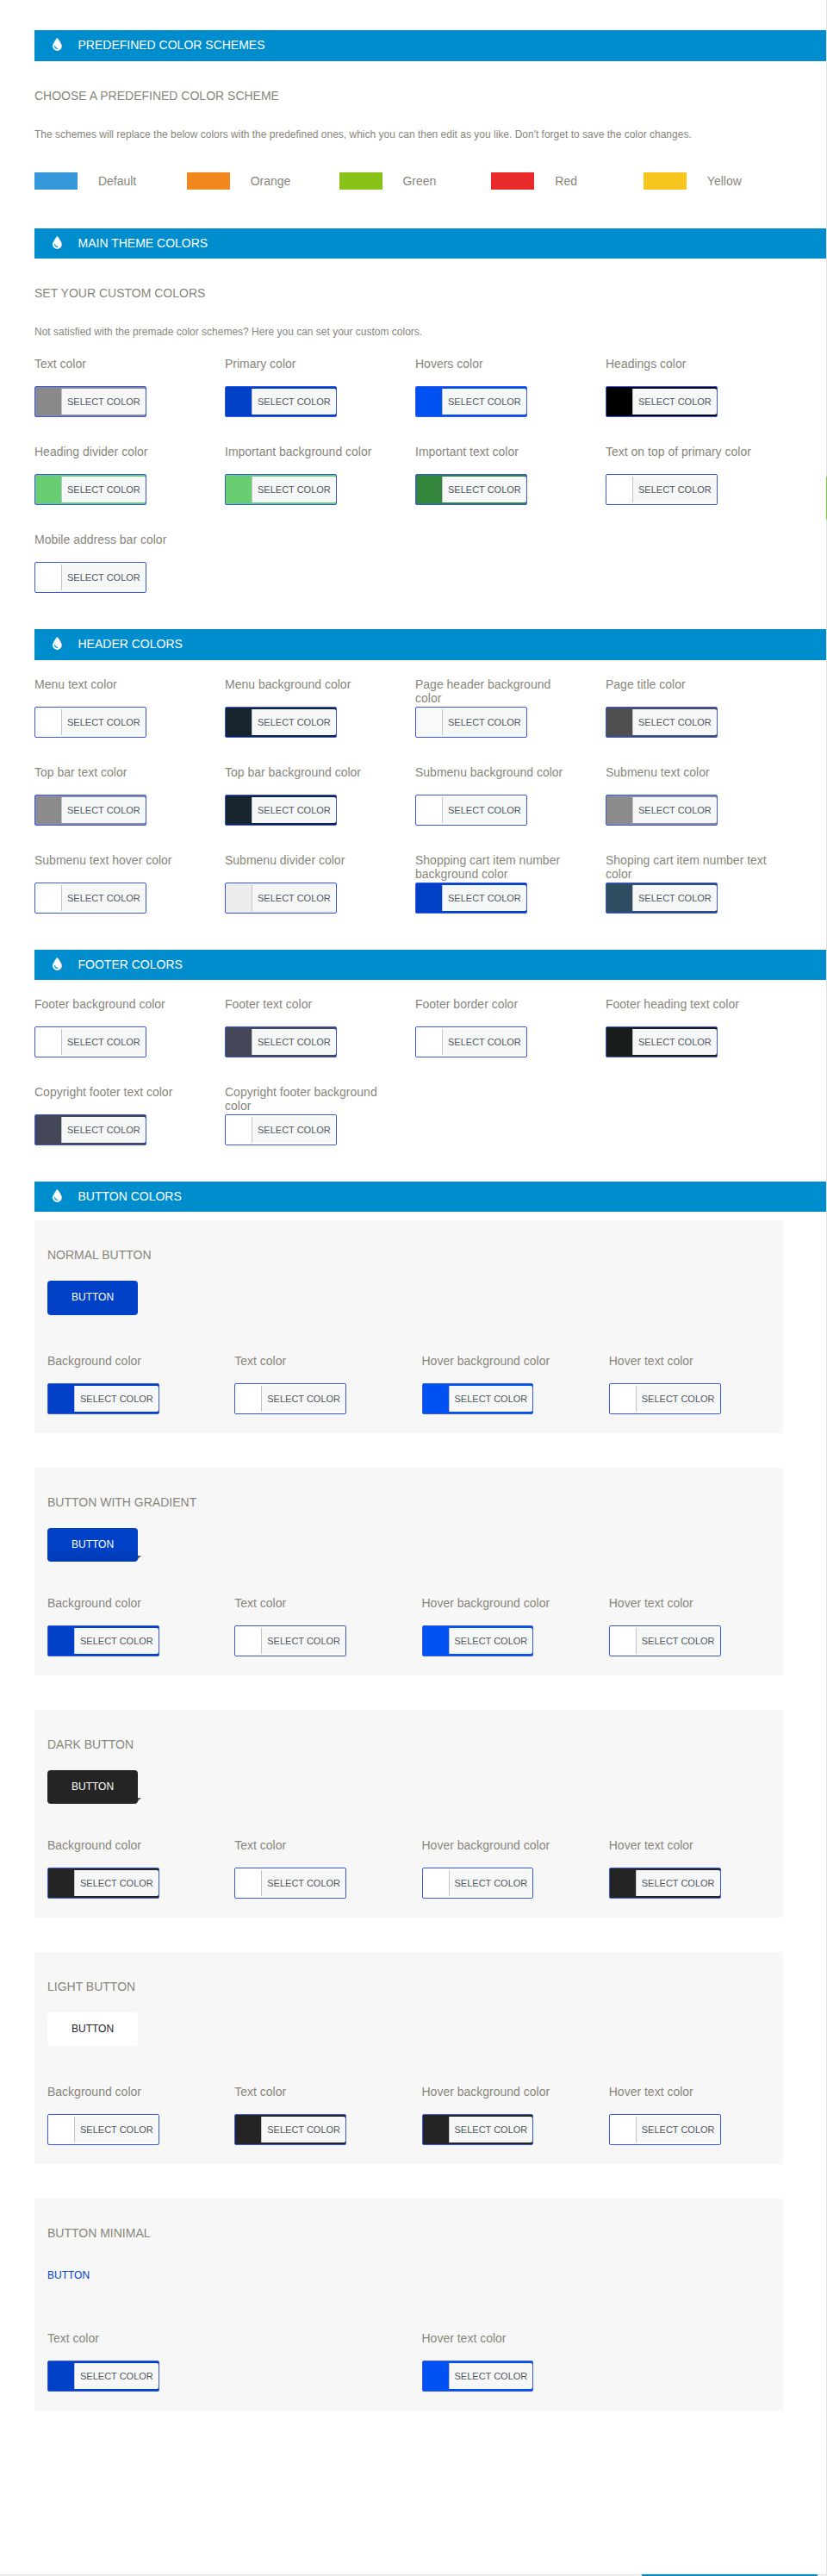
| Colour | What it affects | Default |
|---|---|---|
| Text color | Body copy | 898989 |
| Primary color | The theme's accent: icons, links, active states | 3498db |
| Hovers color | The hover state of anything using the primary colour | 2a76a9 |
| Headings color | Headings in content, sidebars and breadcrumbs | 000000 |
| Heading divider color | The short rule the theme draws under section headings | 69cd72 |
| Important background color | The highlight background used on emphasised items | 69cd72 |
| Important text color | The highlighted row in the footer opening-hours widget | 32853a |
| Text on top of primary color | Text and icons drawn over a primary-coloured background | ffffff |
| Mobile address bar color | The browser chrome colour on mobile, through the theme-color meta tag |
empty |
Mobile address bar colour is the one with no visible effect on the page itself: it tints the browser's own bar on Android and iOS. Leave it empty and the theme omits the tag.
Header and menu colours
| Colour | What it affects | Default |
|---|---|---|
| Menu text color | Top-level menu items | ffffff |
| Menu background color | The bar the menu sits in | 16242e |
| Page header background color | The heading band under the header on inner pages | f8f9f9 |
| Page title color | The page title in that band | 4e4e4e |
| Top bar text color | Text and icons in the top bar | 8c8c8c |
| Top bar background color | The top bar itself | 16242e |
| Submenu background color | Drop-down and mega menu panels | ffffff |
| Submenu text color | Items inside those panels | 8c8c8c |
| Submenu text hover color | Those items under the pointer | fff |
| Submenu divider color | The rule between submenu items | ececec |
| Shopping cart item number background color | The counter bubble on the cart icon | 3daaf3 |
| Shopping cart item number text color | The figure inside that bubble | 2f4d60 |
The Header Options screen carries a second, smaller set of colour fields that apply to one header type or to the front page only. Those are described in Header, top bar and footer; where both are set, the Header Options value wins for the case it covers.
Footer colours
| Colour | What it affects | Default |
|---|---|---|
| Footer background color | The main footer band | 171717 |
| Footer text color | Text in footer widgets | 7f7f7f |
| Footer border color | Rules and separators inside the footer | 2e2e2e |
| Footer heading text color | Widget titles in the footer | ffffff |
| Copyright footer text color | The narrow band under the footer | 9C9C9C |
| Copyright footer background color | That band's background | empty |
Leaving the copyright background empty lets the footer background show through, which is what most of the demos do.
Button colours
The theme draws five button styles, and the screen shows a live example of each above its colours.
| Button | Colours you can set |
|---|---|
| Normal button | Background, text, hover background, hover text |
| Button with gradient | Background, text, hover background, hover text |
| Dark button | Background, text, hover background, hover text |
| Light button | Background, text, hover background, hover text |
| Button minimal | Text and hover text only — it has no background |
Which style a given button uses is chosen in the element that draws it, in Elementor or WPBakery, not here. These settings decide what each style looks like everywhere it is used.
How colours are stored and entered
Every colour field uses WordPress's own colour picker. Press Select Color to open it, drag to a colour, or type a hex value into the field it reveals.
Colours are stored without a leading # — 3498db, not #3498db. If you
paste a value with a hash, the theme strips it. Three-digit shorthand such as
fff is accepted and stored as you typed it. A value that is not a valid hex
colour is ignored on save and the previous colour is kept, so if a colour does
not change after saving, check what you pasted.
Editing colours with a live preview
Most of these colours are also in Appearance → Customize → Theme options, under Main theme colors and Button colors, where the site redraws as you drag. They are the same settings under different controls: change one in the Customizer and Color Management shows the new value, and the reverse.
Two things on the Color Management screen are not in the Customizer: the five predefined schemes, and the mobile address bar colour. Everything else has a Customizer equivalent.
The three font roles
The theme uses three fonts and assigns every piece of text to one of them.
| Role | Used for | Demo value |
|---|---|---|
| Font type 1 | Headings, page titles, buttons, tabs, prices, filter controls | Montserrat |
| Font type 2 | Body copy and everything not claimed by the other two | PT Sans |
| Navigation font type | The main menu and mega menu titles | Montserrat |
Set these three well and the rest follows. There is no per-element font setting; anything finer belongs in Custom CSS or the child theme.
The logo has a fourth font of its own, but only when you use a text logo rather than an image — it is on the Logos & Media screen, described in Theme Options, screen by screen.
Font sizes per element
Sizes are in pixels, and every field on the lower half of the Typography screen sets one.
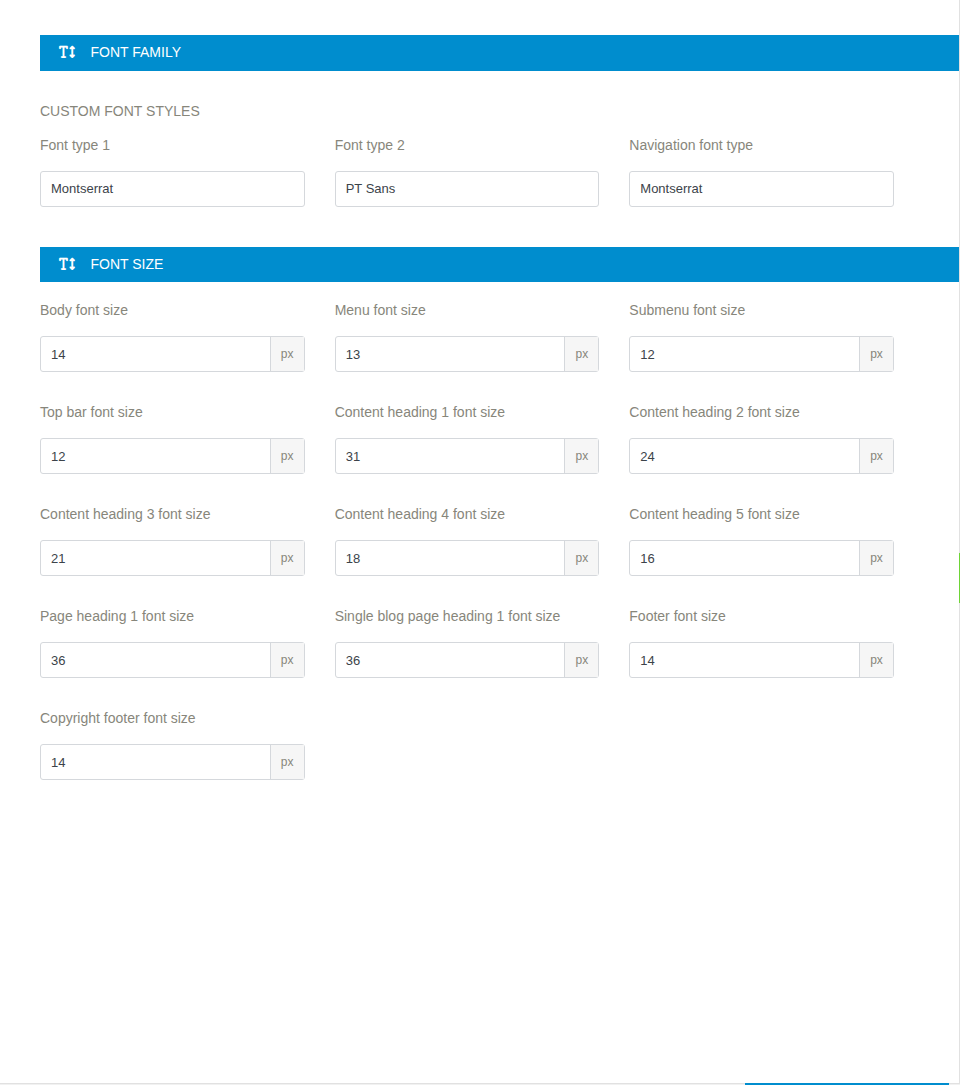
| Field | Applies to | Default |
|---|---|---|
| Body font size | Body copy, and the base size other text is measured against | 14 |
| Menu font size | Top-level menu items | 13 |
| Submenu font size | Drop-down and mega menu items | 12 |
| Top bar font size | Everything in the top bar | 12 |
| Content heading 1 to 5 | h1 to h5 inside page and post content |
31, 24, 21, 18, 16 |
| Page heading 1 font size | The page title in the heading band | 36 |
| Single blog page heading 1 font size | The post title on a single post | 36 |
| Footer font size | Footer widget text | 14 |
| Copyright footer font size | The copyright band | 14 |
The same sizes appear in Appearance → Customize → Theme options → Typography, where you can watch them change. The font families are not in the Customizer — those are only on the Typography screen.
Choosing a font in the picker
Each of the three font fields is a search box, not a long drop-down. Click it and type: the list filters as you type, keeping its group headings, and the arrow keys and Enter select without the mouse. The groups are System fonts, Custom fonts and Google fonts.
System fonts need nothing: they are already on the visitor's machine. A Google
font is fetched from fonts.googleapis.com when the page loads. A custom font
is served from your own site.
The Google font list and how to refresh it
The Google font list is a copy held on your site, not a live feed. The theme fetches it once, when it is first activated, which is why the picker already offers hundreds of fonts on a new site — unless your server could not reach Google at that moment, in which case the Google group is empty. Google keeps adding fonts; your copy does not follow.
If a font you know exists is missing from the picker, go to Appearance → Theme Options → Update Google Fonts and press Update Google Fonts. The screen reports how many fonts are in the list. The fetch needs outbound HTTP access from your server and takes a moment; if it does not change the count, your host is probably blocking the request.
Do this before you start choosing fonts, not after. A font that is not in the list cannot be selected.
Uploading your own font
Appearance → Theme Options → Custom Fonts takes a ZIP archive, by dragging it onto the drop area or clicking to choose a file. The upload runs in place, with a progress bar, and the list of installed fonts refreshes when it finishes.
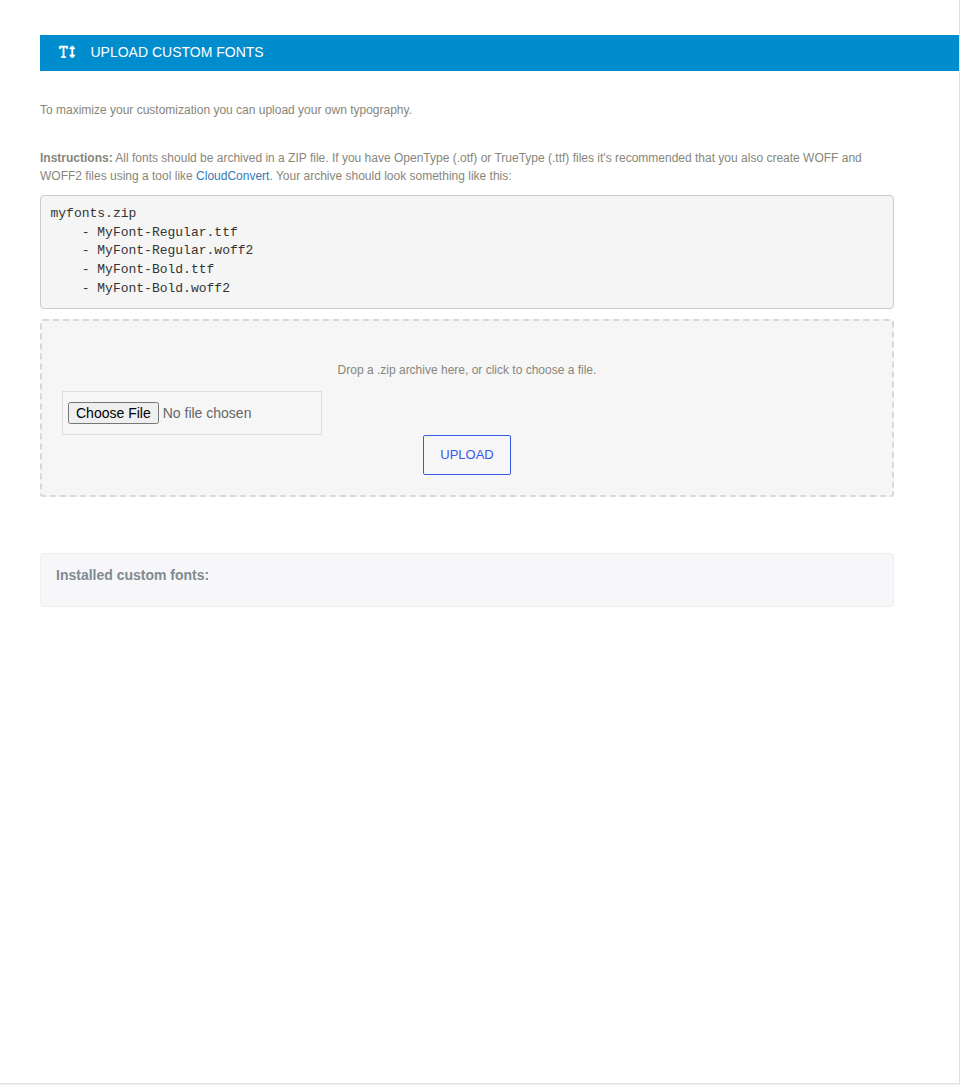
What the ZIP must contain:
- Font files at the top level of the archive, not inside a folder.
- Only
.eot,.woff,.woff2,.otfand.ttffiles can be served as a font. Put nothing else in the archive: any other file still lands in the fonts folder and shows up in the font list as an entry that renders nothing. - Give the browser more than one format. WOFF2 with a WOFF or TTF fallback covers everything in use. If you only have OTF or TTF, convert them first — the screen links to CloudConvert for the purpose.
myfonts.zip
    - MyFont-Regular.ttf
    - MyFont-Regular.woff2
    - MyFont-Bold.ttf
    - MyFont-Bold.woff2
The archive is unpacked into the theme's fonts folder and the ZIP itself is
deleted. Every file sharing a base name becomes one font family named after
that base name, so the example above installs two families,
MyFont-Regular and MyFont-Bold, and both appear under Custom fonts in
the picker. The theme does not pair a regular with its bold: if you want bold
text in a custom face, select the bold family where you want it, in Custom CSS.
The screen refuses an upload that is not a .zip, and refuses a file whose
name already exists in the fonts folder — rename it or remove the old one. If
the theme's fonts folder is not writable, the drop area is replaced by a red
notice naming the folder; that is a file permission fix on the server.
Keep the ZIP. Uploaded fonts are stored inside the theme folder, and updating the theme replaces that folder. Re-upload your fonts after a theme update, and check the Typography screen still shows them.
When to stop using these screens
These two screens cover colour and type across the whole site. One element that needs a different colour, one heading that needs different spacing — that is Custom CSS, not a global setting. Anything beyond styling belongs in the child theme; see The child theme and custom code.
Header, top bar and footer
The header is the most configurable part of the theme, and the screen that controls it changes as you use it: choose a different header type and a different set of fields appears. This chapter goes through what each type looks like, which settings belong to which type, and where a single page can override the lot.
Everything here is at Appearance → Theme Options → Header Options and Appearance → Theme Options → Footer Options, except the per-page overrides, which are meta boxes on the page editor.
How the header settings are organised
Header Options is read from the top down, and each choice narrows what follows:
- Menu layout — horizontal or vertical. This is the big one.
- Header type — with a horizontal menu, one of five arrangements.
- Home page menu options — colours and behaviour for the front page, with a checkbox that applies them to every page.
- Global menu options — the same handful of settings for the rest of the site.
- Global header options — the top bar, sticky behaviour, search, the mega menu and the logo background. These apply to every header type that supports them.
- Heading backgrounds — the image behind the page title band.
The header types
Choosing the vertical layout replaces the header entirely; the five options under the horizontal layout are variations on a bar across the top.
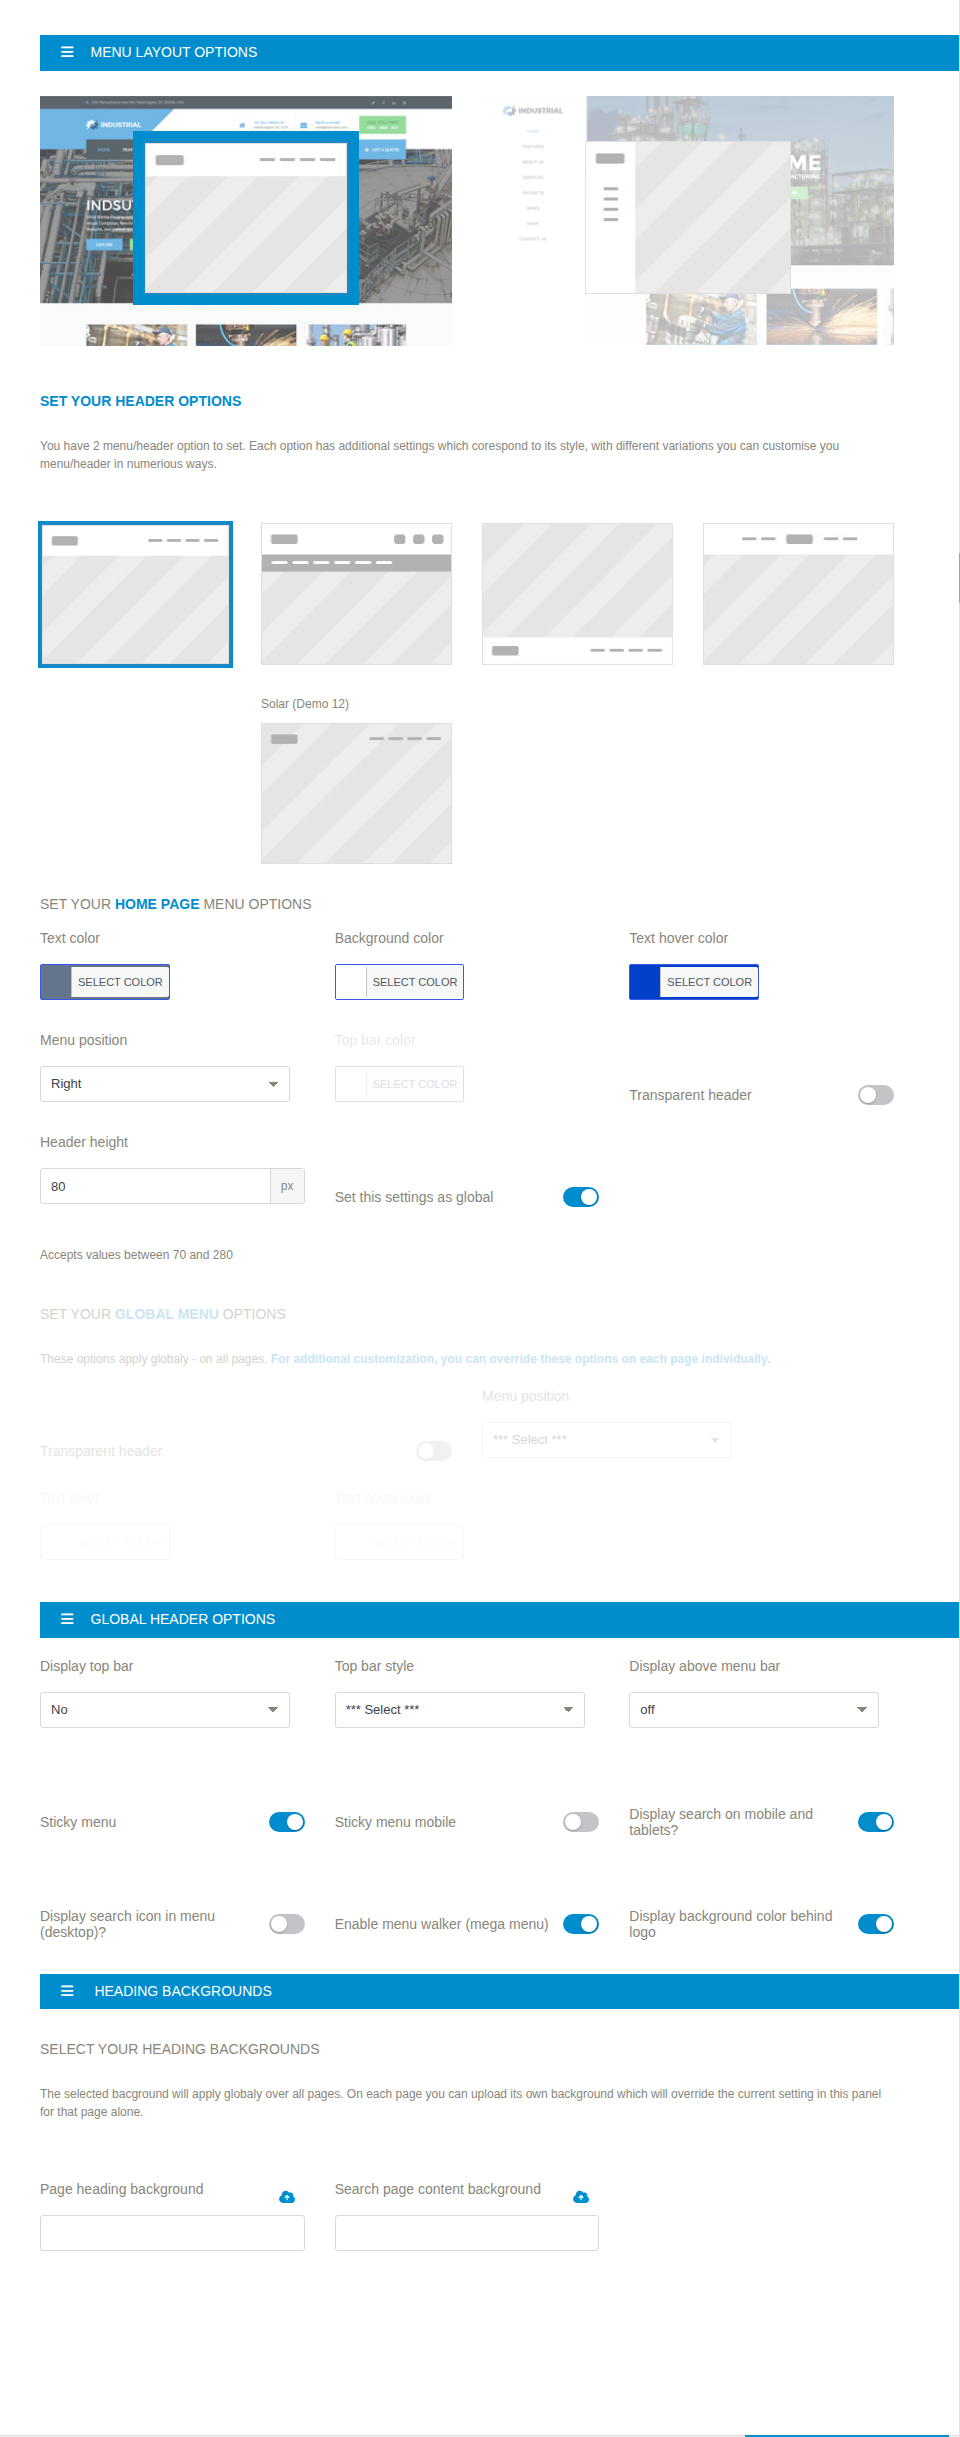
| Type | What it looks like |
|---|---|
| Classic | Logo left, menu right, on one bar. The default |
| Style 2 | Full width: logo on its own band with a widget area beside it, menu on a second full-width bar below |
| Below | The classic bar with the menu dropped below the logo on the front page |
| Logo in the middle | Menu split in two, half to the left of a centred logo, half to the right |
| Solar (Demo 12) | Fixed and transparent over the hero, turning solid once the page scrolls past 70 pixels |
Vertical puts the logo and the menu in a column down the side of the window rather than across the top. It has no separate front page settings — whatever you set applies everywhere, including the front page — and it has two fields of its own: a divider colour and a background image for the column. Boxed layout and sticky behaviour are both ignored while the vertical menu is active.
The Solar type is the header Demo 12 imports. It exists as a choice for any site, not only that demo, but it is built for a page that opens with a full-bleed hero: with nothing dark behind it, transparent white text on white is what you get.
Front page settings against global settings
With a horizontal menu, the screen gives you two sets of the same few settings: one under Home Page Menu Options, one under Global Menu Options. The first applies to the front page, the second to every other page.
| Setting | Home page | Global | Types it applies to |
|---|---|---|---|
| Text color | yes | yes | all horizontal |
| Background color | yes | — | all horizontal |
| Text hover color | yes | yes | all horizontal |
| Above menu background color | yes | — | Style 2 |
| Logo background color | yes | — | Style 2 |
| Menu position: left, centre or right | yes | yes | Classic, Style 2, Below |
| Top bar color | yes | yes | Classic |
| Transparent header | yes | yes | Classic, Below |
| Header height | yes | — | Classic |
The "types" column describes the home page set. The global set is slightly wider: it offers transparent header for every type except Style 2, and menu position for every type except Logo in the middle.
Tick Set this settings as global — offered on the Classic and Style 2 headers — and the front page colours are used on every page, and the Global Menu Options above stop deciding anything. It is the quickest way to get one consistent header when you do not want the front page to differ.
Transparent header removes the menu's background so whatever is behind it — a slider, a hero image, a full-screen heading — shows through. Ticking it in the global set also switches the menu to the global text and hover colours, because the colours that worked on a solid bar rarely work on an image.
Header height is in pixels and accepts 70 to 280; values outside that range are clamped. It applies on screens 1200px and wider, to the unstuck header only — once the header sticks it returns to its compact height.
Style 2 has five more fields of its own: a Menu button with its own text, URL and link target, drawn in the menu bar, and a Large above navigation style with two variants for the widget area beside the logo.
What goes in the top bar
The top bar is the thin strip above the header. It is not a settings field with text in it — its contents come from two widget areas, Top bar left and Top bar right, and if both are empty the bar does not render at all. Put your phone number, address, opening hours, social icons or a language switcher in them; see Widgets and sidebars.
Display top bar has four values:
| Value | Result |
|---|---|
| Yes | Shown at every screen size |
| No | Never shown |
| Only on desktop | Shown on large screens, hidden on smaller ones |
| On desktop & inside mobile menu | Shown on large screens; on small screens its content moves inside the mobile menu |
Top bar style picks between two visual treatments of the same content. With one widget area filled the content spans the full width; with both, each takes half.
The bar above the menu
Display above menu bar controls a second widget area, Above navigation bar, drawn immediately above the menu. The Style 2 header skips it and draws the Large above menu widget area beside the logo instead; the Classic header shows Large above menu too, next to the menu, whenever that area has widgets in it.
Sticky header behaviour
Sticky menu keeps the header visible as the visitor scrolls; it is on by default. Sticky menu mobile does the same on phones and tablets and is off by default, because a sticky header costs more of a small screen than it is usually worth.
Both are ignored when the vertical menu is active. Sticky state has its own logo — see the sticky and transparent sticky logo uploads in Theme Options, screen by screen.
Search and cart icons in the header
Two checkboxes, both on by default: Display search icon in menu (desktop) and Display search on mobile and tablets. The desktop icon opens a search field in the menu bar; the mobile one sits beside the burger button.
The cart icon is not here. It is on the WooCommerce screen, where you choose whether it appears never, only on shop pages, or everywhere; its counter colours are on Color Management.
The mega menu switch
Enable menu walker (mega menu) is what makes the theme's own menu markup — and therefore the mega menu — work. It is on by default.
Turn it off only if you are using a third-party menu plugin that produces its own markup and the two are fighting. Turning it off also turns off the mega menu. See Menus and the mega menu.
The logo background
Display background color behind logo draws a coloured panel behind the logo, setting it apart from the bar it sits on. It applies to the Style 2 header only, and it is on by default. The colour is Logo background color in the home page settings above; leave that empty and the panel uses the primary colour.
The heading band and its background
Below the header, inner pages show a band with the page title and, under it, the breadcrumb trail. Two uploads on the Header Options screen set what is behind it:
- Page heading background — used on every page that does not set its own.
- Search page content background — used behind the search results page only.
The front page never shows this band. Whether the band appears at all, and whether breadcrumbs appear in it, is set on the Page Layout screen — see Page layout and page setup.
Overriding the header on a single page
Four meta boxes on the page editor override the global header for that page alone. Leave them alone and the page follows the settings above.
Header options (pages): Top bar and Above menu, each with Default, Off and On. Default follows the global setting; the other two force it for this page.
Spacing options (pages): Remove Header Margin and Remove Footer Margin close the gap between the header or footer and the content. Use the first when a page opens with a full-width section that should touch the header.
Blank page (pages): Disable Header and Disable Footer remove them outright. This is how you build a landing page, a coming-soon page or a one-page site with no chrome at all.
Page title and breadcrumbs (pages, posts, portfolio items and team members):
| Field | Effect on this page |
|---|---|
| Disable breadcrumbs | Hides the trail, keeps the title band |
| Disable heading | Hides the whole band, title included |
| Page heading background | An image for this page's band, overriding the global one |
| Logo | A different logo for this page |
| Sticky logo | A different sticky logo for this page |
| Mobile logo | A different mobile logo for this page |
| Full screen heading | Grows the band to fill the window |
| Title color | The title colour on this page |
Ticking Full screen heading reveals four more: a Page heading video background — a YouTube URL, a Vimeo URL or a direct link to a video file, played behind the title, with the heading background image as its fallback — and Top bar color, Menu and title color and Hover color, so the header can be recoloured to stay legible against whatever is behind it.
Footer layout and columns
| Setting | What it does |
|---|---|
| Enable footer | Off hides the widget columns; the copyright band still shows if it has widgets |
| Footer style | Default or Modern — two treatments of the same content |
| Footer columns | 2, 3 or 4 |
| Copyright footer columns | 1 or 2 |
| Desktop style | Classic, or Fixed — the footer sits behind the page and is revealed as you scroll to the end |
| Mobile layout | 1 or 2 columns on small screens |
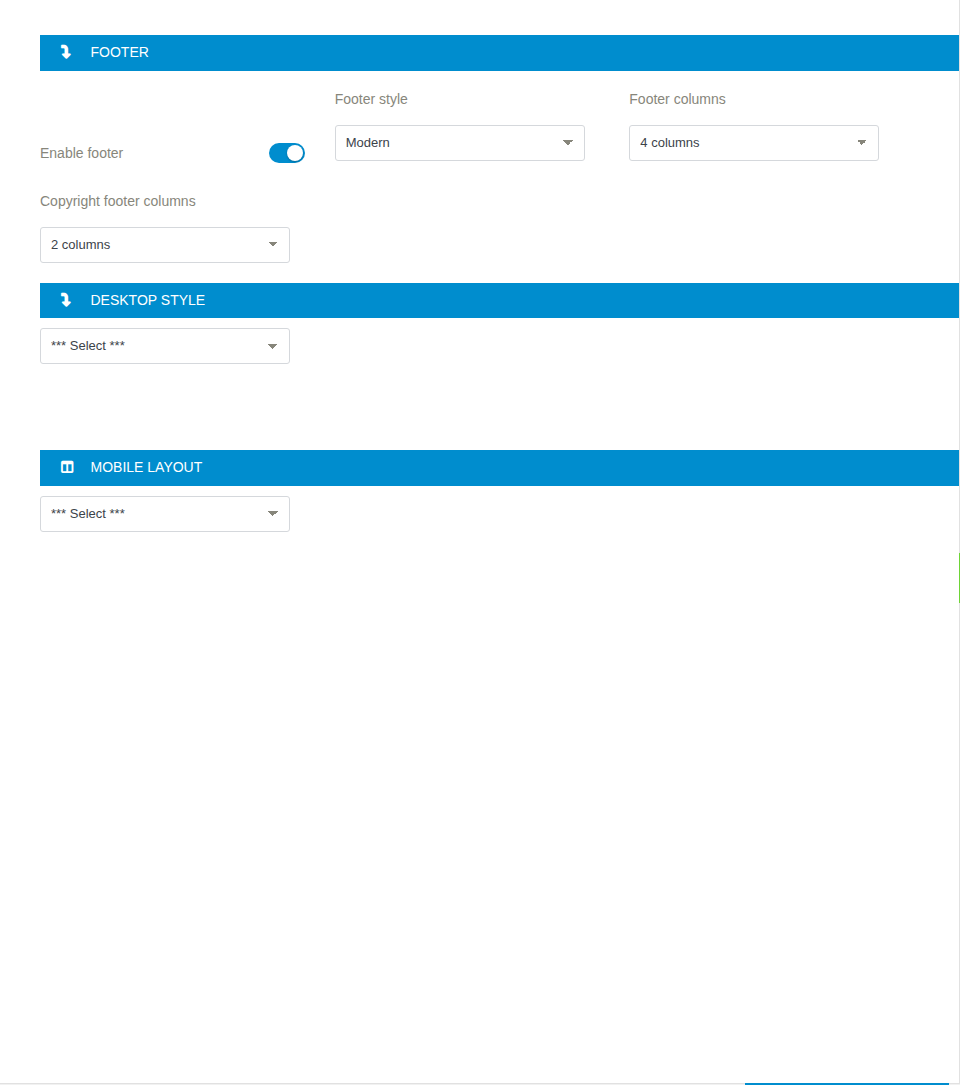
The column counts are not only visual: they decide how many widget areas exist. Choosing three footer columns registers Footer 1, Footer 2 and Footer 3 under Appearance → Widgets; choosing two removes the third. Set the count first, then fill the areas, or your widgets will have nowhere to go.
With two columns on mobile the footer still drops to a single column on the narrowest screens.
Demo 12 uses a footer style that is not in the list. Its import sets a Solar footer, which adds a Footer top band (Solar) widget area on top of the usual columns. The Footer Options screen shows it as the selected value and saving the screen keeps it, but if you switch the style to Default or Modern you cannot switch back from this screen.
What the copyright line actually is
There is no field anywhere for copyright text. The band at the very bottom is one or two widget areas — Copyright footer 1 and Copyright footer 2 — and the line most sites want is a Text widget in the first of them. With one column the content is centred; with two, the first area sits left and the second right.
If both areas are empty the band is not drawn, whatever the column setting says. That is the usual reason a copyright line does not appear.
Colours and sizes for both the footer and the copyright band are on the Color Management and Typography screens, in Colours and typography.
Page layout and page setup
Two screens hold the settings that decide how ordinary pages and posts are put together: Appearance → Theme Options → Page Layout for the shape of the page, and Appearance → Theme Options → Page Setup for the pieces of content attached to it — the slider, the 404 page, the portfolio and team slugs and the post meta.
Almost everything here is a default. Individual pages and posts can override the sidebars, the title band and the breadcrumbs from meta boxes on the editor screen; the last section of this chapter lists exactly what can be overridden and what cannot.
Boxed or full width
Full width is the default and is what every demo uses: the site fills the window. Ticking Boxed version narrows the site to a centred column with a shadow, and reveals the background settings below it, because a boxed site has visible space around it to fill.
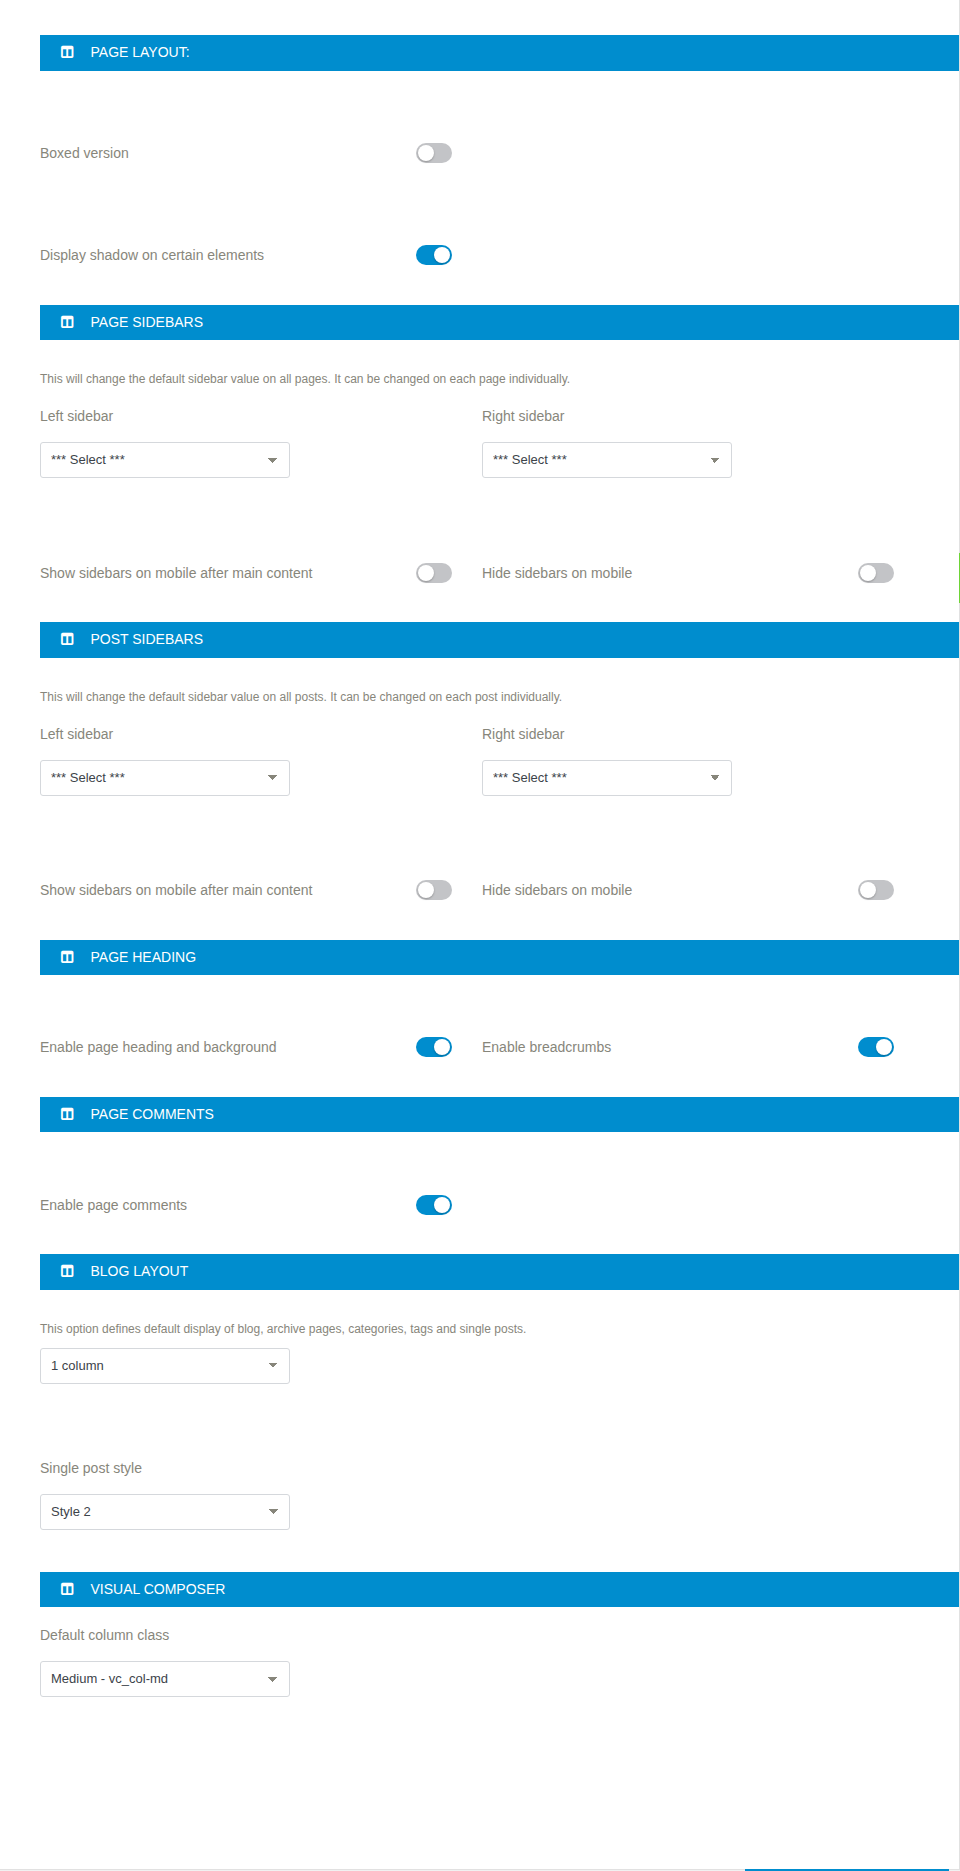
Boxed is ignored while the vertical menu is in use — the vertical header assumes the full window.
Backgrounds and patterns behind a boxed site
With boxed on, you get ten thumbnails to pick from. Nine are tiling patterns that ship with the theme. The first, the blank one, means "I will supply my own background", and choosing it reveals three more fields:
| Field | What it does |
|---|---|
| Custom background type | Stretched, Tiled or Custom color |
| Custom background image/pattern | The image, for Stretched or Tiled |
| Background color | The colour, for Custom color |
Stretched scales one image to cover the window and holds it still as the page scrolls. Tiled repeats the image at its own size. Custom color ignores the image and paints the area in a flat colour.
These three do nothing unless the blank thumbnail is the one selected — pick a pattern and the pattern wins.
Shadows on elements
Display shadow on certain elements is on by default. It adds a soft drop shadow to cards, buttons and similar blocks across the site. Turning it off gives a flatter look in one move, without any CSS.
Default sidebars for pages and for posts
The screen has two identical groups: Page Sidebars, which sets the default for every page, and Post Sidebars, which sets the default for every post. Each offers a left sidebar and a right sidebar, chosen from the widget areas registered on your site.
You get a left sidebar, a right sidebar, both, or neither:
| You want | Set |
|---|---|
| Content only, full width | Leave both on *** Select *** |
| A sidebar on the right | Right sidebar only |
| A sidebar on the left | Left sidebar only |
| Two sidebars | Both |
The list contains every registered widget area, including any you have created yourself. Widgets and sidebars covers creating them and filling them.
Sidebars on phones and tablets
Each group has two checkboxes for small screens, where there is no room for a column beside the content:
- Show sidebars on mobile after main content moves the sidebar below the content instead of above it. Without this, a left sidebar pushes the article down the page.
- Hide sidebars on mobile drops the sidebar altogether on small screens.
Both can be overridden per page.
The page title band and breadcrumbs
Two checkboxes, both on by default:
- Enable page heading and background draws the band under the header that holds the page title. Turning it off removes the band everywhere.
- Enable breadcrumbs draws the trail under that band.
The front page never shows either, whatever these say. The image behind the band is set on the Header Options screen — see Header, top bar and footer.
Comments on pages
Enable page comments decides whether pages can be commented on. It is on by default, and it is about pages only: comments on posts are WordPress's own setting, under Settings → Discussion and in each post's Discussion box.
Blog columns and the single post style
Blog Layout sets the default for the blog, category, tag and archive listings: one, two, three or four posts in a row. One column gives the classic full-width blog; three or four suit a news grid.
Single post style sets how one post is laid out. Style 1 and Style 2 are the two general treatments; Demo 12 (Solar) is the layout that demo imports and can be used on any site. More on both in News and the blog.
The WPBakery column class
Visual Composer → Default column class decides which Bootstrap tier
WPBakery columns are rendered at. Medium is the default: the theme rewrites
WPBakery's vc_col-sm-* classes to vc_col-md-* as the page is drawn, so a
row of columns stacks on tablets instead of staying side by side. Small
leaves WPBakery's own classes alone.
The change applies as pages are rendered, so it affects existing WPBakery pages as well as new ones.
This affects the WPBakery builder only. Elementor manages its own breakpoints — see Building pages with WPBakery if you are working on a WPBakery site.
The front page slider setting
Slider shortcode on the Page Setup screen takes a Slider Revolution slug —
slider-1, for example — and the theme puts that slider at the top of the
front page, above the content, without you editing the page. Leave it empty if
your front page provides its own hero. See
Slider Revolution.
Choosing the 404 page
404 error page picks one of your existing pages to show when a visitor asks for an address that does not exist. Build the page first — with whichever builder you use, so it can carry a search box, your best links and your own wording — then select it here.
Excerpt length in listings
Excerpt length is the number of words shown in listings when a post has no hand-written excerpt. The default is 40. The theme appends an ellipsis, not a "read more" link.
It applies wherever WordPress generates an excerpt, so changing it changes the blog, archives and search results together.
The scroll-to-top button
Add "scroll to top" button puts a small arrow in the bottom corner of every page that returns the visitor to the top. It is off by default. Worth turning on for long pages, which most builder-made front pages are.
Portfolio slug and single style
Portfolio slug is the segment in a project's address. Empty means
/portfolio/; set it to projects and projects live at /projects/….
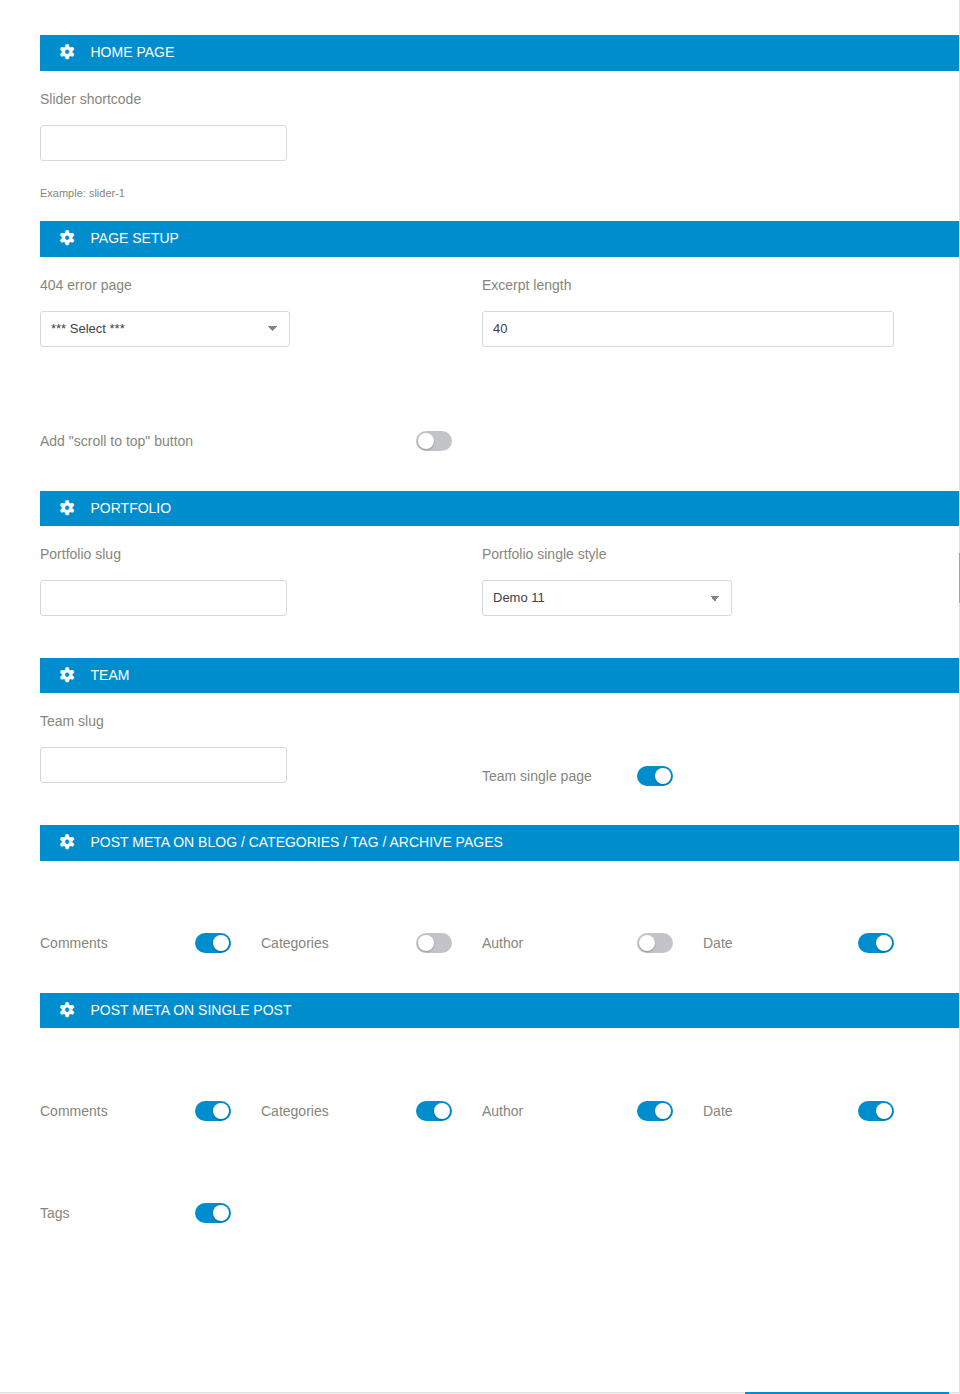
Change the slug before you launch, not after. Every project's address changes with it, and old links stop working unless you add redirects. After changing it, go to Settings → Permalinks and press Save — the new slug does not take effect until WordPress rebuilds its rules, and until it does every project returns a 404.
Portfolio single style picks the layout of one project's page: Style 1, Style 2, Style 3, Demo 11, or Demo 12 (Solar). The last two are the layouts those demos use and are available to any site. Portfolio shows what each does and covers the per-project fields — the project info table, the short text and the breadcrumb parent — which are meta boxes on the project, not settings here.
Team slug and single pages
Team slug works exactly like the portfolio slug, defaulting to /team/,
and needs the same permalink save afterwards.
Team single page decides whether a team member has a page of their own. On, and a member's name links to their page. Off, and members appear only in the team elements you place on pages. See Team.
Post meta on archives and on single posts
The bottom of the Page Setup screen has two groups of checkboxes that decide which details are printed beside a post. All are on by default.
| Meta | On archives | On a single post |
|---|---|---|
| Comments | yes | yes |
| Categories | yes | yes |
| Author | yes | yes |
| Date | yes | yes |
| Tags | — | yes |
The two groups are independent, which is the point: a tidy grid of posts with only the date, and the full attribution on the post itself, is a common and sensible combination.
What a single page can override
The table below is the whole of it. Anything not listed is global.
| Setting | Overridden per page by |
|---|---|
| Left and right sidebar | Sidebars box, on pages, posts and team members |
| Sidebars after content on mobile | Sidebars box |
| Hide sidebars on mobile | Sidebars box |
| Page title band | Page title and breadcrumbs box — Disable heading |
| Breadcrumbs | Page title and breadcrumbs box — Disable breadcrumbs |
| Heading background image | Page title and breadcrumbs box |
| Top bar and above-menu bar | Header options box, pages only |
| Header and footer entirely | Blank page box, pages only |
In the Sidebars box, an empty selection means "use the global default" and None means "no sidebar on this page" — they are not the same thing, and None is how you give one page full-width content on a site that otherwise has a sidebar.
Boxed layout, background, shadows, blog columns, single post styles, excerpt length, slugs and post meta have no per-page equivalent. They are decided once, on these two screens. See Theme Options, screen by screen for the rest of the panel.
Building pages with Elementor
Elementor is the builder Industrial is built around. Every demo ships an Elementor version of its pages, the theme's two newest demos exist only as Elementor layouts, and all new element work in the theme and plugin happens here. If you are starting a site from scratch, this is the chapter to use.
The plugin registers 87 widgets of its own into Elementor. They sit beside Elementor's widgets, not instead of them: a page is normally a mixture of the two.
Getting Elementor onto the site
Elementor Page Builder is one of the theme's required plugins, so you do not have to find it yourself. Either take the Plugins step of the setup wizard and let it install and activate Elementor for you, or install it from Plugins → Add New in the usual way. The free version from the WordPress plugin directory is what the theme is built against; Elementor Pro is optional and the theme does not need it.
Never run Elementor and WPBakery at the same time. With two page builders active the demo importer refuses to run, and Demos 11 and 12 refuse to import even when Elementor is active if WPBakery is still switched on. Pick one builder for the site and deactivate the other. See The twelve demos.
Creating a page and opening the editor
Add the page first, then build it.
- Pages → Add New, give the page a title and publish or save it.
- Press Edit with Elementor.
- Build the page out of sections or containers, then Update.
The page title you typed is not part of the Elementor canvas. It is printed by the theme in the page-title band above the content, together with the breadcrumb trail, and it is controlled from the Page title and breadcrumbs box on the WordPress edit screen — see header, footer and page title below.
The Industrial Elements category
Open the widget panel and the theme's widgets are grouped under Industrial
Elements. Internally the category is anps-em, which is the name you would
use in code; in the panel it is the plain-language title.
The fastest way to place one is to type into the panel's search box. Every
widget the theme adds is named after what it renders — Anps Heading,
Anps Portfolio, Solar - Savings Calculator — so searching for "portfolio",
"team" or "solar" narrows the list immediately. The complete list of names is in
Element and widget reference, generated from the
plugin so it cannot drift out of date.
How the theme's widgets differ from Elementor's own
Elementor's widgets are generic and carry a large Style tab. The theme's widgets are the opposite: they render the theme's own markup and class names, and then mostly get out of the way.
| Elementor's widgets | Industrial Elements | |
|---|---|---|
| Typography | Set per widget in the Style tab | Follows Theme Options → Typography |
| Colours | Set per widget, or from the Elementor kit | Follows the theme's colour options, with a few per-widget overrides |
| Spacing | Full padding and margin controls | The theme's section rhythm, adjusted on the parent section |
| Content | Text you type, or Elementor's own loop widgets | Several query your Portfolio, Team and posts directly |
The practical consequence: when you change the primary colour or the body font in Colours and typography, the theme's widgets change with it across every page, and widgets you styled by hand in Elementor do not. Prefer the theme's widget where one exists for the job, and reach for Elementor's when you need something the theme has no element for.
Colour controls on the theme's widgets are wired to Elementor's global colours, so leaving one empty is the normal state — it means "use the site's colour".
Widgets that query your content
Six of the general widgets build their own list of posts rather than taking typed content. What they query is fixed; only the filtering and the layout are yours to set.
| Widget | What it lists | The settings that matter |
|---|---|---|
Anps Portfolio |
Portfolio items, optionally one portfolio_category |
Number of items, 2/3/4/6 in a row, category filter bar on or off, order, mobile columns |
Anps Recent Portfolio |
Portfolio items, optionally one category | Number of items, order |
Anps Team |
Team members | Items in a column, number of members (-1 for all), specific member IDs |
Anps Team With Description |
Team members, with their biography | As above |
Anps Blog |
Published posts, optionally one category | Posts per page, 1–4 columns, order; this one paginates |
Anps Recent Blog |
Published posts, newest first | Number of posts, category IDs, items in a row, carousel on or off, excerpt length |
Two details catch people out. Anps Recent Blog takes category IDs as a
comma-separated list (3,7,12), while Anps Blog takes a single category
chosen from a dropdown. And the portfolio widget's filter bar is built from the
categories actually used by the items it found, so a filter button only appears
once at least one item carries that category.
With the filter bar switched on, the grid is re-laid out in the browser as you filter. Four- and six-column grids drop the title-and-excerpt overlay and show a link icon on hover instead, because there is no room for text at that size.
See Portfolio, Team and News and the blog for the content these widgets read.
The Demo 11 and Demo 12 widget sets
Of the 87 widgets, 31 are named for Demo 11 and 24 carry the Solar - prefix of
Demo 12. They are whole page bands rather than small parts: a hero, a stats
strip, a case-study row, a savings calculator.
They are registered on every site, and their styling is compiled into the theme's stylesheet rather than loaded per demo, so you can drop one onto any page and it will render. What you cannot assume is that it will look right. Each was designed against its own demo's palette, type treatment and content proportions, and several read content that only that demo's import creates. Treat them as part of the demo, not as a general toolkit.
Demo 12's widgets all open their Style tab with an Accent color pair. It does not paint one element: it redefines the accent variable for everything the widget renders — kicker bars, rules, badges, buttons, icons — from one control. Left empty it follows the primary colour theme option, which is what you normally want.
One Demo 11 widget, Insights Modern, uses Elementor's nested elements and only appears in the panel while Elementor's Nested Elements feature is enabled. It holds a real sidebar you drop other widgets into, rather than a fixed list of links.
Demo 12's global colours and fonts live in an Elementor kit. The importer points Elementor's active kit at the imported one and clears the cached CSS. If you later delete or recreate the kit from Elementor's own panel, the demo's colours and container width go with it.
Full-width sections and the theme's page container
The theme wraps page content in its own container, about 1170 pixels wide by default. An ordinary Elementor section therefore sits inside that container, and setting a section to full width inside a boxed parent does nothing useful on its own.
Two ways out, depending on which layout element you are using:
- Containers. The plugin adds a Stretch Container section to the Layout tab of every native Elementor container. Switch Enable Stretch Container on and the container runs edge to edge while its contents stay boxed at a width you choose. Content width defaults to the active Elementor kit's container width, or 1170 pixels if the kit does not set one; Side Padding defaults to 15 pixels, and there is a separate tablet default of 750 pixels.
- Sections. Elementor's own Stretch Section and full-width content-width settings work as normal. The theme corrects their geometry when the vertical header layout is in use, so a stretched band spans the area beside the vertical menu instead of sliding under it.
A full-bleed hero usually also wants the gap above it removed. That is the Spacing options box on the page edit screen: Remove Header Margin and Remove Footer Margin.
Whether the page is boxed at all, and which sidebars appear beside the content, come from Page layout and page setup — not from Elementor. A page with a sidebar has a narrower content column, and the Elementor canvas narrows with it.
Header, footer and page title on an Elementor page
The theme owns the header, the top bar, the page-title band and the footer. These are theme templates chosen in Theme Options, not Elementor templates, so you do not build them in the editor. Set them up once in Header, top bar and footer and every page inherits them.
Per page, the WordPress edit screen gives you three boxes that change what the theme prints around the Elementor content:
| Box | What it does |
|---|---|
| Page title and breadcrumbs | Disables the breadcrumb trail or the whole page-title band, and sets that band's background image, video, colours and logo |
| Header options | Forces the top bar and the above-menu row on or off for this page, overriding the global setting |
| Blank page | Disable Header and Disable Footer — for a landing page you want to build entirely in Elementor |
Header options and Blank page appear on pages only. Page title and breadcrumbs also appears on posts, portfolio items and team members, so a single project or profile can drop its title band as well.
Disable Header removes more than the header. The same switch suppresses the top bar, the header, the page-title band and the breadcrumbs, because the theme treats all four as the page's top furniture. If you only wanted the title band gone, use Disable heading in the Page title and breadcrumbs box instead.
Neither switch removes the theme's content container. For a page with no container at all, use one of Elementor's own page templates in the Template dropdown on the page edit screen.
Turning the theme's Elementor widgets off
anps-framework passes the whole widget registry through a filter before
registering anything:
add_filter( 'anps_widgets_filter', function( $widgets ) {
    unset( $widgets['demo12_calculator'] );

    return $widgets;
} );
The array is keyed by the widget's internal name — the right-hand column of the Elementor table in Element and widget reference — so you can drop one widget, drop a whole demo's set, or return an empty array to remove all 87.
This is for sites that have finished importing and want a shorter widget panel,
and for developers replacing a widget with their own version of it. It is not a
performance setting: the widgets are only loaded when Elementor asks for them.
Put the filter in the child theme's
functions.php, never in the theme, or the next update will remove it.
Removing a widget does not remove it from pages that use it. A page built with a widget you have filtered out renders nothing where that widget was, and Elementor shows it as missing in the editor. Edit the pages first.
Building pages with WPBakery
WPBakery Page Builder is fully supported. Demos 1 to 10 each ship a WPBakery version of their pages, the plugin maps 32 elements into the builder, and the theme overrides several of WPBakery's own templates so they match the rest of the design. If your site was built with WPBakery, nothing has been taken away from you and this chapter is the reference for it.
What is true, and worth saying plainly: new element work in Industrial goes into Elementor. Demos 11 and 12 exist only as Elementor layouts, and the widgets written for them have no WPBakery equivalent. For a brand-new site, start with Building pages with Elementor. For an existing WPBakery site, carry on here — there is no need to migrate.
Installing WPBakery Page Builder
WPBakery is one of the theme's required plugins and is installed for you.
- In the setup wizard, choose WPBakery at the Page builder step and let the Plugins step install it.
- Or install it later from the theme's required-plugins notice.
- Or upload
plugins/js_composer.zipfrom your download by hand at Plugins → Add New → Upload Plugin.
The theme installs its own copy and puts WPBakery into theme mode, so there is no purchase key to register and no licence panel to fill in. New versions arrive through the theme's required-plugins notice when you update the theme, not from WPBakery's own updater.
Deactivate Elementor before you use WPBakery. With two page builders active the demo importer refuses to run at all, and a page saved by one builder cannot be opened by the other. Choose one per site.
Which demos import as WPBakery pages
Demos 1 to 10 exist twice over: once as WPBakery content and once as Elementor content. The importer looks at which builder is active and imports the matching set, so the demo you see in the preview is what you get either way.
| Active builder | Demos 1–10 | Demos 11 and 12 |
|---|---|---|
| WPBakery | WPBakery pages | Refused |
| Elementor | Elementor pages | Elementor pages |
| Both | Refused | Refused |
The refusal for Demos 11 and 12 is deliberate, not a bug: those layouts are built entirely from Elementor widgets and would import as empty pages. See The twelve demos and Importing a demo.
Importing a demo does not convert anything. If you import a WPBakery demo and later switch the site to Elementor, the imported pages stay as WPBakery shortcodes. There is no converter, in either direction. Rebuilding the pages is the only route.
Backend editor and frontend editor
Open any page and WPBakery offers two editors for the same content.
| Editor | What it is | When to use it |
|---|---|---|
| Backend editor | A schematic of rows, columns and elements in the admin | Almost always: it is faster, and settings are easier to reach |
| Frontend editor | The same page edited over the live rendering | Fine-tuning spacing and backgrounds, where seeing the result matters |
Both write the same content, and you can move between them on the same page. Switching a page to the Classic Mode editor shows you the shortcodes underneath; that is useful for copying a block of layout from one page to another, and dangerous for anything else, because a mistyped closing tag breaks the row that contains it.
Rows, columns and the theme's grid
A WPBakery page is rows, rows hold columns, columns hold elements. The theme adds three things to that.
Full-width rows. The row's own Row stretch setting, set to stretch the row, takes it out of the theme's content container and runs it edge to edge. The theme keeps such rows visible rather than clipping them, so backgrounds and absolutely positioned images inside a stretched row are not cut off.
Row and column classes. The Extra class name field on a row or column accepts the theme's spacing helpers, which the demos use heavily:
| Class | Effect |
|---|---|
no-padding |
Removes the row's top and bottom padding |
no-top-padding |
Removes only the top padding |
padding-small |
A shallower band, 50 pixels top and bottom, on screens 1000 pixels and wider |
padding-top-small |
30 pixels of top padding on screens 1000 pixels and wider |
no-padding-mobile |
Removes the column's top padding below 1000 pixels |
no-margin-mobile |
Removes the top margin below 1000 pixels |
bg-image-bottom |
Anchors the row's background image to the bottom edge |
Where columns stack. Appearance → Theme Options → Page Layout has a
Visual Composer section with one setting, Default column class. On
Medium - vc_col-md, the default, the theme rewrites the vc_col-sm-* classes
WPBakery writes into vc_col-md-*, so a row of columns stacks on tablets rather
than holding its shape. On Small - vc_col-sm the classes are left as WPBakery
wrote them and the columns stack only on phones. Medium matches the demos. See
Page layout and page setup.
The Anps Shortcodes category
Add an element and the theme's elements are grouped under Anps Shortcodes. The full list, with the shortcode tag each one writes, is in Element and widget reference — generated from the plugin, so it is always complete.
Eleven of them are child elements and do not appear in the main list: you add
Contact info, Contact info card, Google maps, Info, List, Logos,
Social icons, Testimonials or Timeline first, and then add items inside
it. If you cannot find Testimonial item in the element picker, that is why —
it only exists inside a Testimonials container.
The theme also changes two things about WPBakery's own elements. It removes
WPBakery's Google Maps element, because the theme's Google maps element is the
one the demos use and the one that is styled. And it replaces WPBakery's
templates for Button, Toggle and the Tabs / Tour / Accordion family
so they inherit the theme's colours and shapes; the Button element gains the
theme's button styles and a shadow option.
Elements that need more than their name
Most elements do what their title says. These are the ones worth reading about before you place them.
| Element | What it does, and the settings that decide it |
|---|---|
Blog |
A paginated grid of posts. One category from a dropdown, posts per page, 1–4 columns, order. This is the element for a blog page built in the builder |
Recent blog |
A short strip of the newest posts. Takes category IDs as a comma-separated list, not a name; items per row; a slider switch; and an excerpt length in characters, 130 by default |
Portfolio |
The project grid. 2, 3, 4 or 6 in a row, an optional category, and a filter bar built from the categories the found items actually use. At 4 and 6 across, items show a link icon on hover instead of a title and excerpt |
Recent portfolio |
The same content without the filter bar, for a teaser row on another page |
Team |
Staff cards. Number per column, number of members (-1 for all), or an explicit list of member IDs when you want a particular few in a particular order |
Team with description |
The same, with each member's biography shown |
Counter |
A number that counts up when it scrolls into view. Set the Max number it stops at and the animation duration in milliseconds, 5000 by default; the text under it is the element's content |
Testimonials |
A container for Testimonial children. Style, random order, autoplay and an autoplay interval belong to the container; the quote, name, job title and photo belong to each child |
Table |
A plain-text table with striped, bordered and alternate-heading switches. Rows are typed into the content field, so keep it to small comparison tables rather than long data |
Timeline |
A container of Timeline item children, each with a year, a title and a body. Items render in the order you place them, not by year |
Gallery |
A grid of images from the media library with a chosen number per row |
Logos |
A row of client logos; each Logo child holds an image and an optional link |
The remaining elements — alerts, buttons, headings, icons, quotes, downloads, call-to-action bands, contact information, appointment and subscribe forms, the 404 block, the Twitter feed — are short enough that their fields explain themselves.
WooCommerce in a WPBakery page
The plugin adds no WooCommerce elements of its own. Product listings inside a builder page come from WooCommerce's own elements, which appear in the element picker once WooCommerce is active.
What the theme controls is how shop pages look: products per row, products per page, the cart icon in the header, and the product-image zoom, lightbox and thumbnail slider. Those live in Appearance → Theme Options → WooCommerce, not in the builder. See Shop and products.
What the elements actually are, and what happens without WPBakery
Every element in Anps Shortcodes is a shortcode with a visual wrapper around
it. Placing Counter writes [counter max="120"]…[/counter] into the page; the
builder screen is a form for that shortcode's attributes. This is why the
reference table lists the tag beside each name, and why an element can be used
outside the builder — in a text widget, or in a page's content if you ever turn
the builder off for it.
The theme's shortcodes are registered by the Anps Theme Plugin whether or not WPBakery is active. WPBakery's own rows and columns are not.
Deactivating WPBakery breaks the layout of every page built with it. The theme's own elements carry on rendering, because the plugin registers their shortcodes independently. But
[vc_row]and[vc_column]have nothing left to render them, so they appear on the page as literal text and the content loses its grid. Reactivate WPBakery and the pages return exactly as they were — nothing is lost, but do not deactivate it on a live site expecting a graceful fallback.
One shortcode has no element at all: [anps_current_year] prints the current
year, for a footer copyright line that does not need editing every January.
Portfolio
Projects live in their own post type, portfolio, provided by the Anps Theme
Plugin. A project has a title, a body, categories, a featured image, an optional
gallery or video, and a small table of facts — client, location, year, whatever
you choose. You then place a grid of projects on a page.
With the theme active and the plugin missing there is no Portfolio menu at all. See Before you start.
Adding a project
- Portfolio → Add New.
- Type the project name as the title.
- Write the body. The body is what a visitor reads on the project's own page, and on some single styles it is the whole page, so if you are building the project with Elementor this is where you build it.
- Fill in the Excerpt. The project grids print the excerpt in the hover panel, so a sentence is enough. If the Excerpt box is not visible, switch it on in Screen Options, or in the three-dot menu → Preferences → Panels on the block editor.
- Tick a category in the Categories box.
- Set a Featured image.
- Publish.
Repeat for each project. Nothing on this list is compulsory except the title, but a project with no featured image and no gallery shows an empty tile in a grid.
The featured image
The featured image is the tile in every project grid, and it is the banner background on the Demo 12 single style. The theme crops it to a registered size of 359 × 283 pixels for grids, so upload something at least that big and landscape. Do not upload a 5000-pixel photograph — see Going live for why image weight matters.
If a project has no featured image, the grids fall back to the first image of its gallery. If it has neither, the tile is blank.
Project categories
Projects use their own taxonomy, portfolio_category, shown in the editor as
Categories under the Portfolio menu. These are separate from post
categories; a project cannot be filed under a blog category and vice versa.
Categories fill the filter bar above a project grid — each category with at least one project becomes a button, and the grid filters in place without reloading — and a grid can be restricted to one branch of the tree, so a page about one service shows only that service's work. Category names become the filter labels verbatim, so keep them short.
The project gallery
A project can carry a gallery of images in addition to its featured image. The box is called Gallery images and sits in the side column of the editor.
Click Add gallery images, select as many as you want, and click Add to gallery. Drag the thumbnails to reorder them; the first one is what a visitor sees before interacting. A thumbnail's Delete link removes it from this project without removing the file from your media library.
On a project page the gallery renders as one large image with a caption, a full-screen button, and — when there are two or more images — a row of five thumbnails you can scroll through. The caption comes from the image's Caption field in the media library, falling back to its Title.
A video instead of an image
The side column also has a Featured video box: a single text field that takes a YouTube or Vimeo address.
| What to paste | Example |
|---|---|
| A YouTube watch address | https://www.youtube.com/watch?v=dQw4w9WgXcQ |
| A Vimeo address | https://vimeo.com/76979871 |
Paste the full address from the browser bar. Short youtu.be links do not work,
and the field is not a shortcode field — the old manual's [youtube] and
[vimeo] shortcodes are not part of this theme.
The three media boxes are not independent. The theme picks exactly one: the gallery if it has anything in it, otherwise the featured video if an address is set, otherwise the featured image. So a project with both a gallery and a video shows the gallery — clear the gallery to let the video through.
The featured video on a project's own page is rendered through WPBakery. On the Style 1 and Style 2 single layouts the player is produced by WPBakery's video element, so a project video only appears there if WPBakery Page Builder is active. Project grids and blog listings embed YouTube and Vimeo without WPBakery. If you are on Elementor and want a video on a project page, add Elementor's own Video widget to the project body instead.
Fields in the project side column
Two more boxes, both specific to this post type.
Project info table
A repeater of icon-and-text rows. Each row has an icon picked from the Font Awesome library and a line of text beside it. Use it for the facts that are the same shape on every project: client, location, year, value, duration.
Click Select icon to open the picker; it has a search box, so type user,
map or calendar and choose from the results. Type the text in the field
below it, and use + and − to add and remove rows. The text field accepts
a little markup — <strong>, <em>, <span>, <b>, <i>, <br> and links —
so you can bold a label or link a client name.
The info table only prints on the Style 1 single layout. On Style 2, Style 3, Demo 11 and Demo 12 the template does not draw it, so rows you enter there are stored but never shown. If you need the facts on those layouts, place them in the project body with a builder element.
Breadcrumbs parent page
A dropdown of your published pages. Whatever you pick is inserted into the
breadcrumb trail on the project's own page, between the home link and the
project title — so a project can read Home / Our projects / Harbour crane
rather than Home / Harbour crane. The same box appears on posts and does the
same thing there.
On the Demo 12 single style this setting has a second job: the "all projects"
button in the previous/next footer links to the page you chose here. If you leave
it unset, that button looks for a published page with the slug projects, and
falls back to the home page.
The portfolio slug
Appearance → Theme Options → Page Setup has a Portfolio slug field. It
sets the URL segment for a project: with portfolio in the field a project sits
at /portfolio/harbour-crane/, with projects at /projects/harbour-crane/.
Changing the slug changes every project address. Links you or anyone else has already published to a project will stop working. Change it before you launch, not after, and if you must change it later set up redirects. After changing it, visit Settings → Permalinks and click Save Changes so WordPress rewrites its rules.
Portfolio single styles
The same Page Setup screen has a Portfolio single style dropdown. It decides the layout of every project page on the site; it is not a per-project setting.
| Style | Layout | Draws the media boxes | Draws the info table |
|---|---|---|---|
Style 1 |
Title and body in a narrow left column, media and the info table in a wider right column | Yes | Yes |
Style 2 |
Media full width at the top, then the title, then the body underneath | Yes | No |
Style 3 |
The body and nothing else | No | No |
Demo 11 |
The body and nothing else | No | No |
Demo 12 (Solar) |
A photographic banner built from the featured image, then the body, then a previous/next project footer | No | No |
Styles 3 and Demo 11 are deliberately bare: they hand the whole page to the editor, which is the right choice when each project is built with Elementor and needs its own arrangement of sections.
Demo 12 suppresses the theme's own page heading band, because its banner already carries the project title and the breadcrumb trail. Demo 11 suppresses the page heading too. On the other three styles the page heading behaves as it does everywhere else — see Page layout and Page Setup.
The sidebars set for pages apply to project pages, and every style narrows its column to make room for them.
Project archives
The portfolio post type has no archive page. There is no
/portfolio/ listing that shows every project, and a link to one will 404.
Projects are listed by putting a grid on an ordinary page, which is what all
twelve demos do.
Project categories do have archives, at
/portfolio_category/<category-slug>/. They are rendered by the theme's generic
archive template — the same one that renders blog categories — so they look like
a blog listing rather than a project grid. They are useful as a fallback, not as
a designed page. Build the page you actually want to link to.
Putting projects on a page
Both builders ship the same two elements — in Elementor under the
Industrial Elements category, in WPBakery under Anps Shortcodes. A third
grid, Anps Demo 11 Portfolio Grid, is Elementor only.
| Element | What it does |
|---|---|
Anps Portfolio / Portfolio |
The main grid, with the category filter bar |
Anps Recent Portfolio / Recent Portfolio |
A compact recent-projects block with a heading |
Anps Portfolio settings:
| Setting | What it does |
|---|---|
Number of portfolio posts |
How many projects to show. Leave empty for the site default |
Show in row |
2, 3, 4 or 6 tiles across on desktop |
Portfolio categories |
All, or one category to restrict the grid to |
filter |
On shows the category filter bar above the grid, Off hides it |
Order By |
Default, Date, Id, Title or Name |
Order |
Ascending or descending |
Mobile view |
1 or 2 tiles across on phones |
| Colour settings | Tile background, text and title colours for the hover panel |
At 2 and 3 across, hovering a tile reveals the project title, its excerpt and a Read more button. At 4 and 6 across the tiles are too small for that, so hovering shows a link icon and the whole tile becomes the link.
See Building pages with Elementor or Building pages with WPBakery, and Element and widget reference for every element by name.
Team
Staff live in their own post type, team, provided by the Anps Theme Plugin. A
member is a title, a photo, a job title, a short description and an optional set
of social links. You then place a grid of members on a page.
It is a small post type with no categories and no tags. If you need to group people — by department, by office — make one grid per group and pick the members by ID.
Adding a team member
- Team → Add New.
- Type the person's name as the title.
- Fill in the Excerpt. This is the one-or-two-line description printed under the name in a grid. If the Excerpt box is not visible, switch it on in Screen Options, or in the three-dot menu → Preferences → Panels on the block editor.
- Write the body if the member has a page of their own. It appears beside the photo on that page, and nowhere else.
- Set a Featured image — the photograph.
- Fill in Team subtitle with the job title.
- Add Social accounts if you have them.
- Publish.
The photograph
The featured image is the portrait. The theme crops it to 455 × 355 pixels for the standard grid and 458 × 450 for the with-description layout, so upload something at least 460 pixels wide. Both crops are landscape-to-square rather than tall portrait, so a photograph framed tightly around a head will be cut at the chin. Frame a little loose and let the crop do its work.
A member with no featured image still appears in a grid, with a gap where the photograph should be.
Team subtitle
A single text field in the main editing column, below the body. It is intended
for the role — Managing Director, Site Foreman, Head of Compliance — and it
prints in small type under the name in every grid and on the member's own page.
Leave it empty and nothing is printed; the name simply sits closer to the description.
Social links on a team member
The Social accounts box in the side column is a repeater. Each row is an icon plus a link.
- Click Select icon to open the picker. It has a search field: type
linkedin,facebook,twitter,instagram,youtube,xing,whatsappand pick the brand icon from the results. - Paste the profile address into the field below.
- Click + for another row, − to remove one.
The picker is the whole Font Awesome library, not a fixed list of networks, so any network with a Font Awesome brand icon is available — and so is any other icon, if you want an envelope for an email address rather than a social profile.
Social links only appear on a member's own page. The team grids print the photograph, the name, the subtitle and the description, and nothing else. If you have turned member pages off, the links you enter here are stored but never shown anywhere.
The team slug and member pages
Two settings at Appearance → Theme Options → Page Setup:
| Setting | What it does |
|---|---|
Team slug |
The URL segment for a member page. With team a member sits at /team/jane-smith/ |
Team single page |
Ticked, the photograph and the name in every grid link to the member's own page. Unticked, they are plain and the page is no longer reachable through a query |
Untick Team single page when your team is a wall of faces rather than a set of biographies. The grid then prints exactly the same content but stops inviting a click that leads nowhere useful.
Changing the team slug changes every member address. Do it before you launch. After changing it, visit Settings → Permalinks and click Save Changes so WordPress rewrites its rules.
What a member page shows
When member pages are on, a member page puts the photograph, the social icons, the subtitle and the excerpt in a narrow left column, and the body in a wider right column. There is no setting to change the arrangement; if you want something else, build it with a builder on an ordinary page.
Putting the team on a page
Two elements, in both builders, plus a Demo 12 variant.
With Elementor
Search the widget panel under Industrial Elements:
| Widget | What it does |
|---|---|
Anps Team |
The standard grid |
Anps Team With Description |
Up to three members beside a block of text |
Solar - Team Grid |
The Demo 12 team layout |
Anps Team settings:
| Setting | What it does |
|---|---|
Number of items in column |
2, 3, 4 or 6 members across |
Number of team members |
How many to show. -1 shows all of them |
Team member id/s |
A comma-separated list of post IDs, for example 12, 40, 7. Leave empty for all members, newest first |
Filling in Team member id/s does two things: it limits the grid to those
people, and it orders them exactly as you typed them. That is the only way to
control the order — there is no order setting — so use it whenever the sequence
matters. A post ID is visible in the address bar while you edit the member, as
the post= number.
Anps Team With Description settings:
| Setting | What it does |
|---|---|
Team member id/s |
Which members to show, in that order |
Title |
The heading of the text panel beside them |
Text |
The body of the text panel |
Button text and Button url |
An optional link under the text |
Target |
Whether the button opens in a new tab |
Title color and Description color |
Colours for the panel's heading and text |
The with-description layout shows at most three members. The limit is fixed in the element, not a setting. Listing more IDs than three shows the first three. It also omits the description under each name — only the photograph, the name and the subtitle are printed, because the prose is in the panel beside them.
See Building pages with Elementor.
With WPBakery
The same two elements are in the Anps Shortcodes group of the element
picker, named Team and Team with description, with the same settings. See
Building pages with WPBakery. WPBakery has no
equivalent of the Demo 12 grid.
Both are listed with every other element in Element and widget reference.
News and the blog
Posts are ordinary WordPress posts. What the theme adds is the presentation: how many columns the listing uses, how much of each post it shows, which byline details appear, and three single-post layouts. It also adds two media boxes — a featured video and an image gallery — which stand in for the post formats other themes use.
Adding a news post
- Posts → Add New.
- Type the headline as the title.
- Write the body.
- Fill in the Excerpt. The listing prints it when the site is set to show excerpts, and several elements print it too. If the box is not visible, switch it on in Screen Options, or in the three-dot menu → Preferences → Panels on the block editor.
- Tick a category in Categories and add Tags if you use them.
- Set a Featured image.
- Publish.
The side column also carries Breadcrumbs parent page, a dropdown of your
pages. Whatever you pick is inserted into the breadcrumb trail on this post,
between the home link and the headline — so a post can read
Home / News / New depot opens.
The page heading boxes in the same column override the global page heading for this post only; they are described in Page layout and Page Setup.
Post categories and tags
Posts use WordPress's own categories and tags, which are not shared with
projects. Both have archives — /category/<slug>/ and /tag/<slug>/ — rendered
with the same template and the same column setting as the main listing, so they
need no separate configuration. The page heading of a category archive is the
category name; a tag archive reads Posts tagged "name".
The featured image on a post
The featured image is the picture above the headline in the listing, and above
the headline again at the top of a post on the Style 1 layout. On the Demo 12
layout it is the background of the photographic banner, so pick something that
still reads with white text over it. Landscape works best; the listing renders
the image at WordPress's large size, so upload at least 1024 pixels wide.
A video or a gallery at the top of a post
The theme does not use WordPress post formats. Instead the side column of the post editor has two boxes, and a post can use either in place of its featured image. Both also appear on projects — see Portfolio.
Featured video
A single text field that takes a YouTube or Vimeo address.
| What to paste | Example |
|---|---|
| A YouTube watch address | https://www.youtube.com/watch?v=dQw4w9WgXcQ |
| A Vimeo address | https://vimeo.com/76979871 |
Paste the address from the browser bar. Short youtu.be links do not work, and
this is not a shortcode field — the [youtube] and [vimeo] shortcodes the old
manual mentioned are not part of this theme.
Gallery images
Click Add gallery images, select as many as you like, and click Add to gallery. Drag the thumbnails to reorder them; a thumbnail's Delete link takes it out of this post without removing the file from your media library. On the listing the gallery becomes a carousel in place of the featured image; on a post it becomes a large image with a caption and a row of thumbnails. Captions come from the image's Caption field in the media library, falling back to its Title.
Which one wins
The theme picks exactly one, in this order: the gallery if it has anything in it, otherwise the featured video if an address is set, otherwise the featured image. So a post with both a gallery and a video shows the gallery — clear the gallery to let the video through.
The Demo 12 single post layout ignores both boxes. It draws its banner from the featured image only. A gallery or video on such a post still appears in the listing, but not on the post itself — put it in the body with a builder element instead.
The posts page and how to assign it
WordPress decides where posts are listed, not the theme. At
Settings → Reading, Your homepage displays either shows Your latest
posts on the front page, or lets you pick A static page as the homepage and
a second page as the Posts page. Create an empty page called News or
Blog and select it there.
That page is used for three things and nothing else: its title becomes the page heading of the listing, its sidebar boxes decide the listing's sidebars, and its address becomes the listing's address. Its content is never printed — the listing template replaces it, so there is no point building a layout on it. Every demo creates and assigns a posts page for you. If you want a listing with sections above or below it, build an ordinary page and drop the blog element into it, as described at the end of this chapter.
Blog listing layout
Appearance → Theme Options → Page Layout has a Blog Layout section.
| Setting | What it does |
|---|---|
| Columns | 1, 2, 3 or 4 posts across. Applies to the posts page and the category, tag, author and date archives. Search results have a layout of their own and ignore it |
Single post style |
The layout of a post's own page — see below |
One column gives the classic wide listing with the image above the headline. Three and four columns give card grids, at which width the excerpt is the only sensible choice for the body.
How much of a post the listing shows
Two settings decide this, and one is not where you would expect.
| Setting | Where | What it does |
|---|---|---|
For each post in a feed, include |
Settings → Reading | Full text prints the whole post body in the listing. Excerpt prints the trimmed excerpt |
Excerpt length |
Appearance → Theme Options → Page Setup | How many words an automatic excerpt keeps. Default 40 |
The listing reuses the feed setting. A fresh WordPress install has
For each post in a feed, includeset toFull text, so every post appears in full in the listing with a Read More button under it. Set it toExcerptfor a normal blog listing. A demo import sets it toExcerptfor you.
Excerpt length applies only to excerpts WordPress generates from the body. If you have typed something into a post's Excerpt box, that text is used verbatim and the word limit is ignored. Trimmed excerpts end in an ellipsis.
Single post styles
The Single post style dropdown in Page Layout sets the layout of every post page on the site. It is not a per-post setting.
| Style | What it looks like |
|---|---|
Style 1 |
Media, headline, byline, body. A footer table listing categories and tags, and the author's biography if they have written one |
Style 2 |
Headline first, then the author with their avatar and the byline, then the media, then the body. No footer table |
Demo 12 (Solar) |
A photographic banner carrying the headline, date, author and a reading-time estimate, then a narrow centred article, the tags, the author biography, and a previous/next article footer |
Style 2 and Demo 12 both suppress the theme's own page heading band, because their own header already carries the title. The author biography comes from the Biographical Info field at Users → Profile; leave it empty and the block is not printed.
Which post meta shows where
Archives and single posts are configured separately, both at Appearance → Theme Options → Page Setup.
Post meta on blog / categories / tag / archive pages controls the byline in the listing:
| Setting | Shows |
|---|---|
Author |
posted by: Name |
Date |
The publication date, in your Settings → General date format |
Comments |
The comment count |
Categories |
The post's categories, as links |
Post meta on single post controls a post's own page:
| Setting | Shows |
|---|---|
Author, Date, Comments |
In the byline under the headline |
Categories |
In the footer table, not the byline |
Tags |
In the footer table, and only when the post has tags |
All nine are on by default. The difference worth remembering is that on a listing
the categories sit in the byline, while on a post they sit in the footer table —
so unticking Categories under one heading has no effect on the other. That
footer table only exists on Style 1: Style 2 prints no categories or tags at
all, and Demo 12 prints tags at the end of the article, honouring the Tags
setting but not the Categories one.
Comments on posts
Comments on posts are governed entirely by WordPress. Settings → Discussion
sets the site default and the Discussion box on an individual post overrides
it. A post shows its comment section when comments are open, and keeps showing
existing comments after you close them. The theme styles the list and the form,
and moves the comment box to the bottom of the form so the name and email fields
come first; there is nothing to configure. The Enable page comments checkbox
in Page Layout applies to pages, not posts, and unticking it does not affect
the blog.
Sidebars on the blog
Page Layout has a Post Sidebars section with its own left and right dropdowns. These apply to single posts, categories, tags and archives — the blog side of the site — while Page Sidebars applies to pages. Each also has options to hide the sidebars on mobile or move them below the content there. On the posts page and on archives, the sidebar boxes on the page you assigned as the Posts page override the global setting. Building the widget areas themselves is covered in Widgets and sidebars.
Putting posts on a page
Both builders ship the same two elements — in Elementor under the Industrial Elements category, in WPBakery under Anps Shortcodes.
| Element | What it does |
|---|---|
Anps Blog / Blog |
A paginated listing, the same one the posts page uses |
Anps Recent Blog / Recent Blog |
A compact recent-posts block with a heading, optionally a slider |
Anps Blog takes a Blog category to restrict itself to, Posts per page,
Order By and Order, and Columns — 1, 2, 3 or 4 across, overriding the
global setting for this instance. It renders each post through the same
templates as the posts page, so everything above — the byline settings, the
excerpt-or-full-text rule, the media precedence — applies to it unchanged.
See Building pages with Elementor or Building pages with WPBakery, and Element and widget reference for every element by name.
Shop and products
Industrial sells through WooCommerce. WooCommerce does the work — products, cart, checkout, payments, tax, shipping, orders — and the theme supplies the templates and a short list of display settings. Nothing about selling is built into the theme itself, so if WooCommerce is not active none of this chapter applies.
Installing WooCommerce
WooCommerce is optional. The theme lists it among the plugins it can install for you, but it does not require it, and a site that does not sell anything should leave it out.
Install it either from the plugin step of Appearance → Setup Wizard or from Plugins → Add New. Activate it and WooCommerce starts its own onboarding wizard, which is separate from the theme's: store address, industry, currency, payment methods, shipping zones and tax rates. Work through it before you add products. None of it is a theme setting and none of it is affected by the theme.
The theme replaces WooCommerce's stylesheets entirely. WooCommerce's own CSS is not loaded; every button, grid, notice and form on the shop is styled by Industrial. A CSS snippet copied from a general WooCommerce guide may target classes the theme never uses. Add your own rules under Appearance → Theme Options → Custom CSS, or in the child theme — see The child theme and custom code.
The pages a shop needs
WooCommerce needs four pages, and it creates them during its own setup:
| Page | What it is |
|---|---|
Shop |
The product listing |
Cart |
The basket |
Checkout |
The order form |
My account |
Login, orders and addresses |
Check which page is assigned to each role at WooCommerce → Settings →
Advanced, under Page setup. If a page is missing or unassigned, the cart or
checkout will appear empty for no obvious reason; that screen is the first place
to look.
The Shop page is also the page whose sidebar and page-heading settings govern the product listing, so it matters as more than a placeholder.
A demo import destroys these four pages and rebuilds them. The importer deletes the pages currently assigned as Shop, Cart, Checkout, My account and Terms — permanently, not to the trash — then recreates them from the demo and re-assigns the options. It also empties every widget area before it runs. If you configured WooCommerce first, that configuration is lost; the deletion happens as soon as the import starts, before the importer checks whether it is allowed to proceed, so it happens even on an import that is then refused. Import the demo first, then set up your shop. See Importing a demo.
Where the theme's shop settings live
Appearance → Theme Options → WooCommerce holds every shop setting the theme has. There are six, in three groups.
| Group | Setting | What it does |
|---|---|---|
| Settings | Display shopping cart icon in header? |
Where the basket icon appears: Never display, only on Woo pages, Display everywhere |
| Layout | How many products in column? |
4 columns or 3 columns of products on desktop |
| Layout | Products per page |
How many products a listing shows before pagination. Default 12 |
| Product | Product image zoom |
Magnifies the main product image on hover |
| Product | Product image lightbox |
Opens the product images full size when clicked |
| Product | Product thumbnails slider |
Turns the row of product thumbnails into a carousel |
The same settings also appear in the Customizer under Theme Options, if you would rather change them with a live preview. See Theme Options, screen by screen.
Leave the cart dropdown on "*** Select ***" and no icon appears. The field starts unset, and an unset value is treated as
Never display. Choose one of the three real options explicitly.
The product listing layout
How many products in column? sets the desktop grid only. Narrower screens are
fixed, so the choice is between two desktop arrangements:
| Screen | Products across |
|---|---|
| Phones | 2 |
| Tablets | 3 |
| Desktop | 4 or 3, whichever you chose |
WooCommerce has a products-per-row setting of its own in Appearance → Customize → WooCommerce → Product Catalog. It has no effect here; the theme sets the column widths itself. Use the theme's setting.
Products per page overrides whatever WooCommerce would show, on the Shop page,
product category archives and product tag archives alike.
Each product tile shows the sale badge and the image in one block with the Add to cart button, then the product name, then the star rating and the price. Above the grid, the result count and the sort dropdown share one row.
Four theme-wide changes to the listing are worth knowing, because they are not settings and cannot be switched off from the admin:
- WooCommerce's own breadcrumb is removed. The theme's breadcrumb trail is used instead, and it is controlled with every other page's breadcrumb at Appearance → Theme Options → Page Layout.
- WooCommerce's shop page title is removed. The theme's page heading band shows the Shop page's title instead.
- WooCommerce's own sidebar is removed. The theme's sidebars are used — see below.
- The pagination arrows are the theme's.
The product page layout
A product page is two equal columns: the image gallery on the left, the product summary on the right. Underneath, full width, come the product tabs (Description, Additional information, Reviews), then up-sells, then related products.
The summary column reads top to bottom: title, price, star rating, short description, product meta (SKU, categories, tags), then the Add to cart form. The theme deliberately moves the Add to cart form below the meta and lifts the rating up under the price; WooCommerce's own order is different, and neither change is a setting.
The short description is what appears in the summary column. The long description in the main editor goes into the Description tab. Fill in both.
Product images, zoom and lightbox
Three settings, all under the Product heading of the theme's WooCommerce
screen, and all three concern the gallery on a product page.
| Setting | On | Off |
|---|---|---|
Product image zoom |
Hovering the main image magnifies the area under the pointer | Nothing happens on hover |
Product image lightbox |
Clicking an image opens it full size in an overlay | Clicking does nothing |
Product thumbnails slider |
The thumbnails become a carousel with arrows: two visible on small phones, three on larger ones, four on tablets and up | The thumbnails wrap onto as many rows as they need |
Zoom and lightbox are on by default; the thumbnails slider is off. Turn the slider on when a product carries more than four or five images, so the gallery does not push the Add to cart button down the page.
The main gallery always slides between images when you pick a thumbnail. That is not optional.
Product image sizes themselves are WooCommerce's, at Appearance → Customize → WooCommerce → Product Images. Change them there and then regenerate thumbnails — see Going live.
The cart icon in the header
Display shopping cart icon in header? decides where the basket appears at the
end of the navigation:
| Choice | Where the icon appears |
|---|---|
Never display |
Nowhere |
only on Woo pages |
On the shop, product, cart, checkout and account pages only |
Display everywhere |
On every page of the site |
The icon carries a count of the items in the basket and opens a small panel
listing them with a link to the cart; the count updates without a page reload.
only on Woo pages is the quiet choice for a site whose shop is a side
business, Display everywhere the right one when selling is the point of it.
There is also an AnpsThemes - Mini Cart widget with no settings of its own, for putting the same basket into any widget area — the top bar, for instance, or the bar above the menu. When that widget is present in the header, the theme moves the basket into it rather than appending it to the menu. Widget areas are covered in Header, top bar and footer.
Sidebars on shop and product pages
Shop pages take their sidebars from the Page Sidebars defaults at Appearance → Theme Options → Page Layout, not from the Post Sidebars defaults — even though a product is technically a post.
To override them, use the sidebar boxes on the Shop page itself for the product listing — that also governs product category archives — and the sidebar boxes on an individual product for that product. Choosing no sidebar gives the listing the full twelve columns; each sidebar takes three.
Which shop settings live where
The split is not obvious, so it is worth stating plainly.
| Job | Where |
|---|---|
| Currency, prices, tax, shipping, payments | WooCommerce → Settings |
| Which page is the Shop, Cart, Checkout, My account | WooCommerce → Settings → Advanced |
| Product image sizes | Appearance → Customize → WooCommerce → Product Images |
| Emails to customers | WooCommerce → Settings → Emails |
| Stock, orders, coupons, reports | The WooCommerce and Products menus |
| Products per page, products per row | Appearance → Theme Options → WooCommerce |
| Zoom, lightbox, thumbnails slider | Appearance → Theme Options → WooCommerce |
| Cart icon in the header | Appearance → Theme Options → WooCommerce |
| Page heading and breadcrumbs on shop pages | Appearance → Theme Options → Page Layout |
| Sidebars on shop pages | Appearance → Theme Options → Page Layout, or the Shop page itself |
As a rule: anything about money, stock or fulfilment is WooCommerce's, and anything about how many products fit across the screen is the theme's.
Building shop pages with a builder
Cart, Checkout and My account are generated by WooCommerce and should be left as WooCommerce made them; adding builder sections to them is the most common way to break a checkout. The Shop page is different — its title, sidebar and heading settings are yours to change — but its body is replaced by the product listing, so building a layout on it achieves nothing. To wrap the shop in marketing sections, build an ordinary page and link to the shop from it.
Product pages can be built with a builder if you enable the builder for the
product post type, which is a setting inside the page builder rather than in
the theme — see
Building pages with WPBakery and
Building pages with Elementor. Do it only if you
need it; a product page that a builder has taken over no longer follows the
layout described above.
Widgets and sidebars
Widgets fill the parts of the page that are not the page: the column beside your content, the top bar above the header, the footer columns, the copyright strip. You place them at Appearance → Widgets.
Industrial registers more widget areas than most themes because its header and footer are assembled from them, and the Anps Theme Plugin adds fifteen widgets of its own. This chapter lists both, then covers building a sidebar of your own and pointing a single page at it.
The theme's widget areas
These areas always exist. The name is what you see in Appearance → Widgets; the slug is what appears in exported widget data and in CSS.
| Area | Slug | Where it appears |
|---|---|---|
| Sidebar | primary-widget-area |
The default content sidebar |
| Secondary Sidebar | secondary-widget-area |
A second content sidebar |
| Top bar left | top-bar-left |
Left end of the top bar, above the header |
| Top bar right | top-bar-right |
Right end of the top bar |
| Above navigation bar | above-navigation-bar |
A band between the top bar and the menu |
| Large above menu | large-above-menu |
Inside headers 1 and 3, beside the logo |
| Left services sidebar | left-services-sidebar |
Nowhere on its own — assign it to a page |
| Footer 1 … Footer 4 | footer-1 … footer-4 |
The footer columns |
| Copyright footer 1 | copyright-1 |
The copyright strip below the footer |
The number of footer columns is not fixed. Appearance → Theme Options →
Footer Options decides how many exist through Footer columns and
Copyright footer columns: set Footer columns to two and only footer-1
and footer-2 are registered, so widgets you had placed in footer-3 and
footer-4 drop into WordPress's Inactive Widgets until you raise the count
again. Four footer columns and one copyright column is the default.
Above navigation bar is also conditional on a setting rather than on the widgets you put in it: the theme only prints it when the matching switch in Appearance → Theme Options → Header Options is on — a single page can override that — and never when the classic menu style is set to style 2. Large above menu prints in header 1 without further conditions, and in header 3 only when the classic menu style is style 2. See Header, top bar and footer.
Left services sidebar has no template of its own. It is registered so that you can select it as a page's left or right sidebar in the Sidebars box described below. Nothing prints it automatically.
Areas that appear only under a condition
Two more areas are registered only when a matching setting is active, so they appear and disappear from Appearance → Widgets as you change options.
| Area | Slug | Registered when |
|---|---|---|
| Vertical menu bottom widget | vertical-bottom-widget |
The global menu type is the vertical layout |
| Footer top band (Solar) | footer-solar-top |
The footer design is set to Solar |
Footer top band (Solar) is the call-to-action, contact and newsletter band across the top of the Solar footer used by Demo 12. It takes Heading, Text, Contact number, Subscribe and Social icons widgets, and lays each widget out as a half-width column.
Vertical menu bottom widget is registered when the vertical menu is on, but no template in the theme prints it; like Left services sidebar, it is a named area you can assign to a page.
Widgets the Anps Theme Plugin adds
All fifteen are listed under names beginning AnpsThemes - in Appearance →
Widgets. They come from the plugin, not the theme, so deactivating the plugin
empties every area that uses them.
AnpsThemes - Button
A theme-styled button. Text and Link set the label and destination,
Target picks _self, _blank, _parent or _top, and Size is Small,
Medium or Large. Style offers Normal button, Button with gradient, Dark
button, Light button and Minimal button — the same five styles the builders
use. Align is Left, Right or Centre.
AnpsThemes - Contact Number
A phone number with a line of text above it, for a top bar or a footer column. Fields are Text, Number, Text color, Number color and Background color. Leave the colour fields empty to inherit the scheme set in Colours and typography.
AnpsThemes - Download
A download link with an icon, meant for price lists and brochures. File picks an item already in your media library; File external takes a URL for a file hosted elsewhere. Title is the widget heading, File title is the clickable label, and Icon, Icon color and Background color control the tile.
AnpsThemes - Google Maps
A map in a widget area. Zoom and Height size it, and Markers is a repeatable field — press the plus button to add another pin — where each marker has a Location, a Pin image and an Info bubble.
A map needs an API key. Google stopped serving keyless maps in 2016. Paste your key at Appearance → Plugin Options → Google Maps or the map area stays blank.
AnpsThemes - Heading
A standalone heading for a widget area, with Heading text, Font size in pixels, Font weight from 100 to 900, and Text color.
AnpsThemes - Images
A single image chosen from the media library, with an optional Title above it.
AnpsThemes - Menu
A menu rendered in two columns. It behaves like WordPress's own Navigation Menu widget but only supports one level — submenu items are not displayed. Fields are Title and Select Menu.
AnpsThemes - Mini Cart
The WooCommerce mini cart, in any widget area. It has no settings and does nothing without WooCommerce active. See Shop and products.
AnpsThemes - Opening time
A list of opening hours. Each row has a Day, a Time you type freely
(for example 10:00 - 18:00) and an Exposed switch that highlights that
row — use it for today, or for a day with unusual hours. Add rows with the plus
button.
AnpsThemes - Recent News
The most recent posts, styled to match the theme rather than WordPress's plain list. Title for recent news sets the heading and Number of articles to show limits the list.
AnpsThemes - Recent Projects
The same, for the Portfolio post type: Title for recent projects and Number of projects to show. See Portfolio.
AnpsThemes - Simple Navigation Menu
A menu as a plain list of top-level links, for a footer column or a copyright strip. Fields are Title, Select Menu, Link font size, Link color and Spacing between items. If you have not created a menu yet the widget says so and links you to the menus screen.
AnpsThemes - Social icons
Linked social icons. Style offers Default, Minimal, Border and Transparent border. Open links as sets the link target for every icon at once. The icons themselves are a repeatable field: each one has an icon, a link and a colour.
AnpsThemes - Spacing
Empty vertical space between two widgets, from 1 to 500 pixels. Use it instead of adding blank paragraphs to a Text widget.
AnpsThemes - Text and icon
A repeatable row of icon, title and subtitle — the address-and-phone blocks in the demo top bars are built from this. Each row has Icon, Title, Subtitle, Icon color, Title color and Subtitle color, and an Icon URL if the icon should link somewhere.
Text and icon is a top bar widget. Its own description says so. It is styled for the narrow bar above the header and will look wrong in a content sidebar or a footer column.
Choosing which sidebar a page or post shows
A sidebar is not attached to a widget area by default — you choose, per side, which registered area fills it. The site-wide choice is at Appearance → Theme Options → Page Layout, which has separate Left sidebar and Right sidebar selectors for pages and another pair for posts, plus Show sidebars on mobile after main content and Hide sidebars on mobile. Until you pick something there, pages have no sidebar at all. See Page layout and Page Setup.
Individual pages override the site-wide choice in the Sidebars box on the edit screen. It has the same four controls, and its selectors list every registered area including the ones you have generated yourself.
| Value in the box | Effect on that page |
|---|---|
| Left blank | Use the site-wide setting |
| A sidebar name | Use that area instead |
None |
Show no sidebar, even though the site-wide setting has one |
None is the one worth remembering: without it, a landing page built
full-width in a builder still inherits the global sidebar and comes out
narrow.
The box appears on Page, Post and Team edit screens. On a WPBakery site using the classic editor it is printed below the content instead.
Creating a sidebar with the sidebar generator
Appearance → Sidebars lists the sidebars you have created and their slugs. Press Add Sidebar, type a name, and it is registered immediately: the new area appears in Appearance → Widgets ready for widgets, and in every sidebar selector described above.
Names must be unique — the screen refuses a name that already exists — and the
slug is derived from the name, so Services sidebar becomes
services-sidebar.
Removing a sidebar does not remove its widgets, and renaming breaks assignments. Pages point at a generated sidebar by its name, not its slug. Remove it and any page set to it falls back to the site-wide sidebar, while the widgets it held move to Inactive Widgets, where they stay until you delete them.
The practical pattern is one generated sidebar per section of the site: a services sidebar with a services menu and a contact block, a news sidebar with categories and recent posts, assigned page by page in the Sidebars box.
Copying widgets to another site
Widget contents can be moved between installations from Appearance → Theme Options → Import/Export Widgets. Export downloads a text file of every widget in every area; Import reads one back.
This screen adds to what is there, it does not replace it. Every widget in the file is appended to the area it came from, so importing the same file twice leaves two copies of every widget. Run it on a site you are setting up, not one you have already arranged, and empty the areas first if you are re-running it.
A demo import reuses the same importer but empties every widget area immediately before it runs, so a demo never duplicates widgets the way this screen can — it replaces them instead. See Importing a demo.
Menu widgets are handled specially on the way in, by both routes: the file stores the menu by name, and the import looks up the matching menu on this site, skipping the widget if there is no menu by that name.
The rest of the Theme Options panel has its own separate import and export, covered in Theme Options, screen by screen.
Slider Revolution
The full-width animated hero at the top of most demo home pages is Slider Revolution, a commercial slider plugin by ThemePunch. It is not part of Industrial. The theme bundles a copy, registers it as one of its recommended plugins, and hands the demo sliders to it during an import — after that, the slider is the plugin's, and so is its documentation.
Where the theme's responsibility ends
Industrial's support covers the theme, the Anps Theme Plugin and the demo content. It does not cover Slider Revolution's own editor, its layer animations, its add-ons or its licensing. If a slide is misbehaving inside the slider editor, that is a question for ThemePunch.
What the theme does do:
| The theme | What it means for you |
|---|---|
Ships plugins/revslider.zip in your download |
You do not buy the plugin separately |
| Registers it as a recommended plugin | It appears in the plugin notice and the wizard |
| Calls the plugin's own "set as theme" hook on every load | The plugin treats itself as bundled with Industrial rather than separately purchased |
| Imports the demo slider with a demo | Demos 1 to 10 arrive with a working slider |
Because the copy is bundled with the theme rather than purchased in your own name, it updates when the theme's plugin list offers a newer version, not from ThemePunch directly.
Installing Slider Revolution
It is optional. Nothing in the theme breaks without it — you simply get no hero slider, and any page whose content contains a slider shortcode shows nothing where the slider would be.
Two ways to install it:
- The setup wizard. Its Plugins step lists Slider Revolution with an Install button. See The setup wizard.
- The plugin notice. Go to Appearance → Install Plugins, find Slider Revolution, install it and activate it.
Install it before importing a demo. The importer hands the slider file to the plugin as the last part of the run, and if the plugin is not active at that moment the import continues without it and prints "Revolution slider is not active. Demo data for revolution slider can't be inserted." Your pages are imported; the slider is not.
If you missed it, re-importing the whole demo is not the fix. A second import duplicates every page, post and image. Install the plugin, then import just the slider by hand as described below.
Demo sliders that arrive with an import
Demos 1 to 10 each ship one slider, exported from the demo site. Demos 11 and 12 do not — their heroes are built from Elementor widgets, not from Slider Revolution. See The twelve demos.
The imported slider is called slider3, whichever of demos 1 to 10 you
imported, and the slide images arrive in your media library with the rest of
the demo media. Find it at the Slider Revolution entry in the WordPress
admin menu, and open it to replace the slide images and text with yours.
To import the slider on its own — the case above, where the plugin was installed after the demo:
- Take
industrial.zipfrom your download and unzip it. - Inside, find
anps-framework/classes/importer/, then the folder for the demo you imported:dummy4for demo 4 with WPBakery,dummy4efor demo 4 with Elementor. Elementor folders end ine. - Take
slider3.zipfrom that folder. - In WordPress, go to Slider Revolution, choose the import option and upload that file.
Putting a slider on a page
A slider is placed by dropping it into the page like any other element. The demos place theirs at the very top of the home page, in a full-width row with a negative top margin so that the slider sits under the header.
With Elementor, drag the Slider Revolution widget — supplied by the plugin, not by the theme — into a section and pick your slider from its dropdown. The demo pages use exactly this widget. See Building pages with Elementor.
With WPBakery, add the Revolution Slider element to a row and pick the slider from its dropdown. See Building pages with WPBakery.
Anywhere else — a template, a text widget, a page you are editing without a builder — use the shortcode, with the slider's alias:
[rev_slider alias="slider3"]
That is the form the demo content uses, and the alias is visible in the slider's own settings if you rename it.
Where to get slider help
Slider Revolution has its own manual, and it is far more detailed than anything reproduced here would be:
Use it for slide layers, transitions, responsive behaviour, video backgrounds and navigation styling. Come back to Licence, updates and support for anything to do with the theme itself.
Licence, updates and support
Updates and support run through ANPS Club. You paste a licence key into one screen in the theme, and from then on the theme updates itself the way any other WordPress theme does: a notice appears, you press a button, it installs.
There is no API key to generate, no marketplace username to type, and nothing to download by hand unless you want to.
The ANPS Club licence screen
Everything on this subject lives at Appearance → ANPS Club Licence
(themes.php?page=anps-club-license). The screen shows, in order: your licence
status, the key itself, and the state of updates.
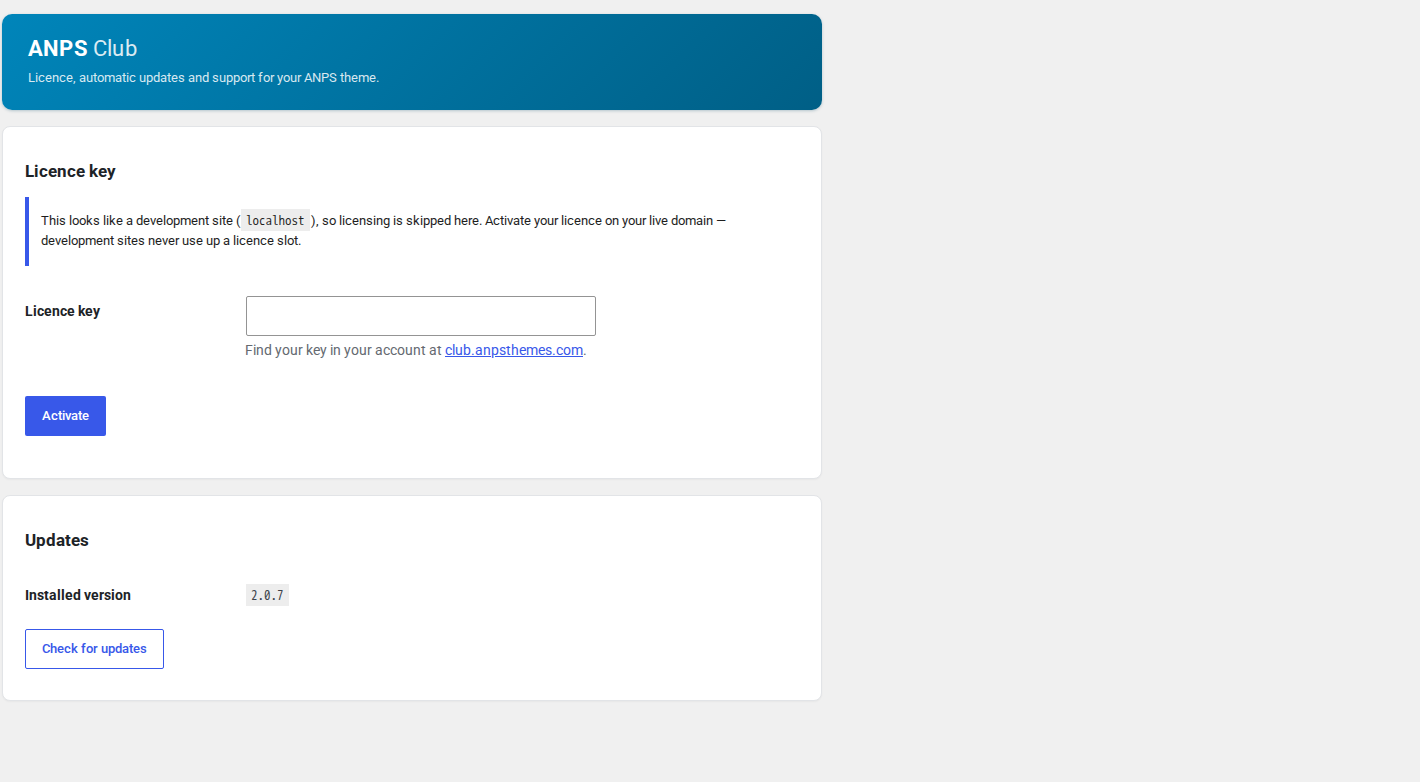
Your key comes from your account at club.anpsthemes.com. It is the same key whether you bought this theme on its own or hold a club membership covering every ANPS theme.
An unlicensed site is not a crippled site. Nothing in the theme is withheld without a key. Every option, every element, the demo importer and all twelve demos work exactly the same. What a licence adds is automatic updates and support, and nothing is taken away if you never enter one.
Activating your licence key
- Open Appearance → ANPS Club Licence.
- Paste the key into Licence key.
- Select Activate.
The screen then confirms "Your licence is active. This site gets automatic theme updates and support", and lists the domain it registered and the date your support and updates period runs to.
Deactivating is the mirror image. Deactivate this site, under the key, releases the licence so you can use it on another site. Use it before you retire a site or move a project to a new domain — the count of sites a licence covers is a count of activations, and an abandoned one keeps occupying a slot.
If the licence is already active on another production site, the screen says so, names the other domain, and offers Move my licence to this site. Moving it stops the other site receiving updates; nothing else about that site changes.
A few other verdicts you may meet, all of which the screen states plainly:
| What it says | What it means |
|---|---|
| This licence key is not active for this site | The key was not recognised for this domain. Check for a stray space, then contact support |
| Your licence key is valid, but it is for a different theme | The right key, the wrong product. Copy the key listed against Industrial |
| This site could not be activated | The server declined and says why: a lapsed subscription, or every site slot in use |
| This theme is not set up correctly | A build problem rather than anything you did. Send support the message shown |
Development sites and licence slots
A staging copy or a local build should not consume a licence slot, so the theme does not try to license one. When the site's address is a development address, licensing is skipped entirely: no key is checked, no slot is used, and the screen says so rather than leaving you wondering.
The addresses treated as development:
| Kind | Values |
|---|---|
| Exact hosts | localhost, 127.0.0.1, ::1, 0.0.0.0 |
| Domain endings | .test, .local, .localhost, .example, .invalid |
A leading www. is ignored, so www.example.test counts the same as
example.test.
staging.anddev.subdomains are not development addresses.staging.yoursite.comis a real, reachable hostname and could easily be somebody's live site, so it is treated as production and will use a slot. Deactivate it when you are done with it, or build on a.testor.localaddress instead.
Activate your licence on the live domain. A development site has no updates to receive, because the update check does not run there.
Updating the theme from the dashboard
With a licence active, the theme checks for a new release twice a day and publishes what it finds to the places WordPress already uses. An available update appears at Dashboard → Updates, on Appearance → Themes, and on the licence screen itself.
The licence screen's Updates section is the most informative of the three:
| Row | What it tells you |
|---|---|
| Installed version | What is running now |
| Available | The new version, if there is one, or that you are on the latest |
| Last checked | How long ago the check ran |
Two buttons sit under it:
- Update now installs the theme update, and the Anps Theme Plugin update as well when the release includes one. It is shown only when there is something to install and only to a user allowed to update themes — on a multisite network that is a super admin.
- Check for updates forces an immediate re-check instead of waiting for the twice-daily one. Use it when you know a release has landed.
If your support and updates period has ended, the screen names the version that was released and says the period has ended rather than pretending there is nothing new. Renewing makes it installable; the version you already have keeps working either way.
Your settings are not touched by an update. Theme Options, colours, typography, menus, widgets and all your content live in the database, not in the theme folder.
Ignore the Theme Update screen in Theme Options. Its text predates ANPS Club and describes a marketplace plugin and an API token. That is not how this theme is updated. The licence screen and Dashboard → Updates are the only routes, plus the manual one below.
Updating the theme by hand over FTP
Use this when the site cannot reach the update server, when the host blocks outgoing requests, or when you would rather do it yourself.
Back up the site first. Both the files and the database. This procedure replaces a whole directory; a backup is what makes that reversible.
Anything you edited inside the
industrialfolder is lost. You are replacing that folder wholesale. Edited templates, edited PHP and edited stylesheets all go. This is the reason for the child theme — see The child theme and custom code.
- Download the current release from your account at
club.anpsthemes.com and unzip it. Unzip
industrial.zipfrom inside it as well, so you have anindustrialfolder on your computer. - Leave the theme active. Do not switch to another theme first: WordPress stores widget placement and menu locations per theme, and switching away and back can leave widget areas and menu positions empty.
- Connect over FTP or SFTP and go to
wp-content/themes/. - Rename the existing
industrialfolder toindustrial-old. Renaming rather than deleting gives you an instant way back, and your custom CSS and options are in the database, so the site keeps rendering. - Upload the new
industrialfolder in its place. - Load the site's front end and check it, then delete
industrial-old.
If the release also ships a new Anps Theme Plugin, update it the same way:
replace wp-content/plugins/anps_theme_plugin with the new folder, leaving the
plugin active.
Keep the folder names exactly as they are. The child theme names its parent as
Template: industrial, and the licence check reads the parent theme's folder.
Asking ANPS Club support for help
Support requests go to club.anpsthemes.com/help. An active licence is what entitles a site to support.
A request that includes the following is usually answered once rather than three times:
| Include | Where to find it |
|---|---|
| The System Requirements summary line | The line under the table at Appearance → Theme Options → System Requirements — PHP version, memory limit, execution time, ZipArchive. See What your server needs |
| Which demo you imported | Or that you did not import one |
| Which page builder | Elementor or WPBakery |
| Theme version | 2.0.7, or whatever Appearance → Themes reports |
| Whether the child theme is active | And whether you have edited any theme file |
| What you did, and what happened | The action, the result, and the result you expected |
| The exact message | Copied as text, including an importer log from the wizard's Finish step |
Say what you did rather than what you concluded. "The import stopped after about two minutes and the pages list shows 14 pages" is a diagnosis; "the import is broken" is not.
Check Troubleshooting first. A good share of requests are one of the handful of problems documented there, and the answer is quicker to read than to wait for.
Translating the theme
Industrial is translation-ready: every string the theme and the plugin print is wrapped for translation, and both ship a template file you translate against. Nothing is hard-coded in English except the demo content, which is your copy to rewrite rather than translate.
Very little of a finished site is actually theme text. The words you see are mostly yours — page content, menu labels, widget titles. What needs translating is the small set of strings the software generates itself: the search box placeholder, the "Reset" button on a filter, the comment form labels, the Previous and Next arrows on a WooCommerce listing. The Portfolio and Team labels — "Portfolio", "Categories", "View portfolio" — come from the plugin rather than the theme, which is why there are two files to translate and not one.
Two text domains, two files to translate
The theme and the plugin are separate pieces of software with separate strings, so they are separate translation jobs. Translating one and not the other is the single most common reason a site ends up half translated.
| Text domain | Template file | |
|---|---|---|
| Industrial (the theme) | industrial |
wp-content/themes/industrial/languages/industrial.pot |
| Anps Theme Plugin | anps_theme_plugin |
wp-content/plugins/anps_theme_plugin/languages/anps_theme_plugin.pot |
A .pot file is the list of translatable strings with no translations in it.
You never edit it. You use it to create a .po file for your language, which
compiles to a .mo file — the binary WordPress actually reads. Both tools
below handle that for you.
Plugins you install separately — WooCommerce, Contact Form 7, Elementor, Slider Revolution — carry their own translations and are not affected by anything in this chapter.
Setting the site language
Translate nothing until the site is running in the target language, because neither the theme nor the plugin loads a translation for a language the site is not set to.
Go to Settings → General → Site Language and choose the language. If it is not listed, WordPress downloads it the moment you save. Check Settings → General again afterwards and confirm the admin has switched language; if it has not, the language pack did not install and the host is blocking outbound requests to WordPress.org.
Translating with Loco Translate
Loco Translate edits translations in the browser. It is the easiest route and the one we suggest.
- Install and activate Loco Translate from Plugins → Add New.
- Go to Loco Translate → Themes and choose Industrial. For the plugin strings, go to Loco Translate → Plugins and choose Anps Theme Plugin instead; the rest of these steps are identical.
- Press New language.
- Choose your language. Under Choose a location, pick Custom — see the warning below — and press Start translating.
- Pick a string from the Source text list. The box below it is where the translation goes. Use the filter box above the list to find a particular string.
- Press Save. The
.mofile is written and the front end uses it immediately.
Loco Translate shows a Sync button on an existing translation. Press it after a theme update: it adds strings that are new in this version and marks ones that have been removed, so you only have to translate the difference.
Translating with Poedit
Poedit is a desktop application, and the better choice for a long translation or one you want to keep in version control.
- Open Poedit and choose File → New from POT/PO file.
- Open
languages/industrial.potfrom a copy of the theme on your computer. - Choose the language when Poedit asks.
- Translate the strings and save. Poedit writes both the
.poand the.mo. - Name the pair for your locale:
industrial-de_DE.poandindustrial-de_DE.mofor German,industrial-fr_FR.*for French. For the plugin the prefix is the plugin's text domain, soanps_theme_plugin-de_DE.mo. - Upload both files to the folder named in the next section.
The locale code must match the one WordPress uses for the language you chose in
Settings → General, including the region part and the underscore. A file
named industrial-de.mo is ignored on a site set to de_DE.
Where translation files survive an update
This is the part that costs people their work. Updating the theme replaces the
whole themes/industrial/ folder, and updating the plugin replaces the whole
plugins/anps_theme_plugin/ folder. Anything you put inside either is gone.
Put translations here instead:
| What you translated | Where the file belongs |
|---|---|
| The theme | wp-content/languages/themes/industrial-de_DE.mo |
| The plugin | wp-content/languages/plugins/anps_theme_plugin-de_DE.mo |
WordPress looks in those two folders before it looks inside the theme or the plugin, and nothing in an update touches them. Create the folders if they do not exist.
Never save a translation into the theme's own
languagesfolder. It works, right up until the next update deletes it. This is what Loco Translate's Custom location avoids: it saves towp-content/languages/loco/, which also survives.
A translation is not code, so the child theme is not the place for it either — the folders above are.
Demo text is copy, not translation
The demo content — page text, project descriptions, staff biographies, post
bodies, widget titles, menu labels — is imported into your database as ordinary
content. It is not translatable theme text and no .po file will touch it.
Rewrite it. Every word of it is placeholder copy about a fictional company, and editing a page to say what your company does is the same job in any language. Menu labels are edited at Appearance → Menus, widget text at Appearance → Widgets, everything else on the page or post itself.
If you want the same site in two languages, that is a multilingual plugin's job rather than a translation file's — WPML or Polylang, with the theme translated as above underneath. The theme's top bar widget areas accept the WPML language selector widget. See Going live for the rest of the launch checklist.
The child theme and custom code
One sentence covers this whole chapter: anything you edit inside the
industrial folder is deleted the next time the theme updates. Not
overwritten where it clashes — the folder is replaced wholesale, so an edit to
header.php, a rule added to custom.css, a function dropped into
functions.php and a translation saved into languages/ all disappear
together, silently, in the middle of an otherwise routine update.
A child theme is how you avoid that. It is a second theme that inherits everything from Industrial and holds only your changes, in a folder an update never touches.
Why a child theme exists
WordPress lets one theme declare another as its parent. The child provides
nothing but its own style.css header, and WordPress falls back to the parent
for every template, function and asset the child does not have. When the child
does have a file, the child's copy wins.
The consequences worth knowing:
Parent theme (industrial) |
Child theme (industrial-child) |
|
|---|---|---|
| Replaced by an update | Yes, entirely | No |
| Holds the templates and functions | Yes | Only the ones you copy in |
| Where your edits belong | Never | Here |
You do not need a child theme to use Industrial. Most sites never need one: colours, fonts, layout, headers and footers are all settings, and CSS has its own screen. You need one the moment you want to change theme markup or add PHP.
Installing the bundled child theme
The child theme is in your download as industrial-child.zip. Do not build
your own — this one already declares industrial as its template and is
correct.
- Install and activate the parent first, if you have not. See Installing the theme.
- Go to Appearance → Themes → Add New → Upload Theme and upload
industrial-child.zip. - Press Activate.
Nothing about the site changes visibly, and nothing is lost: theme options, menus, widgets and content are stored outside the theme and carry over.
Custom CSS is stored per theme, not per site. WordPress keys the Custom CSS screen's content to the active stylesheet, so switching from
industrialtoindustrial-childpresents an empty Custom CSS box. Copy your CSS out of Appearance → Theme Options → Custom CSS before you activate the child, and paste it back afterwards.
After activation the child theme contains two files you will use:
| File | For |
|---|---|
style.css |
Your CSS, below the theme header comment |
functions.php |
Your PHP |
Both ship containing a single comment and nothing else. The child's
style.css is loaded on the front end automatically — the parent enqueues the
active theme's stylesheet — so you do not need an @import line, and adding
one only slows the site down.
What belongs in the child theme, and what does not
| Change | Where it goes |
|---|---|
| A few CSS rules | Theme Options → Custom CSS |
| A lot of CSS, or CSS you want in version control | The child's style.css |
| A hook, filter or small function | The child's functions.php |
| Different markup in a template | A copy of that template in the child |
| A translation | wp-content/languages/ — see Translating the theme |
| A colour, font, header or layout choice | Theme Options, not code |
| A new post type, shortcode or widget | A plugin of your own, not the theme |
The last two rows are the ones people get wrong. Reaching for CSS to change something Theme Options already controls leaves you fighting the theme's own stylesheet forever; check Theme Options, screen by screen first. And registering a post type in a theme means the content vanishes from the admin the day you change theme — that belongs in a plugin.
Overriding a parent template
Copy the file, keep the path, edit the copy.
Industrial loads its partials through WordPress's own template lookup, which checks the child theme before the parent. So to change the markup of header layout 1:
- Find
templates/template-header-1.phpin the parent theme. - Copy it to
industrial-child/templates/template-header-1.php, creating thetemplatesfolder. - Edit the copy.
The same works for the top-level templates — page.php, single.php,
archive.php, 404.php, footer.php, comments.php — for the blog and
portfolio partials in templates/, and for the WooCommerce overrides in
woocommerce/.
An overridden template stops receiving fixes. Your copy is frozen at the version you copied. When an update changes that template — a bug fix, a new option, an accessibility correction — your copy does not get it. Copy as few templates as you can, and re-check them after a major update.
One file is the exception: templates/template-footer-solar.php is loaded by
absolute path rather than through the lookup, so a child copy of it is ignored.
To change the Solar footer, copy sidebar-footer.php into the child instead
and adjust what it loads.
Adding PHP to the child theme
industrial-child/functions.php is loaded before the parent's functions.php,
on every request. It is a normal theme functions file: add hooks, filters and
functions, and do not redeclare anything the parent already defines.
A worked example. The plugin filters the list of Elementor widgets it
registers through anps_widgets_filter, so you can hide widgets you never use
and shorten the Elementor panel:
add_filter( 'anps_widgets_filter', function ( $widgets ) {
	unset( $widgets['twitter'] );
	unset( $widgets['timeline'] );

	return $widgets;
} );
The keys are the widget file names in the plugin's widgets/ folder. Removing
a widget from the list only removes it from the panel; pages already built with
it keep working, because the removal happens at registration and not in the
database.
Test PHP on a staging copy. A syntax error in
functions.phptakes the whole site down, admin included, and the only way back is editing the file over FTP. Nothing in the WordPress admin can rescue you from it.
When Custom CSS is the better answer
For CSS, Appearance → Theme Options → Custom CSS beats the child theme most of the time:
- It needs no child theme, no FTP and no second theme to keep track of.
- It is stored in the database, so a theme update cannot delete it.
- It has a syntax-highlighting editor that catches an unclosed brace before you save.
- It loads after the theme's own stylesheets, so your rules win without
!important.
Use the child theme's style.css instead when the CSS is long enough to want
comments and structure, or when you keep the site in version control.
Either way, the rule beneath all of this is the same: the parent theme folder is not yours to edit. Keeping that line means an update is a two-minute job rather than an afternoon of restoring changes — see Licence, updates and support.
Going live
Between an imported demo and a site you can publish there is a list of things that are easy to miss, because the site already looks finished. Two of them send mail to the wrong address and hot-link images from someone else's server, so work through this chapter before you announce the site.
Replacing the demo text and images
Do it page by page rather than by searching for stray words. Open Pages, sort by title, and work down the list. For each page: the title, the headings, the body text, the buttons and their links, and the images.
The demo also fills in places that are not pages:
| Where | What to replace |
|---|---|
| Posts | The demo articles. Delete them or rewrite them; do not leave them published |
| Portfolio | The demo projects, their images and their categories |
| Team | The demo staff, their photographs and their social links |
| Products | The demo products, prices and gallery images |
| Appearance → Widgets | Addresses, phone numbers, opening hours and social links in the footer and sidebars |
| Appearance → Theme Options | Contact details in the top bar and the footer |
| Slider Revolution | Slide images and slide text, for the demos that ship a slider |
The demo photographs are licensed for the demos, not for your site. They are placeholders. Every image that arrived with the demo must be replaced with an image you own or have licensed before the site is public.
When the pages are done, open Media → Library and sort by date: the demo images are the oldest batch. Delete the ones nothing uses, and delete attachments before the pages that used them, or you will not be able to tell which was which.
Deleting demo content you will not use
Demos 1 to 10 bring 27 pages, and most sites need a third of them. The pages that exist to show off elements — the FAQ, the notifications, the progress bars, the column variants of the news page — are the first to go.
Remove the page from every menu first, delete it, then empty the trash — a page in the trash is still in the database. Check for widgets that pointed at it, then reload the front page and the footer looking for links that now 404.
If you are not using WooCommerce, deactivate it rather than deleting the Shop, Cart, Checkout and My account pages one at a time. If you are not using the Portfolio or the Team post type, leave them empty; they add nothing to the front end when they have no entries.
Site title, tagline and search-engine visibility
At Settings → General, set the Site Title and the Tagline. The theme and WordPress both use them — in the browser tab, in feeds, in the mail WordPress sends, and wherever you have chosen a text logo instead of an image. Check the admin email address on the same screen: WordPress sends its notifications there, and on Demos 11 and 12 so does the contact form.
At Settings → Reading, clear Discourage search engines from indexing this site if it was set while you were building. Setting it is the right thing to do on a staging site and the wrong thing to leave in place on a live one.
Front page, posts page and permalinks
A demo import sets all three of these, so usually you are confirming them rather than setting them.
| Setting | Where | What it should be |
|---|---|---|
| Front page | Settings → Reading | A static page — the demo's Home page, or yours |
| Posts page | Settings → Reading | The News or Blog page |
| Permalinks | Settings → Permalinks | Post name; the importer sets /%postname%/ |
Two things to do here before launch:
- If you changed the Portfolio slug or the Team slug at Appearance → Theme Options → Page Setup, open Settings → Permalinks and press Save Changes. The rewrite rules are not rebuilt when you save those options, so until you do, single portfolio and team pages return 404.
- Settle on the permalink structure before you publish. Changing it after launch changes every URL on the site and breaks every link anyone has saved.
Menu locations before launch
Check Appearance → Menus → Manage Locations, not just the menu contents. The importer assigns one imported menu to Primary Navigation, and on a demo that shipped several menus it may not be the one you want.
The theme registers Primary Navigation normally, and a second location, Right Navigation, only when the header is set to the centred-logo style. Switch to that header at Appearance → Theme Options → Header Options and the second location appears unassigned — the right-hand half of the header stays empty until you assign a menu to it. See Menus and the mega menu.
Then walk the menu as a visitor: every item, including the sub-items and the mega-menu columns, and every footer link.
Contact form recipients
This is the item that most often survives to launch unnoticed, because the form works — it simply sends the message somewhere else.
Demos 1 to 10 import a contact form addressed to a fixed address left over from the demo build. It is not your admin email and it is not on your domain. Until you change it, enquiries from your site go to someone else's mailbox. Demos 11 and 12 use
[_site_admin_email]instead, which resolves to the address in Settings → General — check that address is right too.
Open Contact → Contact Forms, edit each imported form and check the Mail tab:
| Field | What to check |
|---|---|
| To | Your address, or [_site_admin_email] |
| From | An address on your own domain; hosts reject mail claiming to be from elsewhere |
| Reply-To in Additional headers | Reply-To: [your-email], so you can reply to the enquirer |
| Message body | That every form field you kept appears in it |
Then submit the form on the live site and confirm the message arrives. If it does not, the cause is almost always the host's mail configuration rather than the form — an SMTP plugin is the usual fix.
Logos and favicon before launch
Upload your own logo and favicon at Appearance → Theme Options → Logos & Media. The screen takes a primary Logo, a separate Front page logo for a transparent header, a Sticky logo and a transparent variant of it for the scrolled header, Mobile logos for screens under 1200px, the Favicon for the browser tab and a 152×152px Home screen icon for phones. Each has a height field beside it: set the height there rather than uploading a pre-scaled image, and upload at twice that height so the logo stays sharp on high-density screens.
After a demo import the logo and favicon options point at the ANPS demo server. The theme keeps loading them from there — your site displays another site's files, and shows nothing at all if that server changes. Upload your own and re-select them here.
Image sizes and regenerating thumbnails
The theme registers five crops of its own — for gallery thumbnails, featured images, portfolio items and team photographs — in addition to WordPress's thumbnail, medium and large sizes at Settings → Media.
Changing a size only affects images uploaded afterwards, so after any change to Settings → Media you have to regenerate the existing ones with a thumbnail-regeneration plugin.
That matters even if you changed nothing: the importer deliberately switches the theme's crops off while it runs, so that importing a few hundred images does not resize every one of them into every size and exhaust the memory limit. Imported media therefore arrives without the theme's crops. If portfolio, team or gallery images look stretched or mis-cropped after an import, regenerate thumbnails once and they will be rebuilt.
Caching and what to flush when
A caching plugin is the single largest speed improvement available to you, and it is also the reason a change you just made does not appear.
Flush the cache after:
| Change | What to flush |
|---|---|
| Theme options, colours or typography | The page cache, then reload with a hard refresh |
| Custom CSS | The page cache and the minified CSS cache, if the plugin has one |
| An Elementor page | Elementor's own CSS, via Elementor → Tools → Regenerate CSS & Data |
| A demo import | Everything — page cache, CSS cache and object cache |
| Switching page builder | Everything, and check the pages afterwards |
If a change refuses to appear after a flush, check it in a private window before you change anything else. Browsers cache CSS harder than caching plugins do.
HTTPS and site addresses
Serve the live site over HTTPS. Forms, logins and anything you sell need it, and browsers mark pages that collect input without it.
- Install the certificate first, then set WordPress Address and Site
Address at Settings → General to the
https://form. - Content imported or built while the site was on
http://may still holdhttp://URLs. Fix those in the database with a search-and-replace tool rather than by hand, and include Elementor and WPBakery page data. - Check for mixed-content warnings in the browser console on the front page, a
portfolio single and the shop. One image or font still loaded over
http://triggers one. - The HTTPS row on Appearance → Theme Options → System Requirements reports what the theme sees. See What your server needs.
Speed before launch
Four things account for nearly every slow Industrial site, in this order:
- Unoptimised images. The biggest cause by far. Never upload an image larger than the space it appears in — a 4000px photograph in a 360px portfolio tile costs every visitor the full download — and export it compressed.
- Plugins. Each one adds work to every request. To find a slow one, deactivate all but the plugins the theme requires, measure, then reactivate one at a time.
- No caching. See the section above.
- The host. A site can only run as fast as the plan it is on. If you have done all of the above and pages are still slow, the conversation is with your host.
The pre-launch checklist
| Done | Item |
|---|---|
| Every page's text is yours | |
| Every demo image is replaced and the unused ones are deleted | |
| Demo posts, projects, team members and products are deleted or rewritten | |
| Site title and tagline set | |
| "Discourage search engines" cleared | |
| Front page and posts page set at Settings → Reading | |
| Permalinks settled; portfolio and team singles load | |
| Menus assigned to their locations; every link checked | |
| Contact form To and From changed, and a test message received | |
| Logo, mobile logo and favicon uploaded to your own media library | |
| Thumbnails regenerated | |
| HTTPS on, no mixed-content warnings | |
| Caching plugin installed and flushed | |
| Licence key entered, so updates reach you | |
| A backup taken of the finished site |
The licence key is at Appearance → ANPS Club Licence — without it the theme cannot tell you an update exists. If something on this list does not behave, Troubleshooting covers the common cases, and Theme Options, screen by screen is the reference for every setting named above. If you have not imported a demo yet, start at Importing a demo.
Troubleshooting
Organised by what you are looking at, not by cause. Find the symptom, read the cause, apply the fix.
Two general points before the list. First, most problems here are the server
rather than the theme: an import that dies part way, a builder page that saves
incomplete, a plugin that will not install. Appearance → Theme Options →
System Requirements measures your server against what the theme is built
for, and prints a forwardable sentence under every row that falls short — see
What your server needs. Second, WP_MEMORY_LIMIT
in wp-config.php cannot raise the memory limit above the ceiling PHP is
configured with, so the fix for several of these is a request to your host and
nothing you can do from the dashboard.
Symptoms during a demo import
The import stops part way and the page dies
The next admin page load shows "A demo import was started and did not finish. Your site may be only partly imported — check its content before importing again."
PHP ran out of time or memory. An import creates several hundred posts and pages and downloads every demo image, which takes minutes and is the single heaviest thing the theme ever does.
Check Max execution time and Memory limit on the System Requirements screen. The theme is built against 600 seconds and 256M. If either is lower, ask your host to raise it — the hint under the failing row is written to be forwarded as it stands.
Do not simply run the import again. The first run already created content, and a second run adds a second copy of all of it: duplicate pages, duplicate menus, duplicate media. Restore the backup you took, or start from a clean WordPress install, then import once with the limits raised.
The import refuses and says to activate only one page builder
"Please activate only one page builder. If you have 2 or more page builders activated, you cannot use demo content."
Elementor and WPBakery are both active. The demo packs come in two variants, one per builder, and the importer picks by which builder is active — with both on, it cannot tell which site you want.
Go to Plugins and deactivate one. Deactivating a builder does not delete anything it has already built. Elementor is the recommended choice for a new site; see The twelve demos.
Demo 11 or Demo 12 cannot be selected in the grid
Both tiles are greyed out and carry one of three lines: "Activate Elementor to import this demo", "Deactivate WPBakery to import this demo", or "Activate Elementor and deactivate WPBakery to import this demo".
Demos 11 and 12 exist only as Elementor layouts. They require Elementor active and WPBakery inactive — the tile states the condition you have not met. Do what the line says at Plugins and reload the import screen.
The import screen warns about the server before you start
"One or more issues with server found! Please take a look at the System Requirements tab."
At least one requirement is not being met. The warning does not block the import, and a row being short of the recommendation is not automatically fatal — but this is the point at which to read the System Requirements screen rather than after a failed run. See Importing a demo.
Symptoms after a demo import
Every widget area is empty, or holds the demo's widgets instead of mine
Expected, not a fault. An import empties every widget area before it runs and then installs the demo's own widgets. If you imported onto a site whose sidebars and footer you had already arranged, that arrangement is gone and cannot be recovered except from a backup.
Rebuild the areas at Appearance → Widgets, or import on a clean install instead. Importing a demo covers what else an import overwrites, and Widgets and sidebars covers the areas themselves.
My shop, cart, checkout or account pages have disappeared
Also expected. An import permanently deletes the WooCommerce Shop, Cart, Checkout, My account and Terms pages — not to the trash, deleted — and then points WooCommerce at the demo's own copies of Shop, Cart, Checkout and My account.
If you had customised those pages, they are gone. If WooCommerce is left without them, recreate them at WooCommerce → Status → Tools → Create default WooCommerce pages and re-select them under WooCommerce → Settings → Advanced. See Shop and products.
Contact form submissions never arrive
The demo's contact form is imported with its To address still set to the address used when the demo was built, not yours, so mail goes somewhere you cannot read. This affects demos 1 to 10; demos 11 and 12 ship the form correctly set to the site administrator's address.
Go to Contact → Contact Forms, open the form, and on the Mail tab set
To to your own address or to [_site_admin_email]. Do this before you
launch, and send yourself a test message afterwards.
Demo images are missing, or show as broken thumbnails
The importer downloads every demo image from our server into your media library one at a time. Any that fail are reported individually, with messages from the WordPress importer such as "Remote server did not respond", "Zero size file downloaded" or "Remote file is too large, limit is …".
Three causes, in order of likelihood:
| Cause | Fix |
|---|---|
| The host blocks outbound HTTP requests | Ask the host to allow them, or to enable cURL |
| The run timed out before the images finished | Raise Max execution time, then re-import on a clean install |
| The uploads folder is not writable | Check the Uploads directory row on System Requirements |
For a handful of missing images, upload replacements by hand and set them on the pages that need them. Re-importing to recover images duplicates all the content as well.
The menu is empty, or the header shows no menu at all
The import creates the demo's menus but has to guess which one belongs in the theme's menu location, and it assigns the second menu it finds — or the only one, if the demo ships a single menu.
Go to Appearance → Menus → Manage Locations and set Primary Navigation to the right menu. The menus themselves are all present under Appearance → Menus; see Menus and the mega menu.
Page builder and page rendering symptoms
A page shows unstyled text, or shortcodes in square brackets
If you see [vc_row], [anps_featured] or similar in the page body, the Anps
Theme Plugin is not active. It supplies every element and shortcode the demo
content uses. Activate it at Plugins, or install it from Appearance →
Install Plugins.
If instead the page shows its text with no layout at all and there are no shortcodes visible, the page's Elementor layout data did not survive the import. The importer detects this and prints a message naming the affected page IDs, ending with a request to send the whole message to support.
Do not open an affected page in Elementor. Elementor sees no layout data, offers to convert the page from its plain content, and accepting that replaces the layout permanently. There is no undo.
Send the message to support as it asks. It contains the diagnostic detail — what the data looked like and why it could not be read — that identifies which host behaviour corrupted it.
An element or widget renders nothing where I placed it
The builder shows it in the editor, the front end shows an empty gap. Almost always the element has nothing to list yet.
| Element | Renders nothing until |
|---|---|
| Anps Recent Blog, Anps Blog, Solar - Post Grid | There is a published post |
| Anps Portfolio, Anps Recent Portfolio, Solar - Project Grid | There is a published portfolio item — see Portfolio |
| Anps Team, Anps Team With Description | There is a published team member — see Team |
| Anything WooCommerce | WooCommerce is active and a product is published |
A category or tag filter set on the element narrows it further, so an element pointed at a category with no posts in it is empty for the same reason.
I switched page builder and my pages are empty or full of shortcodes
The two builders store a page in different places: WPBakery writes shortcodes into the page content, Elementor writes its layout into separate post data. Neither can read the other's, and there is no converter in either direction.
A WPBakery page opened after switching to Elementor shows its shortcodes as text; an Elementor page opened after switching to WPBakery shows nothing. Switching back restores both, because neither builder deleted anything — deciding to change builder for good means rebuilding the pages by hand. Choose the builder before you import, not after. See Building pages with Elementor and Building pages with WPBakery.
A page is completely blank on the front end
On a Demo 12 site this is usually the Elementor kit: the global colours, typography and container width live in a kit, and a page rendered without one comes out empty. The importer activates the imported kit and clears Elementor's cached CSS for exactly this reason, so a blank page means that step did not take. Go to Elementor → Tools → Regenerate CSS & Data, then reload.
If it is blank on every page and every theme, it is a PHP fatal error rather than a layout problem — see the update section below.
Saving a long builder page loses part of the layout
A page with many sections saves successfully but comes back with sections, columns or settings missing. Nothing reports an error.
This is max_input_vars. PHP silently discards everything past that many form
fields, and a long builder page sends thousands. The theme is built against
3000; below that, the tail of the page is thrown away on save.
Read the Max input vars row on System Requirements. Raising it is a host
change — it cannot be set from wp-config.php. Until it is raised, split the
page into fewer, simpler sections or build it in stages, saving as you go.
Changes I saved do not appear on the site
The theme versions its own stylesheets and scripts by file timestamp, so a browser holding an old copy is not usually the cause. Work through these in order:
- A caching plugin or host page cache. Clear it. Most hosts that provide one also have a purge button in the dashboard.
- A CDN. Purge it separately; clearing the plugin cache does not.
- Elementor's generated CSS. Elementor writes per-page CSS files. Go to Elementor → Tools → Regenerate CSS & Data.
- Your own browser. Load the page in a private window to rule it out.
- The wrong screen. A page-level setting overrides the site-wide one, so check the page's own Page Setup box before assuming Theme Options is broken — see Page layout and Page Setup.
Every portfolio item or team member returns a 404
You changed the portfolio or team slug in Theme Options. The new slug is in use, but WordPress's rewrite rules still describe the old one, so the new URLs match nothing.
Open Settings → Permalinks and press Save Changes without altering anything. That rebuilds the rules and the items return. See Portfolio and Team.
Setup wizard, plugin and licence symptoms
The setup wizard did not open when I activated the theme
The wizard opens itself once, on the first admin page you load after activating the theme, and the flag that triggers it lasts thirty minutes. Activating the theme as part of a bulk action, or on a multisite network, consumes the flag without redirecting. Pressing "I'll set it up myself" also marks it finished so it stops prompting.
None of that loses you anything. Open it at Appearance → Setup Wizard —
themes.php?page=anps-setup — which is also linked at the top of the Theme
Options sidebar. See The setup wizard.
A plugin will not install in the wizard
The wizard reports the reason on the plugin's row. The common ones:
| Message | Cause and fix |
|---|---|
| "You do not have permission to install plugins." | Your user cannot install plugins, or file modifications are disabled in wp-config.php |
| "The plugin was downloaded but could not be found afterwards." | The zip unpacked to an unexpected folder; install it from Appearance → Install Plugins |
| "No download could be found for this plugin." | The download URL could not be resolved; install from Appearance → Install Plugins |
| "The theme plugin registry is unavailable." | The theme's plugin list did not load; install from Appearance → Install Plugins |
| Anything mentioning a connection or a timeout | The host blocks outbound HTTP, or is too slow to fetch the zip; ask the host |
Check the row before you retry. On a host that cuts the request short, the plugin often did install and activate before the request died. The wizard re-reads the plugin's real state afterwards, so the row settles on
Active,InstalledorFailed— andFailedon the row is not proof the plugin is absent. Look at Plugins before installing it a second time.
Every wizard step is skippable. Skip the Plugins step, install the plugin from Appearance → Install Plugins or by uploading the zip from your download at Plugins → Add New → Upload Plugin, and carry on.
The licence key will not activate
All of these appear on Appearance → ANPS Club Licence, which tells you which one you have hit.
| What the screen says | What it means |
|---|---|
| "This looks like a development site" | Licensing is deliberately skipped here. Activate on the live domain; development sites never use a licence slot |
| "This licence is already in use on another site" | Press Move my licence to this site. The other site stops receiving updates |
| "Your licence key is valid, but it is for a different theme" | You pasted the key for another ANPS theme |
| "This licence key is not active for this site" | Re-check the key against your account, then contact support |
| "The licence server returned an unreadable response" | The request did not get through. The host is blocking outbound HTTPS, or cURL is missing — check the cURL row on System Requirements |
| "your support and updates period has ended" | The key is fine and the site keeps working, but new versions are withheld until you renew |
Your key is in your account at club.anpsthemes.com. Paste it whole, with no surrounding spaces. See Licence, updates and support.
Symptoms after a theme update
A white screen, on the front end and in the admin
A PHP fatal error. WordPress shows nothing because nothing could run. Three causes, in the order worth checking:
- The plugin was not updated with the theme. The theme and the Anps Theme
Plugin are released as a pair and the theme expects the matching plugin
version. Updating from Appearance → ANPS Club Licence → Update now
installs both; a manual theme upload does not. Update the plugin at
Plugins, or upload
anps_theme_plugin.zipfrom your download. - Code in your child theme. A function or hook it relies on may have changed. Rename the child theme's folder over FTP to fall back to the parent, confirm the site returns, then fix the code. See The child theme and custom code.
- An edit inside the parent theme folder. An update replaces that folder entirely, so a half-replaced customisation can leave a call to something that no longer exists.
To see the actual error, read your host's PHP error log, or add
define( 'WP_DEBUG', true ); define( 'WP_DEBUG_LOG', true ); to
wp-config.php and read wp-content/debug.log. Turn both off afterwards.
To get the admin back with no FTP access at all, ask the host to rename the
wp-content/themes/industrial folder: WordPress falls back to a default theme
and you can work from there.
The theme says an update is available but installing it does nothing
Check the Support and updates row on Appearance → ANPS Club Licence. When the support period has expired the new version is announced but withheld, and the screen names the version and offers a renewal link.
What to send support
Support is at club.anpsthemes.com/help. A ticket is answered faster when it arrives with the facts, so send all of these:
| Send | Where to get it |
|---|---|
| The server summary line | The bottom of Appearance → Theme Options → System Requirements: PHP version, memory limit, max execution time and whether ZipArchive is available, in one line |
| The theme version | Appearance → Themes, or the ANPS Club Licence screen |
| The Anps Theme Plugin version | Plugins |
| Which builder is active | Elementor, WPBakery, or neither |
| Which demo you imported, if any | Its number, and whether the Elementor or WPBakery variant |
| The exact error text | Copied, not described or retyped |
| The URL of an affected page | A link we can load |
If the importer printed a message asking you to send it to support, send that message in full. It carries diagnostic detail that cannot be reconstructed afterwards.
Do not send a ticket asking us to guess: "the slider does not work" without the summary line above takes two round trips before anyone can look at it.
Element and widget reference
Two lists: every widget the Anps Theme Plugin registers into Elementor, and every element it maps into WPBakery. They are the same building blocks described in Building pages with Elementor and Building pages with WPBakery, gathered here so you can look one up by name.
Both tables are read out of the plugin when this manual is built, from the same registry the builders themselves read. Nothing here is typed by hand, so the lists cannot fall behind the plugin: if a widget exists in your copy of the plugin, it is in the table below, and if it is in the table, it is in your copy.
The right-hand column is the internal name. You do not need it to build a page — it is what appears in a filter, a template override or a support request, and for WPBakery it is the shortcode the element writes into the page.
Elementor widgets
All of these appear in Elementor under the Industrial Elements category. There are 87 of them; search the widget panel by the name in the left column.
General widgets
Available on any site with the plugin active, whichever demo you imported.
| Widget | Internal name |
|---|---|
| Anps Alert | alert |
| Anps Appointment | appointment |
| Anps Button | button |
| Anps Counter | counter |
| Anps Call to Action | cta |
| Anps Download | download |
| Anps Error404 | error404 |
| Anps Featured Content | featured_content |
| Anps Featured Horizontal Content | featured_horizontal_content |
| Anps Gallery | gallery |
| Anps Gallery Slider | gallery_slider |
| Anps Heading | heading |
| Anps Icon | icon |
| Anps Portfolio | portfolio |
| Anps Quote | quote |
| Anps Recent Blog | recent_blog |
| Anps Recent Portfolio | recent_portfolio |
| Anps Subscribe | subscribe |
| Anps Team | team |
| Anps Team With Description | team_with_description |
| Anps Blog | blog |
| Anps Contact Info | contact_info |
| Anps Contact Info Card | contact_info_card |
| Anps Google Maps | google_maps |
| Anps Info | info |
| Anps List | list |
| Anps Social Icon | social_icon |
| Anps Table | table |
| Anps Timeline | timeline |
| Anps Logos | logos |
| Anps Twitter | twitter |
| Anps Testimonials | testimonials |
Demo 11 widgets
Built for Demo 11's layouts. They work on any page, but their styling assumes that demo's palette and content.
| Widget | Internal name |
|---|---|
| Anps Demo 11 Hero Slider | demo11_hero_slider |
| Anps Demo 11 About Hero | demo11_about_hero |
| Anps Demo 11 About Intro | demo11_about_intro |
| Anps Demo 11 About Stats | demo11_about_stats |
| Anps Demo 11 About Values | demo11_about_values |
| Anps Demo 11 About Experts | demo11_about_experts |
| Anps Demo 11 About CTA | demo11_about_cta |
| Anps Demo 11 Trust Strip | demo11_trust_strip |
| Anps Demo 11 Solutions | demo11_solutions |
| Anps Demo 11 About Split | demo11_about_split |
| Anps Demo 11 Deployment Steps | demo11_deployment_steps |
| Anps Demo 11 Case Studies | demo11_case_studies |
| Anps Demo 11 KPI Strip | demo11_kpi_strip |
| Anps Demo 11 Final CTA | demo11_final_cta |
| Anps Demo 11 Sectors | demo11_sectors |
| Demo 11 Insights Modern | demo11_insights |
| Anps Demo 11 Contact Hero | demo11_contact_hero |
| Anps Demo 11 Contact Info Block | demo11_contact_info_block |
| Anps Demo 11 Contact Locations | demo11_contact_locations |
| Anps Demo 11 Contact Form | demo11_contact_form |
| Anps Demo 11 Contact Channel | demo11_contact_channel |
| Anps Demo 11 Solutions Hero | demo11_solutions_hero |
| Anps Demo 11 Portfolio Grid | demo11_portfolio_grid |
| Anps Demo 11 Featured Project | demo11_featured_project |
| Anps Demo 11 Related Insights | demo11_related_insights |
| Anps Demo 11 Portfolio Single Hero | demo11_portfolio_single_hero |
| Anps Demo 11 Portfolio Overview | demo11_portfolio_overview |
| Anps Demo 11 Portfolio Benefits | demo11_portfolio_benefits |
| Anps Demo 11 Portfolio Process Steps | demo11_portfolio_process |
| Anps Demo 11 Portfolio Use Cases | demo11_portfolio_use_cases |
| Anps Demo 11 Portfolio CTA | demo11_portfolio_cta |
Demo 12 widgets
Built for Demo 12's layouts, the same way.
| Widget | Internal name |
|---|---|
| Solar - Section Head | demo12_section_head |
| Solar - Page Banner | demo12_page_banner |
| Solar - Photo CTA | demo12_cta_photo |
| Solar - Hero Slider | demo12_hero |
| Solar - Marquee | demo12_marquee |
| Solar - Services Explorer | demo12_services_explorer |
| Solar - Project Spotlight | demo12_project_spotlight |
| Solar - Savings Calculator | demo12_calculator |
| Solar - Stats Grid | demo12_stats_grid |
| Solar - Testimonials | demo12_testimonials |
| Solar - Service Rows | demo12_service_rows |
| Solar - Process Steps | demo12_process_steps |
| Solar - Story Split | demo12_story_split |
| Solar - Values Grid | demo12_values_grid |
| Solar - Timeline | demo12_timeline |
| Solar - Team Grid | demo12_team_grid |
| Solar - Offices | demo12_offices |
| Solar - Project Grid | demo12_project_grid |
| Solar - Post Grid | demo12_post_grid |
| Solar - Featured Post | demo12_post_feature |
| Solar - Contact Split | demo12_contact_form |
| Solar - Project Intro | demo12_project_intro |
| Solar - Gallery | demo12_gallery |
| Solar - Pull Quote | demo12_quote |
WPBakery elements
The plugin maps 32 elements into WPBakery, listed under Anps Shortcodes when you add an element. The shortcode tag is what you would write by hand, or what you will see in the text editor if you ever switch a page off the builder.
| Element | Shortcode |
|---|---|
| Alert | [alert] |
| Appointment | [appointment] |
| Blog | [blog] |
| Button | [button] |
| Call to Action | [anps_cta] |
| Contact info | [contact_info] |
| Contact info card | [contact_info_card] |
| Counter | [counter] |
| Download | [download] |
| Error 404 | [error_404] |
| Featured content | [anps_featured] |
| Featured horizontal content | [anps_featured_horizontal] |
| Gallery | [gallery_simple] |
| Gallery slider | [gallery_slider] |
| Google maps | [google_maps] |
| Heading | [heading] |
| Icon | [anps_icon] |
| Info | [info_element] |
| List | [anps_list] |
| Logos | [logos] |
| Portfolio | [portfolio] |
| Quote | [quote] |
| Recent blog | [recent_blog] |
| Recent portfolio | [recent_portfolio] |
| Social icons | [social_icons] |
| Subscribe | [anps_subscribe] |
| Table | [table] |
| Team | [team] |
| Team with description | [team_with_description] |
| Testimonials | [testimonials] |
| Timeline | [timeline] |
[twitter] |
Finding an element by name
Both builders search the list of available elements, so the name in the tables above is all you need.
| Builder | Where to search |
|---|---|
| Elementor | Open the widget panel and type into the search box at the top. The theme's widgets are grouped under Industrial Elements |
| WPBakery | Press Add Element and type into the search field. The theme's elements are grouped under Anps Shortcodes |
Searching by what the element does usually works as well as searching by its exact title: "portfolio", "team", "counter", "testimonial", "solar".
If an element you expect is not there, it is almost always one of four things.
The Anps Theme Plugin is inactive. Every widget and element in this chapter comes from the plugin, not the theme. With the plugin deactivated the builders still work, but both of the theme's categories disappear completely. Check Plugins and see Installing the theme.
You are looking in the wrong builder. The general sets match one for one —
the same 32 elements in both lists, under different names. The difference is the
Demo 11 and Demo 12 widgets: everything named for Demo 11, and everything with
the Solar - prefix, exists only in Elementor and has no WPBakery counterpart.
If a demo's page bands are missing, check which builder is active.
It is a child element. Several WPBakery elements only exist inside their
parent: a Testimonial item lives inside Testimonials, a Logo inside
Logos, a Timeline item inside Timeline. They are deliberately kept out of
the main element picker, because adding one on its own would render nothing. Add
the parent first, then add items inside it.
Elementor has the widget hidden. One widget, Demo 11's Insights Modern, only appears while Elementor's Nested Elements feature is enabled, because it holds other widgets inside itself. Look for it in Elementor's own feature settings under Elementor → Settings.
A widget that is present but renders nothing on the page is a different problem: usually it queries content the site does not have yet — a portfolio grid with no portfolio items, a recent-posts strip filtered to a category with no posts — or it is a demo widget reading content that only that demo's import creates. See Troubleshooting.
Credits
Industrial is built on open-source work by other people. This chapter lists it, with the version the theme ships, so that a licence audit or a security review has the facts in one place.
Libraries the theme loads
Everything here is bundled inside the theme and loaded on the front end. Versions are read from the shipped files.
| Library | Version | Licence | Home |
|---|---|---|---|
| jQuery | Whatever WordPress core ships | MIT | jquery.com |
| Bootstrap | 3.4.1 (JavaScript), 3.3.5 (bundled Sass) | MIT | getbootstrap.com |
| Font Awesome Free | 5.12.1 | Icons CC BY 4.0, fonts SIL OFL 1.1, code MIT | fontawesome.com |
| Owl Carousel 2 | 2.1.6 | MIT | owlcarousel2.github.io |
| Isotope | 3.0.6 | GPLv3 for open-source use, commercial licence otherwise | isotope.metafizzy.co |
| Moment.js | 2.11.2 | MIT | momentjs.com |
| Pikaday | — | BSD and MIT | github.com/dbushell/Pikaday |
| Swipebox | 1.5.1 | MIT | github.com/brutaldesign/swipebox |
| Modernizr | 3.3.1, custom build (flexbox detection only) | MIT | modernizr.com |
| Waypoints | 4.0.0 | MIT | github.com/imakewebthings/waypoints |
| GMAP3 | 7.2 | GPL-3.0+ | github.com/jbdemonte/gmap3 |
| jquery-countTo | — | MIT | github.com/mhuggins/jquery-countTo |
| jquery-doubleTapToGo | DACHCOM.DIGITAL fork, after Osvaldas Valutis | MIT | github.com/dachcom-digital/jquery-doubleTapToGo |
| Flexibility | — | MIT | github.com/10up/flexibility |
| normalize.css | 3.0.3, inside the Bootstrap stylesheet | MIT | necolas.github.io/normalize.css |
Two are loaded from a remote host rather than bundled, and only on pages that need them:
| Loaded from | Used for |
|---|---|
| Google Maps JavaScript API | Map elements and the Google Maps widget; needs your own API key |
| Vimeo Froogaloop 2 | Vimeo background video in a section |
Build tooling
Not shipped to the browser. Used to compile the theme's stylesheets from
scss/.
| Tool | Licence |
|---|---|
| Sass | MIT |
| Gulp | MIT |
| PostCSS and Autoprefixer | MIT |
| RTLCSS | MIT |
| CSSO | MIT |
Third-party plugins in your download
Bundled as zip files beside the theme, each under its own licence and its own support.
| Plugin | By | Role |
|---|---|---|
| Slider Revolution | ThemePunch | The demo hero sliders. See Slider Revolution |
| WPBakery Page Builder | WPBakery | The legacy page builder. See Building pages with WPBakery |
The theme also recommends, but does not bundle, plugins that are installed from the WordPress.org directory: Font Awesome, Contact Form 7, WooCommerce, Newsletter, Elementor and Envato Market. Those carry their own licences and credits.
The WordPress Importer
Demo content is imported by a copy of the official WordPress Importer plugin,
included inside the Anps Theme Plugin at importer/. It is GPLv2 and is
maintained by the WordPress contributors.
Fonts and icons
| Asset | Source |
|---|---|
Font Awesome 5 icon webfonts, in webfonts/ |
Font Awesome Free |
Font Awesome 4 compatibility shims, css/v4-shims.min.css |
Font Awesome Free |
Glyphicons Halflings, in fonts/ |
Ships with Bootstrap 3 |
| Google Fonts, loaded on demand | Chosen on the Typography screen; see Colours and typography |
Google Fonts are requested from Google's servers only for the families you actually select, and not at all if you set every font role to a websafe or uploaded font.
Images and demo photography
The theme's own graphics — the logo placeholder, the map marker, the video play icons, the boxed-layout background patterns and the colour picker sprite — were produced for Industrial.
The photography in the demo content is licensed stock, sourced from Depositphotos and Photodune.
The demo photographs are placeholders. They are imported into your media library so the demo looks like the preview, and they are covered by the licence shipped with the theme, but they are not photographs of your business. Replace them — see Going live.
Licence files in your download
| File | Covers |
|---|---|
GPL.txt |
The GNU General Public License, version 2 |
README_License.txt |
The split-licence statement: PHP and integrated HTML under the GPL, everything else — CSS, images, design — under the licence you purchased |
The same GPL text ships inside the theme folder as _LICENSE.txt.
Files bundled but not loaded
Listed for completeness, because a file audit of the package will find them and they are not credited above. Nothing in the theme enqueues any of them, and removing them changes nothing on the front end.
| Path | What it is |
|---|---|
css/prettyPhoto.css and images/prettyPhoto/ |
prettyPhoto lightbox styling, from an earlier release. The theme's own lightbox is Swipebox |
css/skins/ |
LayerSlider skins, from an earlier release. Industrial does not ship or use LayerSlider |
css/ie-fix.css |
Internet Explorer fixes, from an earlier release |